
Foods and Feeding
Moina Macrocopa
- Details
- Written by Puddlefish
- Parent Category: Articles
- Hits: 20617

Another easy to culture cladoceran species
By
Puddlefish
Introduction
Keeping small Rivulus species presents the aquarist with a few problems on what to feed. Most species will take prepared and frozen morsels but some will not. Finding small live-foods other than the obligatory artemia and grindalworm can be a chore.
I have been cultivating Daphnia pulex indoors for some time now but I’m always on the lookout for new varieties or species to add to the killi-larder.
I became interested in Moina through reading articles in books and via internet research. This seemed an ideal food source; it lends itself well to home culturing and with pretty much minimal effort. I set about trying to locate a starter culture which I managed to about a year ago and I now have enough to feed my killifish and distribute starters to folks around the UK and further afield.
Natural History of Moina.
Kingdom: Animalia - Phylum: Arthropoda - Sub-phylum: Crustacea - Class: Branchiopoda
Order: Cladocera - Sub-order: Eucladocera - Family: Moinidae - Genus: Moina - Species: macrocopa
Moina macrocopa is pretty common and is widely distributed throughout the world; cultures have been collected in such geographical locations as North and South America, Africa, Europe & South East Asia. They are often found to inhabit temporary shallow pools with high nutrient levels.
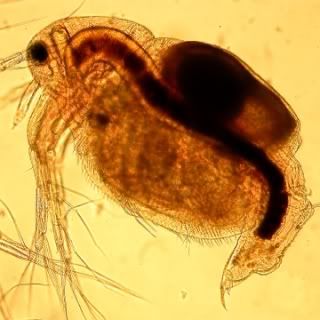
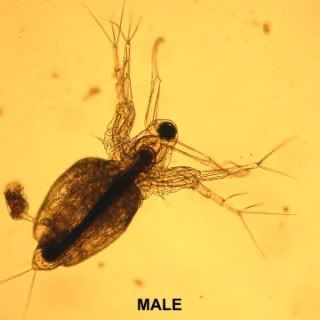
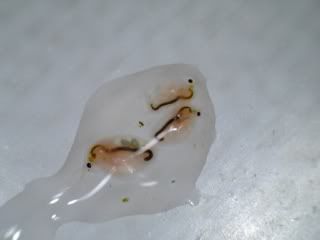
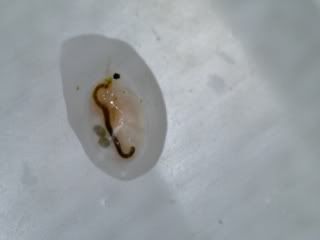
Moina macrocopa are pretty small they are round in shape with adult males measuring around 0.5 – 0.9mm in length, females being slightly larger. They are an excellent food for fish with small mouths with juvenile monia being an excellent food supplement for small fry.
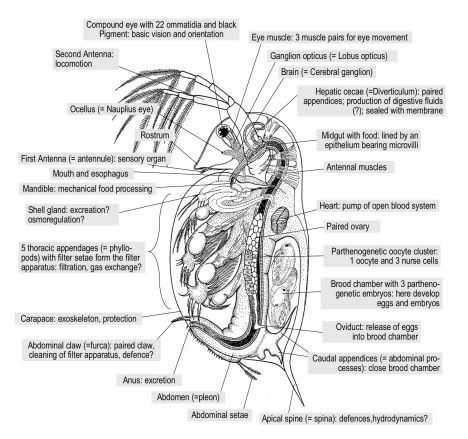
This small water flea species has a relatively large head which is almost half the length of its body, there is also a large compound eye in this region. Its carapace possesses two large antennas on the rear of its head followed by a further flexible antenna just below the eye. Further down the frontal carapace are two larger grasp like appendages. The clearly visible brood chamber is aft.
Moina are filter feeders, sifting all their food from the water column. Food is brought into the carapace by the utilisation of the frontal appendages by moving water across them. This food will be predominately algae but can also contain bacteria and organic detritus. Obviously the food has to be very small.
In order for Moina to grow, they moult like all cladocerans. Moulting occurs many times thought its short lifespan.
This small crustacea sp. lives for around 12 days, reaching their sexual and reproductive peak in approximately 5-10 days.
When conditions are favourable Moina reproduce via the cyclic parthenogenic method. Adult females produce unfertilised eggs which, after moulting, are deposited into their brood chamber; these eggs develop into juvenile females which are released at the next subsequent moult.
When conditions become adverse, the female will produce special eggs that will develop into males. Once these males reach maturity the female will then start producing haploid eggs. These eggs are fertilised by the males and released by the female upon a further moult to lie dormant in the substrate. This hard shell or Ephippium is very resistant to adverse conditions and will keep the next generation moina safe until favourable conditions return whereby the fertilised eggs will hatch and will all become parthenogenic females ensuring the survival of the species.
Moina Culture.
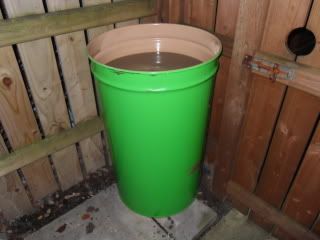
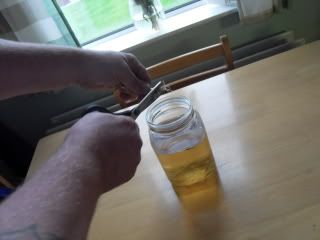
To culture this small cladoceran you need no more than a 3ltr Ice cream tub. I set them up much in the same way as I do for internal Daphnia.
I use rainwater to a neutral pH, spreading a substrate of aragonite sand to a depth of around 8mm on the bottom of the tubs.
The tubs are kept at a temperature of around 24’C with a night and day cycle of lighting performed by timers.
They will reproduce quite quickly under these conditions and soon the tubs will be amassed with small water fleas.
Feeding.
A word on feeding the culture must be mentioned at this stage. Whilst I do culture my own live Chlorella algae I found that Moina don’t do quite as well on this as they do on dried yeast. Here we have a bit of a problem as the yeast can pollute the culture if you’re not careful and it will crash and all will be lost. So we have to feed this sparingly alongside water changes with the same chemical makeup as before.
I make up one sachet of Dried Yeast dissolved in one litre of water. After which I feed 30-60ml of this mixture every other day. This seems to be an ideal maintenance program for my purposes.
Cultures will eventually become tired and need to be sub-cultured on a periodical basis to keep your supply going. You can add snails such a Red Ramshorn’s to the tubs to help keep them clean and they in turn will provide an extra food source for the Moina in the shape of infusorians.
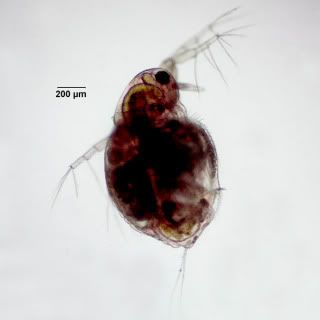
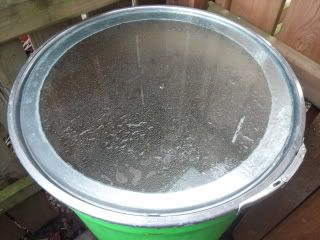
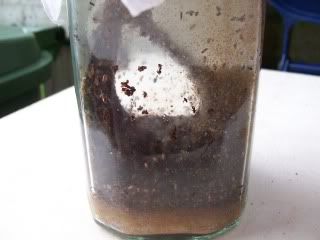
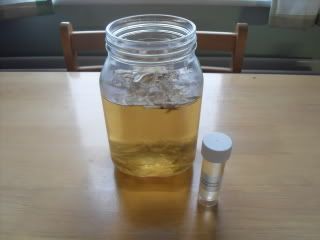
A swarm of Monia macrocopa in one of my culturing tubs
Summary.
Moina is a very small cladoceran species that has higher protein content than daphnia and is excellent for fish and fry with small mouths. They are quite easy to culture and maintain provided you devote the time to meet their needs. Be careful not to overfeed and you should have and endless supply of this little gem to feed your charges especially in the cold winter months when live food becomes scarce.
I hope you enjoyed this article and I hope it provokes some folks not already doing so to take the reins and try culturing this type of food for their fish.
All stills imagery supplied with full permissions by
Professor James F. Haney
UNH Center for Freshwater Biology
Department of Biological Sciences
University of New Hampshire
Durham, NH
www.cfb.unh.edu/
Regards
Colin
A personal study of Daphnia pulex
- Details
- Written by Puddlefish
- Parent Category: Articles
- Hits: 22497
- from a hobbyist standpoint -
by
Puddlefish
Brief Overview
Daphnia or Waterfleas are a large collection of microcrustacean species from the Order of Cladocera.
They live for around 40-56 days depending upon the species and environmental conditions. Each female brood consists of anywhere between 2-10 eggs which if conditions are right turn into embryos and are released into the water column within a few days. Juvenile daphnia reach sexual maturity within 6-10 days. A good healthy population of daphnia will almost certainly contain mostly females which have been produced asexually.
Most commonly, females hatch from eggs in the spring; produce females asexually throughout the summer; in the autumn they start producing males, they mate and lay resting eggs. This breeding system is called Cyclic Parthenogenesis
When attempting to culture Daphnia at home it is important to supply your colony's with the correct conditions in-order not to stress the entire culture which will lead to a crash and possible loss. The culture can become stressed if the population density is too high, poor water quality, food shortages and extreme water temperatures. During these times of stress the female will produce more male embryos (which is not what we want) they will begin to re-produce sexually rather than asexually. The female upon mating with a male will expel the resultant eggs which will fall to the substrate and will only hatch (into females) when conditions in the body of water improve and a non stressful environment persists.
Lifecycle
Daphnia has long been celebrated for possessing the power of re-production without the intervention of the male and for laying two different sorts of eggs....CHARLES DARWIN 1857
Under favourable conditions, a female will produce a clutch of eggs after every adult moult, these eggs are placed in a brood chamber which is located dorsally beneath its carapace. The development of these eggs starts immediately. After around 24 hours at a temperature of approximately 20’C the eggs will hatch but remain inside the brood chamber for a further three days, after which time they are released by the mother. The young daphnia resemble their adult counterparts except that the brood chamber will not yet be fully developed. In most species young Daphnia will pass through 4-6 juvenile instars (developmental stages such as moults) before being able to produce eggs for the first time this may take anywhere between 5-10 days at 20’C and can take considerably longer if food is scarce. An adult Daphnia may produce a brood of eggs every 3 to 4 days until she dies. Life expectancy of a female is around 8 weeks and a little longer if food availability is poor. Brood sizes vary considerably and are dependent on the species you are dealing with, they can range from a couple of eggs to over one hundred for the larger species.
i) A group of Daphnia under 200x magnification
ii) A female D. pulex clearly showing 2 developing embryos within her brood chamber.
In a normal growth and breeding cycle, the Daphnia female will produce eggs that will develop directly and be released as live young without a resting phase. When adverse conditions become apparent the female will produce a different type of egg in her brood pouch, this egg is designed for resting only hatching when favourable conditions resume.
These resting eggs are protected and encased in a saddle like structure known as an ephippium.
The ephippium will usually contain 2 large eggs and will be cast off during the next moulting stage. The ephippia can either sink to the bottom or float via means of minute gas chambers, this means that the eggs can either be dispersed by the wind or inadvertently hosted by other animals (i.e. attached to the feathers of waterfowl) for transportation and to populate other water bodies they will only hatch as and when conditions are right, weither this be due to photo-period, temperature, water quality, availability of food or other factors. But from these resting eggs, only females hatch.
I suspect that this is purely Mother Nature’s way of preventing the species of becoming extinct.
Daphnia Home Culturing Method
The Container & Water Conditions;
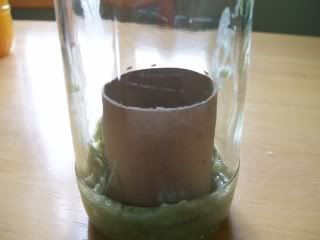
To get my cultures thriving with a view to releasing them into larger quarters outside, I use 3ltr plastic Ice Cream tubs. Into these I place a small margarine tub filled with coral sand, which helps keep the pH stable.
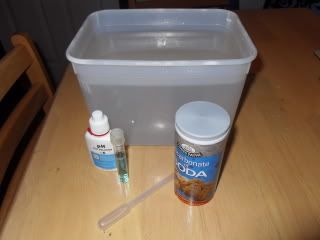
There are many different angles and formulations out there surrounding the best water conditions for culturing Daphnia, all, I’m sure have valid points. For the purpose of this article I can only deal with what I use, without getting too bogged down in a chemistry lesson. True you don’t want your source water to be loaded with chlorine or heavy pollutants or starved of oxygen. I use rainwater which is adjusted to a pH 7.2 and kept at a temperature (internally) of 72'F.
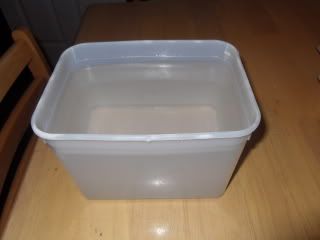
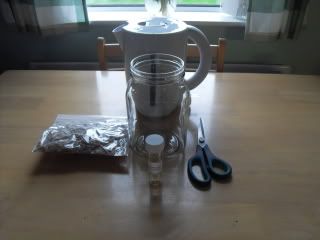
Initial culture vessel, a 3ltr Ice Cream carton. The first thing I needed to do was to adjust the rainwater pH up to 7.2
An airline is placed into the tub and set to a very slow bubble as we don't want heavy aeration because the air can get trapped under the carapace and the Daphnia will be unable to swim and feed properly. Within this environment the Daphnia grow and reproduce quite quickly. There will come a time when, with proper management and feeding the culture will become super saturated. The Daphnia are now ready to be fed to the fish (thinning out) and a 50% water change performed. I have been maintaining these internal cultures for quite some time now, whilst placing some of the surplus stock outside in large barrels. Now with the seasonal climate warming up a little the barrels are now taking over as my prime source of Daphnia on which I use for feeding.All the while still maintaining my internal tubs as infusion resources in case the outside stock should fail.
Foods & Feeding;
Daphnia are filter feeders and sift the water they live in for amongst other things, bacteria, algae and various particles of debris.
Feeding Daphnia has always been open for debate as many Aquarists offer their own tried and trusted concoctions to satisfy their dietary requirements. I have probably stumbled on a so called elixir of algae (which I culture at home) to feed my colonies on. This method works for me so I see no reason to change. Other folks may have their own potions and possibly gain equal or better results for those methods I cannot comment upon as I can only present my findings from my own practical experiences.
I managed to acquire a starter culture of a strain of algae from a local biologist. As yet I do not have a clue as to the species of algae in question. (Possibly Chlorella Vulgaris)
Basic set-up for culturing this "Green Water" involves (i) having a bright light source close at hand, (ii) the ability to provide turbulence within the culture vessel via aeration, (iii) a reliable food source upon which the algae can assimilate (iv) the culture vessel/s themselves.
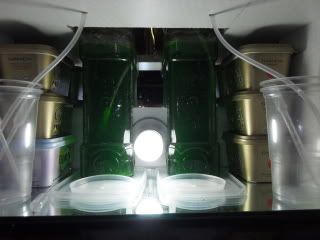
Culture Vessels;
The jars I now use for culturing the algae are made from glass, 2x tall spaghetti jars are now my container of choice. I previously utilised 2ltr Lemonade bottles but they didn't seem to give me the yield that I was seeking. The density of the algae would always be less in a plastic bottle as opposed to glass for some strange reason, perhaps this is due to one of the following reasons, (i) residue from the plastic, (ii) cleanliness or (iii) light dispersion.
Lighting;
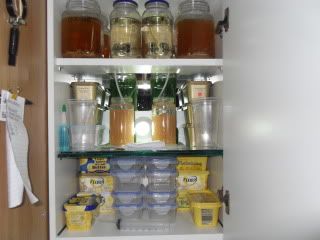
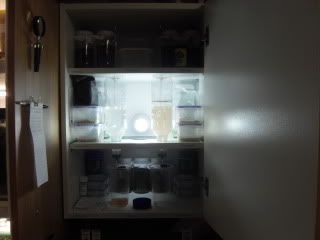
Within the cupboard I choose to call my Live Food larder I have incorporated an energy saver light bulb. This has a two fold function (i) it provides light and (ii) it provides a gentle heat source crucial for the development of the many other livefoods contained on the shelves of the cupboard.
The light source is a 15 watt, Daylight spectrum, 6500k energy saver mini twist bulb. This little bulb is excellent for my needs it warms the cupboard to a constant 70'f. It is the single most item on which many lifeforms depend.
Heating;
It is my belief that green algae cultivation needs a certain amount of heat to flourish. I keep the jars at around 68'f provided from a light bulb as mentioned above. This seems to help the algae.
Feeding;
This became an obsession for me at one stage. Trying to find the magic potion that would act as a catalyst to maintaining a thick dark green soup on which I was to feed the Daphnia. After many months of searching, trialling various plant food products and being subjected to failure after failure I wondered if a nutrient enriched food primarily for feeding algae for marine copepod cultivation would work in a freshwater environment. The results were astounding. The product in question was an enhanced version of Guillard's F/2 medium.
This formulation is now administered at 2ml to 1.5 litres of rainwater. With heavy turbid water and intense lighting the algae will be ready to harvest in around 4 days. After this time lapse I drain of only half of the algae into a well cleaned 2ltr plastic milk carton. I then replenish the original culture vessels with fresh water and add the appropriate amount of food.
Future Developments;
The future for me now is to obtain various species of Daphnia especially the smaller varieties such as Moina (which I have just acquired) and Bosmina longirostris. To try and maintain these in numbers as I have done with D. pulex. I am also currently attempting to culture (long term) Branchinella thailandensis (Thai Fairy Shrimp) utilising similar feeding methods.
Summary;
This has been a labour of love for me to try and get things right, confronted with trials and failures along the way I persevered with the project until it's eventual completion. I can now culture Daphnia in substantial numbers, being able to feed my fish 2-3 times per week and still maintain the colonies. I'm pleased with the results to date, results which I thought were unobtainable at several points.
I hope you enjoyed this lengthy but informative article cataloguing my personal experiences with Daphnia aquaculture. I hope it invites some budding aquarists to give this or similar ventures a go. If writing this article achieves that goal then I feel the time afforded to this this piece of work will have been worth the effort.
All The Best
C
A Fly that cannot Fly!
- Details
- Written by Puddlefish
- Parent Category: Articles
- Hits: 4770
A Fly that cannot Fly!
There here follows a concise way of setting up new Fruitfly cultures.
These are the methods I use which gives a relentless supply of this little nutritious insect all year round.
I use a mutant form of Drosophila melanogaster which have little or no wings so in actual fact you cant really call it a fly..more of a hop, skip and a jump.
They are only a few millimeters in length and are easily cultured at home.
Many breeders just give their fly cultures the basic medium in which to breed upon, I go that extra mile and provide them with a la carte food. LOL
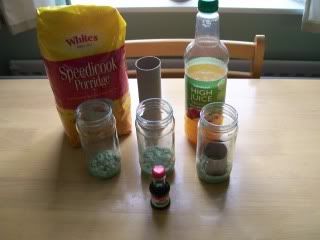
This picture shows some of the ingredients used.
Fruitfly Medium Ingredients;
Oatmeal
Mashed Banana
Grapes
Undiluted Orange Juice
Sugar
Food Colourant (Green)
First off I microwave one cup of Oatmeal to three cups of water for three minutes, then I give it a good stir. I now zap it for a further two minutes.
The oatmeal is now ready after a good stir the paste is nice and loose, not too wet and not too dry. I now leave this to cool.
I now cut half a Banana and mash it up into a paste, I add to this some Grape which again are flattened and mashed. To this mix I then pour on a little undiluted Orange Juice and add a teaspoon of Unrefined Sugar. This is given a good mix and added to the Oatmeal where once again it is blended together to a nice consistency. At this point f I find its a little too stiff then I add a little bit of water and mix it up again. When I feel the mixture is just right I like to add a little bit of Food Colourant (green), this just lets you see the maggots a little more clearly and gives you an indication that all is well within the culture jar.
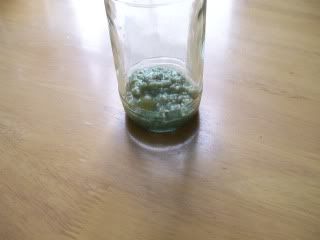
This shot shows the final mix above when its all done and added to the culture jar, about 10mm of medium is all that's required.
I now use an old culture that's nearing the end of it's life to inoculate the new ones.
Now this is where things can get a little tricky as you almost always get a few escapees.
I like to perform this task outside. The missus wont let me use the kitchen table.
You only need around a dozen flies really to start a new culture
I cut a slice of toilet roll core and place it into the medium for the flies to crawl up and rest.

Ventilation is required so the culture jar is topped of with a piece of cotton hankie or muslin and an elastic band.
This obviously stops the insects heading for the hills.
These little insects will now go about business and breed,
Adult flies lay many, many eggs, with a female laying over twenty eggs in a day, she also has the ability to store sperm within her body for up to two weeks & can lay fertilized eggs at will.
Eggs take around 23 hours to hatch at 25 deg C. Once they do hatch, the larvae bury into the media and grow. They will stay as larvae for five days, in which time they undergo three moults.
Eventually they will start to climb the sides of the vial, and when fully grown will settle near the top, and form a chrysalis. The transition from maggot to fly takes three days.
I like to keep my Killifish larder as wholesome and as diverse as possible and this I feel is an excellent food source on which to feed your killifish, They can be a little finicky to get used to dealing with in the begining, but once mastered you will have an endless supply of this nutritious little insect.
Why not try them for yourself
ATB
C
Paramoecium
- Details
- Written by Puddlefish
- Parent Category: Articles
- Hits: 8612
Paramecium is a very small Protozoa. It is only just visible to the naked eye and is better viewed using a strong magnifying lens. It moves about the water column, feeding on bacteria, using an arrangement of hair like filaments (cilia) along its body. It is a very good food to have in your killifish larder for feeding to the smaller species fry. These minuscule animalcules are ideal for feeding to fish fry which are too small to accept artemia and microworms as their first food upon hatching from the egg.
I will not delve into the biology of this small protozoan as it is beyond the scope of this article.
Culturing Paramoecium is relatively easy but your vessels need to be maintained on a rotational basis in order to keep the culture going.
In the following article I will show you how I set about culturing this fascinating little creature.
For the most part the items you will need are all available on the high street they are as follows;
Pure Paramoecium starter culture (Starter cultures available with instructions contact via usual means)
Square slab sided Mason Jar with French Clip Lid
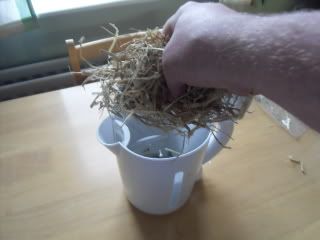
Small bale of Straw or Hay (pet bedding)
Bicarbonate of Soda
Electric Kettle
Pipettes
Household scissors

Mason Jar...I discarded the French Clip lid and gasket.
First thing you will need is a pure Paramoecium culture, one that is not contaminated with any other protozoans which may feed on the Paramoecium.
(drop me a pm if your having difficulty acquiring one)
Boil a handful of straw in the electric kettle and leave to cool. When it has done so, pour about 1.5 litres into your glass mason jar/s. You will probably find that the amber coloured water is a bit acidic. If it is, you should then counteract this with a little Bicarbonate of Soda to make the pH neutral (7.0)
The next step is to take the boiled straw from the kettle, and with some household scissors snip some 2cms cuttings into your liquid in the jar. 10-12 snips will be adequate.
Let you amber coloured straw infused liquid stand for 24 hours then finally pour in your paramoecium starter culture and store in a warm, lit room (but not in direct sunlight).
As the liquid in the culture vessel will be very cloudy for a couple of days you may feel that you have lost your culture...not a bit of it...be patient.
The culture will take around a week to really be suffused with these tiny little creatures as they feed and sub-divide, but visible signs will be there after a few days as the liquid clears somewhat.
After a period of two weeks it is time to set up a couple of new cultures (division) as the original one will be starting to wane. At their peak these cultures are absolutely teeming with life, don't take my word for it, try it for yourself.
Note: Do not use the same pipettes for feeding etc, to avoid transferring of liquids from vessel to vessel for fear of contaminating your culture.
Quite a simple and easy protozoa to culture, that if properly maintained will last indefinitely.
Regards
C
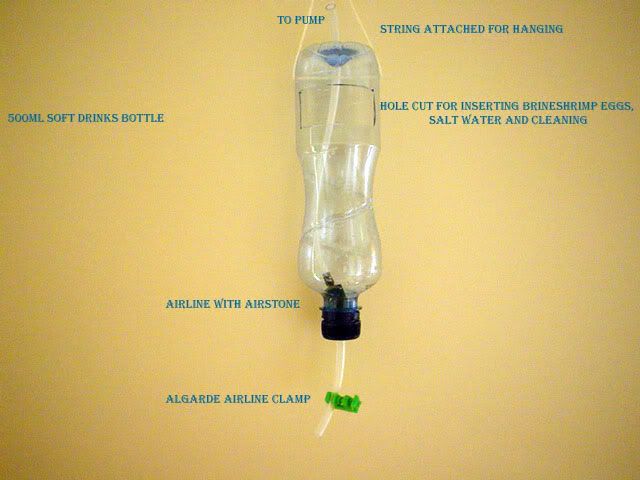
A Simple Brineshrimp Hatchery method
- Details
- Written by Puddlefish
- Parent Category: Articles
- Hits: 9643
Most folks breeding Tropical Fish have, at one stage used brineshrimp on a daily basis to rear batches of fry. Each individual has his or her own methods and receptacles for going about this.
The receptacles used can either be from a commercial source or made in the home by the hobbyist.
There here follows a small pictorial piece on how I personally go about making my Brineshrimp hatcheries.
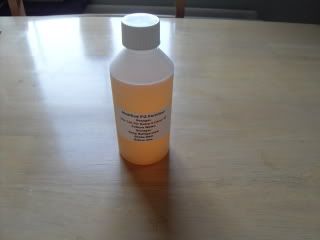
The best receptacle I have found to date for making such a hatchery is a Sainsburys concentrated fruit juice bottle. It has a very long neck, which is ideally suited for funnelling the shrimp out for feeding.
The items I use for making this item are as follows;
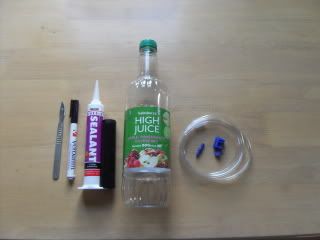
An empty Sainsburys High Juice bottle
A small hobby Knife
A marker Pen
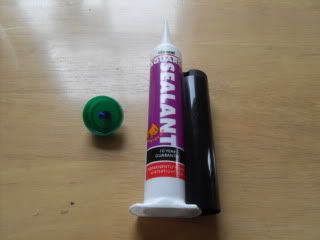
Silicone Sealant
A length of airline
An Algarde straight airline connector
An Algarde airline clamp
Drill with a 7mm Bit
First, I need to remove the label and give the bottle a thorough wash.
Then with a pen I mark out a rectangular section of around 75mm x 25mm
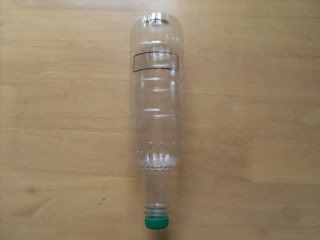
With the hobby Knife I now set about cutting this section out and discard the off-cut.

The next job in hand was to drill a 7mm hole in the base of the bottle and the same in the centre of the cap.
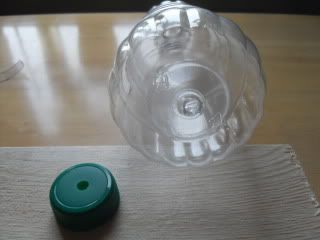
An Algarde straight airline connector was then placed through the hole in the cap and sealed into position using everyday aquarium silicone sealant
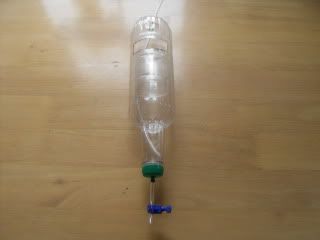
Once the silicone cured I screwed the cap back onto the bottle and finished off the drain assembly, namely I added a short length of airline to the connector and attached the clamp. A longer length of airline was fed into the bottle all the way down to the neck area, the other end was then attached to the air-pump.
If you are wanting to make a similar unit like this, you now have two choices on how to hang it. You can either drill holes with a pad saw in a shelf and set up the hatchery/s as I have done
or
Drill a couple of holes, one either side of the bottle's upturned base and thread some string through. You can now hang this from a hook as seen in the smaller prototype version below.
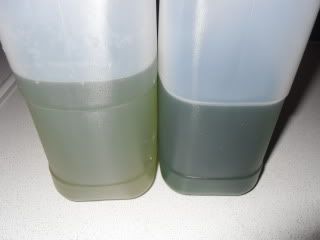
To harvest the shrimp I place a jam pot or similar with a cotton handkerchief draped over the top beneath the drain assembly. I turn off the air supply and let the contents settle. The majority of the newly hatched shrimp will make their way into down into the neck area, where its simply a matter of opening and closing the clamp for the amount of nauplii you require. I then flush this with freshwater and dip the handkerchief into the fry tubs.
I hope you have enjoyed this little pictorial account of how to make a simple brineshrimp hatchery for little or no outlay.
Admittedly the above account is aimed more at the novice fish breeding enthusiast rather than the professional but I hope there is something in it for everyone
Regards
C
Page 1 of 3