
Foods and Feeding
Vinegar Eels
- Details
- Written by Puddlefish
- Parent Category: Articles
- Hits: 8311
Vinegar Eel or Turbatrix aceti are a small nematode worm that is both harmless and non parasitic they feed on a culture medium known as mother of vinegar an ingredient used in the making of vinegar. Vinegar today is pasteurised in much the same way as milk to rid the liquid of these small worms.
We as aquarists/fish breeders can utilise these small nematodes to feed very small fry.
Initally you will need is a small quantity of Vinegar Eel starter culture available from various sources. (Thanks Donald)
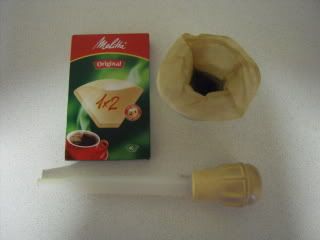
The everyday items needed to culture Turbatrix aceti are:
Jam Jars
Cotton handkerchiefs and elastic bands
Red or White Wine or Cider Vinegar
Apple Slices
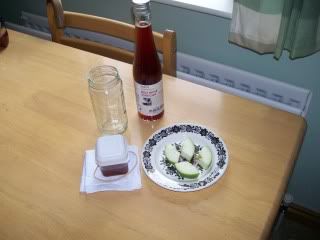
All you need to start your Vinegar eel cultures

Fill the Jam Jar half full of your preferred Wine/Cider Vinegar.
Some aquarists like to dilute the vinegar with a little water but I like to use mine neat.

Next take your starter culture and pour some into the Wine/Cider Vinegar in the jam jar.
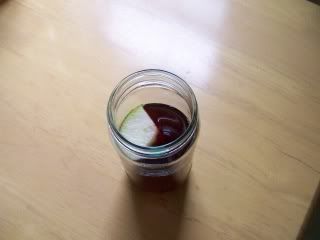
Add a slice of apple. This will sink over the comming days.

Finally cap with a slice of cotton handkerchief and secure with an elastic band.
This lets the culture breathe and stops it getting infested with flies.
These cultures are best kept warm [room temperature] in the dark and covered as mentioned above.
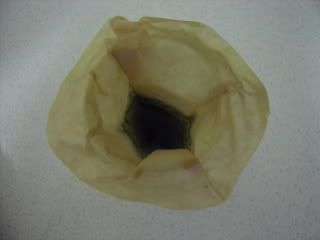
Harvesting
Method 1:
Pour the medium siphoned off your culture through coffee filter paper. Keep the vinegar; return this to your culture. Now rinse the eels trapped in your filter by running some fresh water through this. Finally invert into a glass of clean water. Leave them in the water to purge them before feeding.
Method 2:
Siphon off some of your culture from near the top into a long necked bottle [i.e. a wine bottle]. Fill the bottle until the vinegar just starts to enter the neck of the bottle. Then take a small amount of filter wool to form a plug. Push this down until it sits on the vinegar, leaving most off the neck empty. Fill it up with fresh water. The eels will crawl through the filter floss into the fresh water. They can then be harvested with an eye-dropper or turkey baster, and fed to your fry.
Another little livefood for small fish fry that can be cultured by the home aquarist for you to try
ATB
C
Further interesting reading
www.waynesthisandthat.com/eels.htm
Culturing Whiteworm
- Details
- Written by Puddlefish
- Parent Category: Articles
- Hits: 8484
Enchytraeus albidus (Whiteworm)
Most aquarists, if not already done so, will one day want to culture some live-foods to feed to their beloved fish. Whiteworm are just one of a myriad of nematodes that can be cultured quite easily at home.
A small amount of time and devotion and attention to detail will reward you with many sub-cultures for your fish larder.
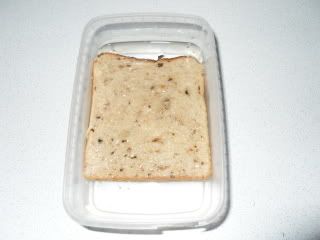
1) Fully soak your bread, I like to use Hovis Granary, I find it's the best for my purposes.
2) Lay your saturated bread onto your worm culture.
3) Now let them tuck in.
4) Jeez..at this rate I'm gonna need another loaf 
Temp
The optimum temperature for reproduction is 15° - 21° C. Below 9°C the worms will stop breeding and above 27°C they will die.
Breeding
For breeding you will need the following:
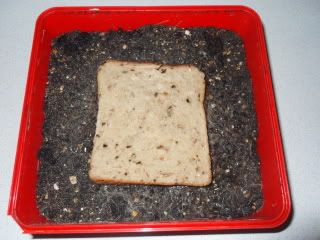
• A Container; e.g. an ice-cream tub or similar with holes punched in the lid. Pinholes will suffice so as not to attract fly infestation.
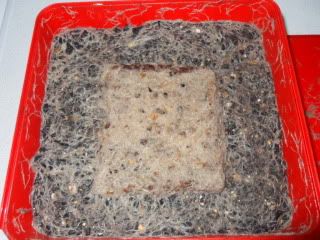
• Medium; Potting Compost; I make my own with a little garden lime added, as worms do not like acid soil. Aquatic soil is also a good medium.
• Food; To begin with I use granary bread cut into 1” squares and soaked in milk. when the Culture matures I then use full slices of Brown Granary Bread fully soaked in RO water, this method has presented me with my best results in terms of yield thus far.
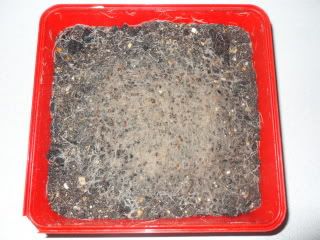
Place your compost in your container to about three inches deep and gently firm. Spray this until it is nice and damp, but not soaking wet. Empty your starter into a depression in the centre of the container. Gently level this and add a square of bread to begin with. Cover this with a piece of glass or slate (the later works best). Cover the box as white worm’s don’t like light.
The worms will begin to slowly disperse into your culture box. To begin with the worms will eat very little and you may find that the food will grow a white hairy fungus. If this is the case carefully remove the uneaten food, taking care not to remove the worms that are attached to the base of the rotting food. Replace with fresh food. Check the culture every day to ensure that they have enough food. You will find that as the worms multiply, the food will be consumed more quickly.
You can increase the number of cultures by adding some worm filled media from your new culture once it is established (as you did to start your first culture), or upsize to a larger container.
Your culture should be ready to harvest in about 8 - 12 weeks.
Harvesting
A common fault is that people attempt to harvest too early. It usually takes at least 8 weeks for the worms to be collected in numbers large enough to both feed fish and sustain the culture.
To collect the white worm place them in a plastic tub containing a small amount of water for around 5 minutes (this is long enough for the worms to purge themselves of any compost), by this time they will have collected together in small balls and are easy to collect and feed to fish.
I hope this small article of another easy to culture livefood encourages some folks to give it a go.
Regards
C
Culturing Mexican Gammarus (Hyalella aztec)
- Details
- Written by Puddlefish
- Parent Category: Articles
- Hits: 9339
by
Puddlefish

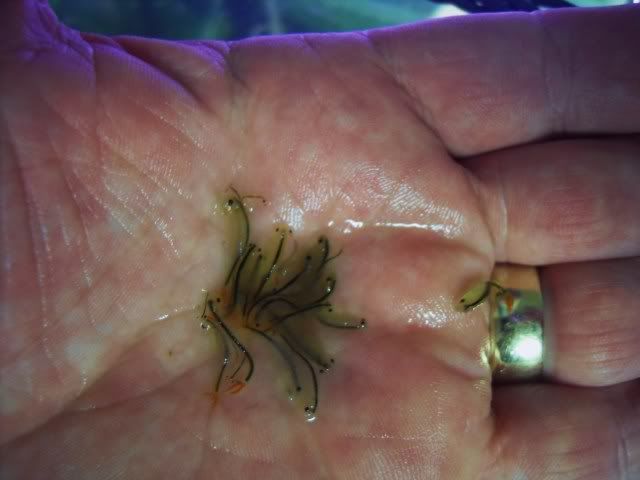
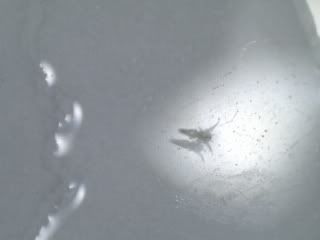
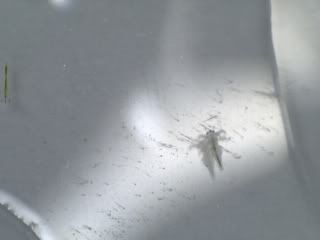
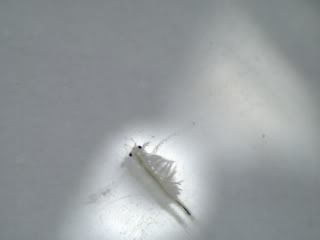
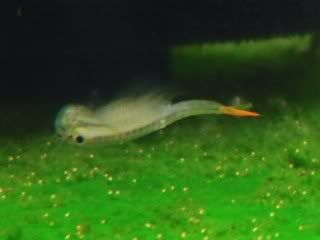
- A Pair of Hyalella aztec mating -
Introduction:
I first came across this little species of shrimp whilst discussing livefood sources with a fellow longstanding killifish enthusiast. He imparted to me that this species would remain (even when adult) small enough for average sized killi species to consume. They would also proliferate at such a speed that a 24x12x12 tank set aside for such a purpose would feed a whole fish-house weekly. What more could I want. He offered to send me a culture and from that contact, this article was spawned. I hope you enjoy this new editoral and be encouraged to seek and find more natural and obscure food resources for your fishes.
Hyalella aztec as the second part of the latin name suggests hails originally from South America (Mexico). They are maintained in many laboratories around the world as they are extensively used in toxicological studies when assessing the environmental health of rivers, streams and other watercourses.
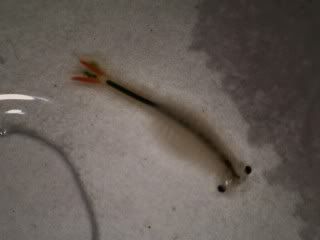
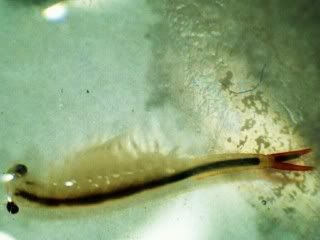
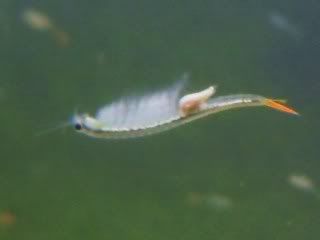
Mexican Gammarus shrimp x200
Life Cycle:
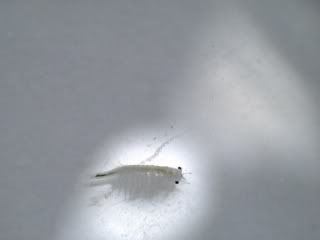
This little amphipod will mate several times per year. If you observe the courtship closely you will notice that the male will carry the female on his back, for about a week, whilst swimming, during the copulation process. Females will normally produce around 40-50 fertilised eggs in her brood pouch which show up as being orange in colour and are conspicuous through her semi-transparent body. The tiny shrimp hatch within the egg pouch of the female and emerge as microscopic, fully developed young.
They will then develop an exo-skeleton and will shed this (moult) several times as they grow. The shrimp have no natural defences against predators so they will hide in any dark areas of the tank. They will however become more active under low light conditions or after dark.
Apperance:
Hyalella aztec, as with many other species of Gammarus Shrimp have a body which is laterally compressed, they are thicker in their length rather than width. The body is divided into eleven segments, one for each set of appendages. There are two long antennas on the head , followed by two pairs of grasping legs, half way down their body they have five pairs of legs for walking, these are followed by another pair of hind legs which assist the shrimp when feeding, curled head to tail.
The tail section has two small protrusions.
Size:
This little species is fairly small with adults perhaps reaching only 10-15 mm in length. This is perfect for feeding to tropical fish species of average size. (Males are larger than females)
Colour:
This depends entirely on their diet within their habitat. They are semi-transparent and their entire digestive tract is visible through the walls of their shell. They will scavenge on all manner of materials, but most of the time they will adopt plant material as their primary food source, of which algae will have an effect on their colouration, showing up in the shrimp as various shades of green.
Environmental surroundings can also effect the colouration. If subjected to a habitat with lots of silt and mud as a substrate then the shrimp will naturally appear to be brownish and blend into the surroundings which help to camouflage them and protect them from becoming prey. You will however always be able to spot the pregnant females by the colour of her eggs being carried within her brood pouch.
Movement:
When you have a population of these going, you will notice that they will swim for around 2 to 6 seconds, and then they will take a rest and breathe. If they are not holding onto something within the tank they will sink toward the bottom in a curled position after a few seconds they will uncurl and swim another short distance. They need to have constant circulation of water over their gills, to achieve this their legs are constantly in motion.
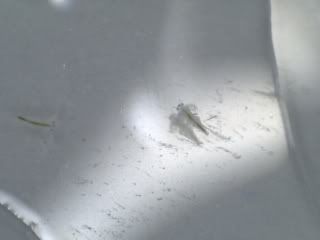
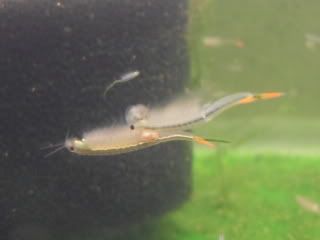
Male and Female coupled
Habitat:
Gammarus Shrimp are primarily scavengers they mostly feed on plant and animal material that have settled to the bottom. Sometimes they will adopt a predatory role and attack other injured or stressed aquatic life. For the most part they tend to hide among plant matter and under rocks or debris when not travelling or mating. Shrimp need calcium to build their shells or exo-skeleton.
So an environment which is non acidic and high in dissolved salts and calcium suit this little critter best.
Home Aquaculture:
When first acquiring my initial starting culture of this shrimp, I asked many questions regarding their aquaculture and husbandry, all of which were met by the same reply.
That said I just knew these little buddies were going to be a cinch. Looking at the evidence above I would have said that this species were nearly impossible to wipe out and you know that's not too far removed from the truth.
I initially set the shrimp up in a 3ltr ice cream tub. Rainwater buffered with a little Bicarb of Soda and some crushed coral sand (in a small tub). Added to this set-up a large Juwel brand coarse filter sponge was added.
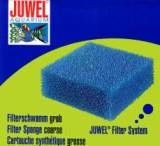 ]
]Juwel Coarse Filter Sponge - Excellent Gammarus Habitat Material
It needs to be the course type as the shrimp utilise this for habitation purposes much the same as being under stones in the stream or river. Finally a few dead leaves were added. Being habitants of moving waterways suggested that they like a lot of oxygenation in their water so I added an airline which provided plenty of surface agitation to their new home, all be it temporary. I feed the little beggars anything that's lying around but predominately they get Tetra Pond Pellets. (must try trout pellets from the local angling shop). They grasp on to these pellets and feed, 100's at a time, its so comical to watch.
In a tub that size I would feed 15-20 pellets a day and water-change every other day.
The population explosion of this species has to be seen to be believed. I have only had this new form of livefood a short while now, and its truly amazing how these things reproduce so quickly.
I can see how it is possible to feed a whole fish-house on these and not deplete you initial stock.
Harvesting the shrimp is very easy too, all you need is a small container with a lid. Punch some holes in the lid and load the container with some delicacy (pond sticks),replace the lid with a length of string attached (so as you can retrieve the pot from the culture aquarium) After a while draw up the pot and it should be filled with Gammarus ready to be fed to your charges.
Summary:
If you are looking for a small sustainable form of livefood to be able to feed your fish on a regular basis, then look no further than this little species. Simplicity in itself to set-up and maintain. The fish seem to love these critters and take them with gusto every time they are offered.
Note!
One downside is that these critters should only be fed to breeding aquaria and stark aquariums devoid of (or folks not worrying about their greenery) plants. Due to the nature of things these shrimps will strip plant matter from a tank very good for hair algae but will relish aquarium plants as desert when that is used up. Sharing a tank with Cherry or other small shrimp species is also a bad idea due to them being out competed for food.
Those small points aside and looking at things from a breeders perspective, then this shrimp species ticks a lot of boxes when trying to keep a fully stocked larder, especially over the winter months when livefood becomes scarce.
I hope some of the patrons of this site will give them a go.
All imagery by the Author except Juwel Coarse Sponge pic
Regards
C
A Shrimp from the Orient
- Details
- Written by Puddlefish
- Parent Category: Articles
- Hits: 15059
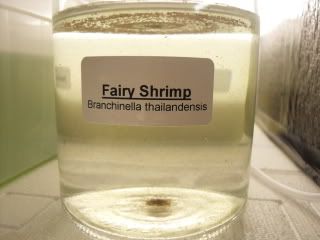
Culturing Branchinella thailandensis
A Shrimp from the Orient
by
Puddlefish
This lengthy editorial was constructed by myself due to the sheer lack of non technical reference material available to the hobbyist regarding this interesting subject matter. I've scoured the internet for hours on end for relevant data that I could use and I only managed to find somewhat sketchy articles of which only just brushed on the topic. So as an endeavour to try and help other aquarists and folks interested in home aqua-culturing such creatures I have managed to put together something based solely on my personal experience. I hope you enjoy what I have managed to unearth.
This being a new venture for me and for anyone that knows me will impart that I like to culture live foods at home if possible, in an effort to give my fish a different and diverse dietary range to satisfy their everyday bodily needs. Borne out of the simplistic idea that brine shrimp need brine water, a salty mix within a specific gravity range to thrive and grow and we are predominately using freshwater as a medium for our fish which is an alien environment for Artemia to survive much longer than an hour or so. Subsequently Artemia do not live very long in freshwater tanks or fry tubs, leading to the fouling of the water which could, if left, lead to disease with resultant fish and fry losses. Thai Fairy Shrimp on the other hand would possibly fill this gap. offering me a high protein, low fat food source that would stick around longer in a freshwater environment giving fish and fry a longer time to catch and consume this fresh food source before ending up as a useless mush on the aquarium floor.
Lots of aquarists would like to give this type of food source a go, but shy away from attempts to home culture this small Crustacea species due to the fear of being duped by unscrupulous Thai vendors sending unreliable cysts through the lengthy postal delivery system. So this little article is set out with a two fold agenda, firstly to catalogue my attempts at culturing and sustaining the shrimp to subsequent populations and secondly to dispel the fear of ordering cysts from the Far East.
I'm not a fool... so realistically I would not be able to produce shrimp cysts in such numbers as to be in a position to distribute large quantities around the country. (I don't have a lake in my back yard) what I am aiming for here is to produce enough shrimp and cysts with a little effort to be able to have a self sustainable food source for both fish and fry feeding. The initial program will be primarily to grow the shrimp to adulthood and collect the cysts, this would be the number one priority. To forget about feeding anything to the fish initially until I have enough cysts to sustain future generations.
An adult of 35mm would be of no use to myself as I only keep and breed small Killifish species so for food purposes I would be only using perhaps the 1st, 2nd and 3rd instars.
What are Fairy Shrimp?
There are many species of fairy shrimp catalogued geographically around our planet, some small, some huge, but for the subject of this particular article I will be concentrating on a relatively small species from Thailand.Branchinella thailandensis.
According to published literature Branchinella thailandensis have been found in the northeastern part of Thailand since 2002. This species can potentially serve as live feed for fish and crustaceans in aquaculture because of its high nutritional value; 64.94% protein, 5.07% fat, 17.96%. carbohydrate, 8.49% ash, providing an alternative to artemia (56.4% protein, 11% fat, 12.1%. carbohydrate and 17.4% ash)
(Figures given suggest that they are of a much higher nutritional value than our other most common freshwater food resource, Daphnia).
The shrimp have adapted to living in shallow vernal pools, prone to drying out on occasion as the seasons predict. The female lays hard cased eggs (similar to Artemia cysts) that will lie dormant in the dry substrate until the pool floods once again. From cyst to adult they go through several instars. Culminating in mating and subsequent egg laying. The lifecycle of the fairy shrimp takes roughly about 6-8 weeks depending on temperature and food resources. Expect the adults reach a size of between 25 to 35mm in this short time-frame. Fairy Shrimp are filter feeders and can comsume wide range of food within the water column such as bacteria, protozoa, algae, rotifer and organic matter. As normal with this family of crustacean they are very sensitive to adverse changes in water conditions and chemicals.
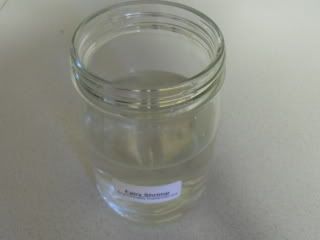
Acquisition of Cysts;
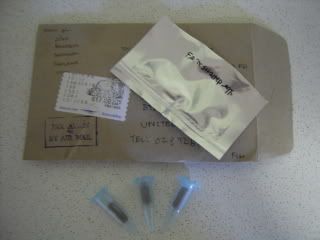
Although the vendor states in his literature that he cannot be responsible for hatching rates etc, I figure I should have enough cysts and hopefully subsequent shrimp to get me to the next stage. Which ultimately would be to raise as many shrimp as possible to adulthood and collect the eggs they produce.
Aquaculturing;
As with all my articles, the findings therein this particular study is purely gathered from my own experiences on the subject matter. Many aquarists may find different methods in order to gain equal or higher success rates or yields. I call upon those people to make comments and offer positive suggestions surrounding this material so as others may share and educate themselves by reading these editorials.
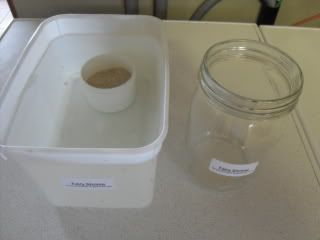
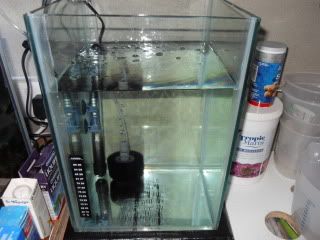
The Container;
The first containers, like everything else are just standard jars and tubs rather than specialist dedicated vessels specifically designed for the job in hand. Initially I set up the cultures almost identical to my internal culturing of Daphnia pulex, in fact everything is essentially the same or similar. Later as the shrimp grow on towards adulthood I will move them into a proper all glass aquarium with a view to collecting the eggs.

When first setting up all of the vessels they have to be sterilised with a very mild bleach solution after which they were thoroughly rinsed with fresh water and meticulousness dried out. If you are attempting to culture these crustaceans sometime in the future don't be tempted to use other chemical washing-up liquids to clean your containers as the residue they leave behind will kill the shrimp.
The Water;
The water I use for the shrimp is nothing fancy, just rainwater in a clean sterile container with the pH adjusted to 7.6. by means of Bicarbonate of Soda. The temperature is kept at around 22'C. Added to the set-up is a small tub of Aragonite sand to help keep the pH up.
The Cysts;
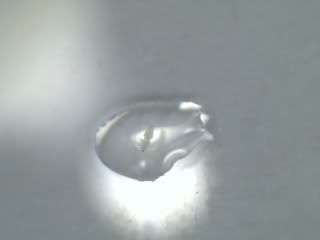
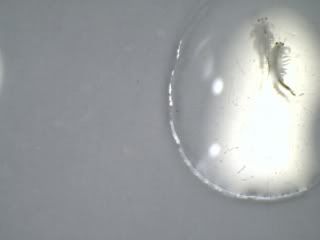
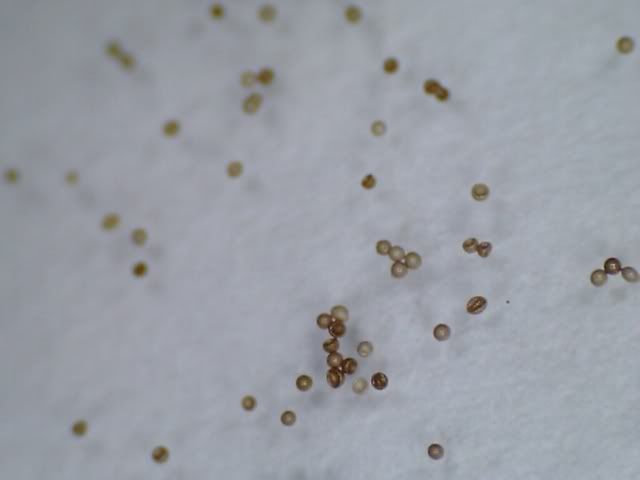
You can differentiate Branchinella thailandensis cysts from other fairy shrimp in the region just by observing the shape of their eggs casings. Thai fairy shrimp cysts are spherical with many irregular six sided indentations or dimples around its circumference. (see pic below)

Branchinella thailandensis cysts under 200x magnification. (Artemia insert)
You can see just by looking at the egg casings that they also differ from Artemia cysts (see insert) in that the casing is rough, heavily dimpled and not as smooth and uniform as the Brineshrimp cyst.
Hatching;
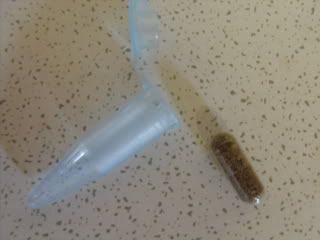
Now we come to the first step on our journey, the initial hatching of the first batch of cysts. I have used a whole capsule of eggs for this initial wetting. It is known from literature that all eggs must sink to the bottom in order for them to hatch. Floating eggs wont hatch by all accounts. You can use some coffee filter papers laid on top of the floating cysts to get them to absorb more water and help them to submerge. Any cysts that still manage to float you can re-dry (see later in thread) and hatch at a later stage for more shrimp
The cysts will immediately begin to absorb water, and will eventually sink to the bottom of the jar. The baby shrimp will not hatch straight away until they are convinced that the water body is permanent. This will take about 24 to 48 hours, sometimes longer, depending on conditions. After the allotted time the nauplii will hatch and begin swimming with jerky movements as they propel themselves through the water column. The do not need to be fed until the second day. They are very small and a small (20x) lens or eye loupe will help you to see them much better. They are "photo-tropic" so if you shine a beam of light through the jar they will congregate near the light source and will be more visible. Unlike brineshrimp vigorous agitation of the water is not required to trigger fairy shrimp to hatch.
21/06/2010 The first batch of eggs are prepared and readied for hatch as per above images. 24 hours later, as expected, the first shrimp have hatched, lots of them, they resemble artemia nauplii with almost identical swimming patterns. My little 200x microscope just isn't quite up to the task in these early stages of life but should come into it's own in the days ahead.
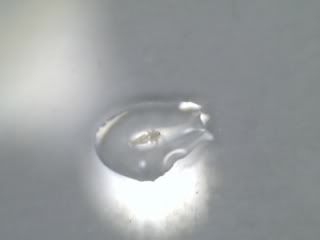
One observation....by comparison, the nauplii of Branchinella thailandensis are almost transparent, opaque white in colour unlike brineshrimp which are orange. I have administered a small feed (20ml) of live algae to the culture jar, just enough to tinge the water green.
Feeding;
Fairy shrimp are filter feeders, They strain tiny particles out of the water for food, in the wild this would mean mostly bacteria, algae, and fungal spores. In captivity I feed them "Green Water" live algae which I culture myself. (details of how to culture this green soup can be found within my Daphnia pulex thread)
You can determine how much food is enough by using this rule of thumb: The water should be slightly hazy, but not cloudy. You should be able to see through it. If it becomes cloudy, stop feeding for a day or two until it clears up. If it becomes extremely clear, feed a little bit more. Increase their food as they grow. At about 2 weeks, the shrimp will need approximately 1 ml per day. When they are fully grown, they will need up to 3 mls daily.
Growth;
Growth of fairy shrimp is pretty rapid, it has to be with such a short lifespan. They will reach adulthood when they are about 12mm long. By four weeks old, they should be close to 25mm long. On conferring with shrimp farms in the far east, they seem to recommend a density of around 15 shrimp per litre of water once they reach adulthood. Here follows a series of images cataloguing the growth of Branchinella thailandensis.
After the third week, (21 days) I again, transfer all the shrimp and contents of their original container (3lb Ice Cream carton) into larger quarters (an all glass tank 10x10x18). This allows them a much more commodious space in which to grow out. Much more live algae is being consumed than before. 200mls of the elixir is now being added which gradually is being taken up by the shrimp, this murky soup clears after 48 hours to which another dose of food is administered. Large males are starting to spar at this stage. Females are maturing and are carrying white eggs awaiting fertilisation which will darken and form a hardshell cyst after 24 hours, these cysts will subsequently be released to lay dormant on the aquarium floor ready to be harvested in another month or so.
Reproduction;
Once the shrimp reach maturity they will concentrate exclusively on breeding . The male's objective now is to fertilise a female to make new viable cysts. The females will begin to produce eggs as soon as they mature. The bright white eggs are stored in a transparent cigar shaped pouch that is attached to their abdomen. This brood pouch makes the female easy to identify. The male shrimp constantly swims around looking for a suitable female. When he finds one, he will grab her with his large antennae. The antennae look like walrus tusks attached to his face. He will quickly fertilize her eggs and swim off to find another suitable mate. You can tell when the eggs have been fertilized because they will grow larger and turn a pale tan colour as they begin to develop a cyst coating. Once the cysts are fully coated, the female will push them out of her pouch, where they will sink to the bottom of the container.
(ii) B. thailandensis cysts litter the substrate of the container
The little embryos inside will grow and develop for about a day or two. When they reach the point of about 4,000 cells they will shut down and become dormant. They will not hatch until they are completely dried out, chilled and re-wetted. One point to note here is, that from published literature, which recommends that it is better to leave the cysts in the parent aquarium for around two to four weeks after all shrimp have expired which allows the resting shrimp embryo to fully develop before entering its diapause (resting) stage.
The Next Generation;
Afer 6-8 weeks the shrimp will start to die off due to their life cycle having run its course, we should, by this time have many cysts strewn all around the floor of their container. You cannot hatch these eggs straight away. They have to be harvested, dried and refrigerated for a week or so before starting the cycle all over again.
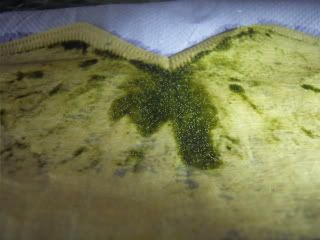
To harvest the cysts I use a clean meat/turkey baster and suck all the gunk from the floor of the container, I then squirt this through coffee filters. One full baster full of gunk laden water to each coffee filter is ample.
(ii) Freshly collected substrate from the base of the Shrimp's aquarium
I open out the coffee filter fully by carefully tearing down the seam. The filter is then outspread on layers of paper hand towel to soak up the excess water. This can now be left to dry out fully on top of the aquarium cover glass.
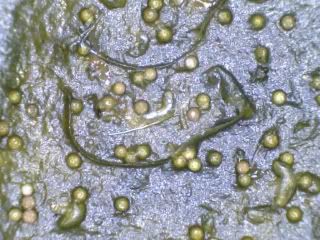
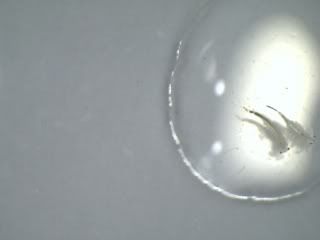
(ii) Newly collected Shrimp eggs under 200x magnification
Don't worry about harming the shrimp as they are safely encapsulated inside their hard cased shell. Once fully dried you can place the collected gunk into a small plastic bag and place in the fridge for around a week (this seems to yield better results for subsequent hatches). After this allotted time I can then start the process over again only this time around as with subsequent hatches I can sacrifice some of the shrimp as fish food. After a period of time the fish will reap the rewards more and more as your stock of shrimp cysts increases.
Observations;
21/06/2010 - Initial setting up and egg immersion
30/06/2010 - Not all the shrimp seem to be developing at the same rate and are maturing at different times - due to the probability that not all eggs might have been laid/hatched at the same time.
10/07/2010 - White eggs become apparent in brood pouches of 10mm females - Maturing males sparring.
11/07/2010 - Eggs within above females darken in colour (hardshell cyst formation)
13/07/2010 - It is noticeable that a great many eggs are strew amongst the debris on the base of the container
21/07/2010 - I sacrificed a medium sized shrimp today and placed it into a breeding tank containing adult Rivulus punctatus. The shrimp was taken with relish by a lucky female. I now know that the fish will eat the shrimp.
Future Developments;
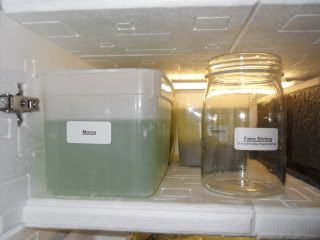
This project was a scratch at the surface, a tentative approach to shrimp culturing. For the future I will be using adapted upturned 15 litre water vessels, the type used on drinks dispensers within foyers of office blocks. I'm also looking into the prospect of upping my algae production by purchasing a couple of Aqua Medic Plankton Reactors (see below) and adding CO2. This I feel is both a necessity and a natural progression if I'm to feed my cultures of Daphnia pulex and Moina as well as the shrimp.

Conclusion;
Seeing as I'm essentially only a hobbyist dabbling in culturing certain terrestrial and aquatic live-foods this operation is diminutive as shrimp aquaculture goes, it's adequate for my present needs. I do feel however that I would get better results by scaling up to larger vessels and dedicated filtration etc. something I'm in the process of accessing.
I hope you have enjoyed this lengthy insight into the way I culture Thai Fairy Shrimp. It's a fairly easy process if certain parameters are followed. Admittedly it takes a little while to amass a decent quantity of cysts to begin feeding to the fish, but whilst you wait for this to happen you can enjoy observing the life-cycle of this truly amazing little creature.
Thanks for viewing and I hope you have enjoyed reading this detailed editorial as much as I've enjoyed compiling it.
Additional Reference Material
The cyst hatching pattern of the Thai Fairy Shrimp, Branchinella thailandensis Sanoamuang, Saengphan & Murugan, 2002 (Anostraca)
All photographs by the author (except Aqua Medic Reactors) please do not use without prior permission.
Regards
C
-----------------------------------------------------------------------------------------------------------------------------------------------------------------------------------------------------------------------------------------------------------------------------------------
UPDATE
Just a little update on the harvesting of B. thailandensis. It has struck me that the coffee filter method may be a little haphazard as when the filter becomes soggy some eggs are lost through the paper.
What I would now recommend is to suck all the gunk from the base of the aquarium into a small glass jar each time waiting for everything to settle then extract as much of the water as possible (syringe and airline attached). Once you have everything collected and most of the excess water extracted, then, simply leave the jar in a warm place (top of an aquarium light canopy or fish-house shelf) and allow the rest of the moisture to evaporate naturally. Once totally dry, cap the jar and place in the fridge for around a week. After which, simply take you jar laden with shrimp eggs from the fridge and place this into a larger vessel filled with water and let the shrimp hatch naturally from there.
Regards
Colin
Decapsulating Brine Shrimp eggs
- Details
- Written by Puddlefish
- Parent Category: Articles
- Hits: 12465
[b]De-capsulating Brineshrimp Eggs
A step by step pictorial[/b]
The problem with hatching brineshrimp eggs using conventional methods means that once hatched you are left with literally millions of unwanted shell casings, these inadvertently get fed along with the newly hatched shrimp to your fry and corals, they are in fact quite sharp and can kill fry. So what can we do to keep fry losses to a minimum whilst separating those unwanted egg casings?
We can dissolve the outer shell of the Brineshrimp cyst by a process known as De-Capsulation.
If you examine a Brineshrimp cyst under a strong lens or microscope you will see that it has the look of a deflated ball, lots of little dimples and a large indentation.
Before we begin the de-capsulation process we will need to make the outer shell spherical. Before we can start the process the outer shell must be fully hydrated. We do this by hydrating the amount of eggs you wish to de-capsulate in a water solution.
Here is a picture of Brineshrimp Cysts before actual Hydration, I have seperated a little group to illustrate the concave shape of most of the eggs before immersing in water.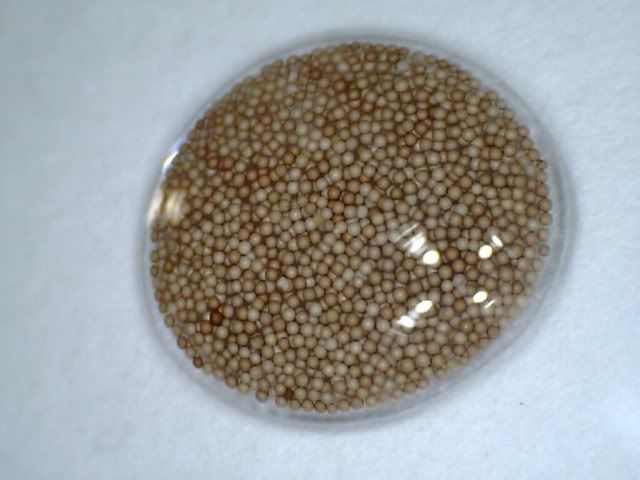
This picture shows the dramatic difference in the shape of the cyst after they have been immersed in water for 90 mins
The items we will be using are:-
Household Bleach (non Fragranced)
White Vinegar
2x Small beakers with lids
Cotton Handkerchiefs or Brineshrimp sieve
Brineshrimp eggs/cysts
Airpump & Airline
Brineshrimp hatchery.
As I only de-capsulate the amount of eggs I need for any one feeding, I will show you my methods and you can scale these up or down as need be to suit your own situation.
Take a small plastic beaker (mine holds around 250ml) and fill this to about a third of its volume with normal tap water, add to this one level teaspoon of Brineshrimp Eggs and replace the cap on the beaker. Shake the mixture vigorously and keep shaking this solution periodically over the course of 90 minutes or so to fully hydrate the eggs.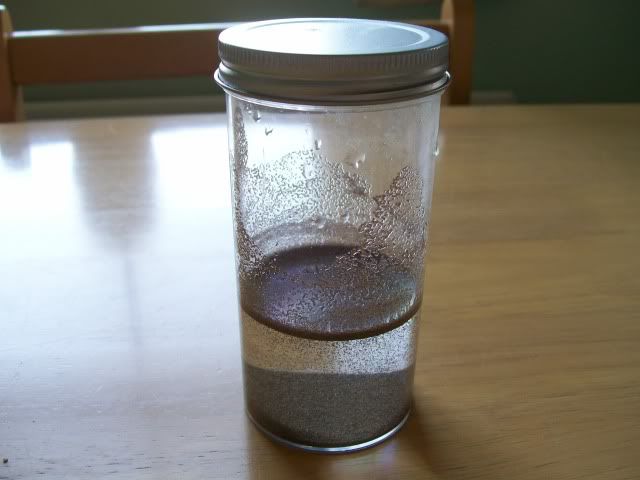
Eggs Settled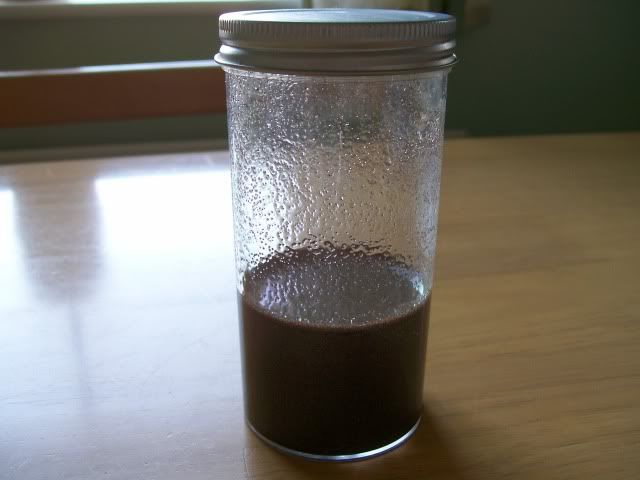
Eggs in Suspension (keep shaking the jar periodically)
Once you’ve done that remove the cap and add household bleach until the container is around three quarters full. Replace the cap and shake once and let the eggs settle for a few moments then shake the jar to really mix the bleach and the eggs in the solution. 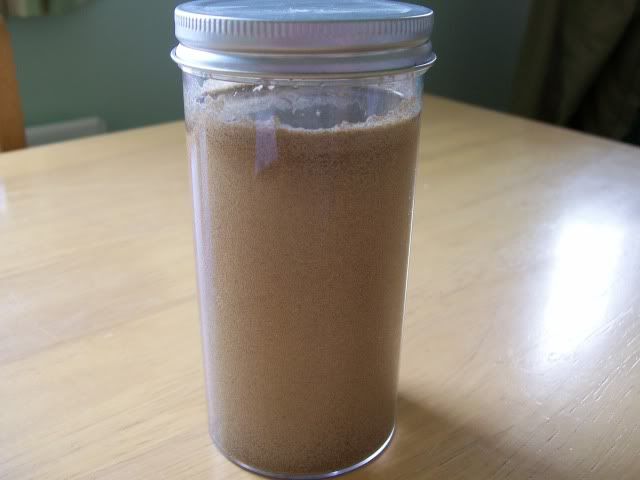
Notice the reaction starting to take place (foaming at the top of the liquid)
Within a few minutes you should notice a reaction taking place, the colour of the cyst should change from brown to grey to white to orange depending on the strength of the chemicals and the thickness of the shell. 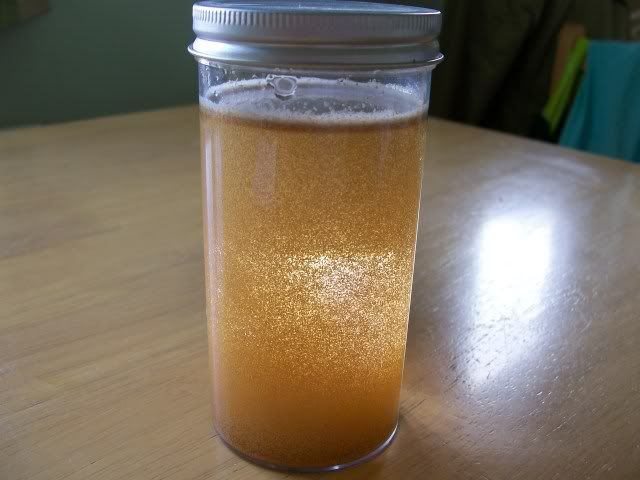
Start of the reaction process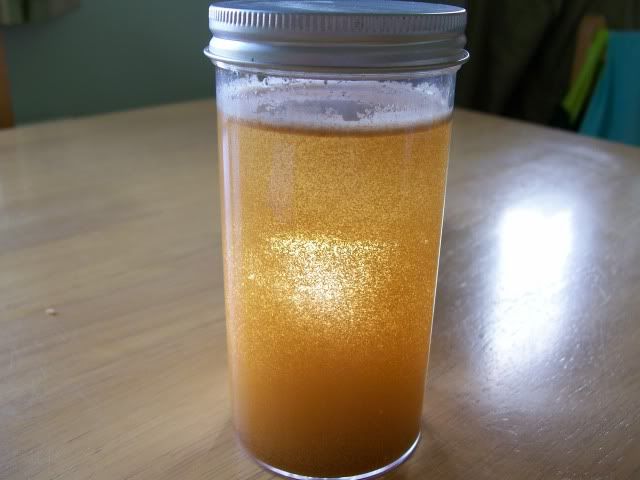
It's working
Almost finished!
When you notice that most of the cysts are orange in colour (90%) STOP! The process immediately by pouring the solution into a cotton hankie draped over another jar. Now, pour a small amount of white vinegar over de-capsulated eggs and once you’ve done this rinse the eggs under the tap to rid them of the entire bleach and vinegar residue. 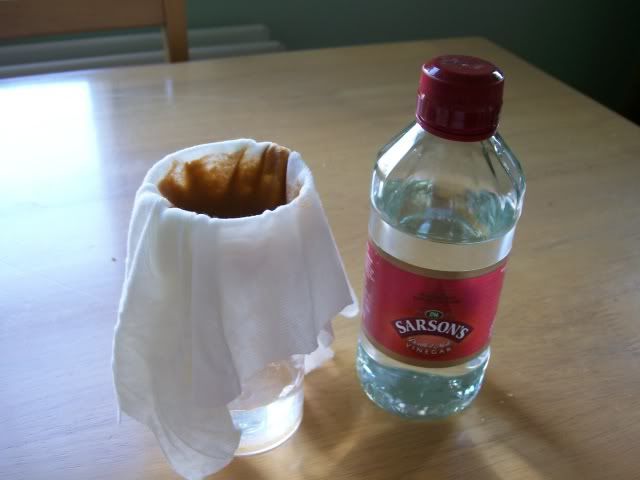
Rinse with White Vinegar and with plenty of tap water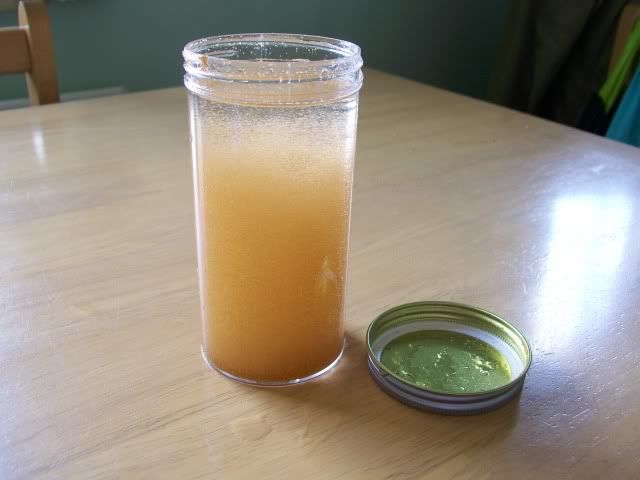
Finished Product - The Amber Nectar.
Once you have your de-capsulated eggs you can hatch them in the normal way, only this time you will have none of the annoying egg casings to contend with.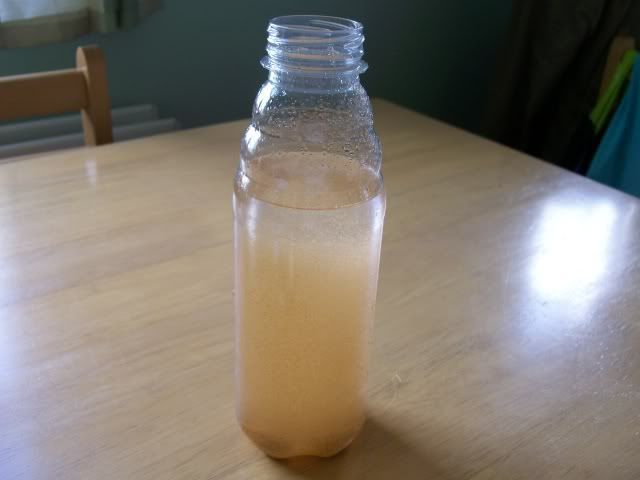
Ready for hatching using the normal conventional method.
This may seem a awful lot of trouble to go to in order to feed your fry or corals. Believe me it is well worth the effort, as you will attain a visually higher hatch rate along with clean no mess feeding.
Why don’t you try it some time, see for yourself.
Larger amounts of eggs can be used along with large amounts of chemical agents for aquarists who need higher volume hatches to feed their fry. De-capsulated Brineshrimp can also be stored in a heavy brine solution (which effectively dehydrates the membrane thus allowing the aquarist to store the eggs for up to a month in the fridge. Of course you dont even have to hatch the nauplii you can feed the unhatched shrimp in the membrane, some say its better nutritionally for the fry. I'll leave you to decide.....
I hope this article was of some help to those aquarists who are fed up with hatching Brineshrimp and the constant battle of trying to separate shrimp from shell.
Regards
C
Page 2 of 3