This is a tutorial to show how to upload or link pictures on a post.
SECTION 1 : If your picture is less than 1MB :
1 - Make sure you know where to find the picture on your computer
2 - Click on "Add File" below the editor (the box where you enter the post's text)
3 - Locate the file in the dialog box and click on "Open"
4 - 2 new buttons will appear next to the "Add File" button : "Remove File" and "Insert"
5 - Position the cursor where you want the picture to appear in the text and click on "Insert"
6 - Some code will appear in your post (do not alter it, otherwise the picture will not show)
Example :
[attachment:2]C:\fakepath\<your_file_name>.jpg[/attachment]
7 - Repeat from step 2 to insert another picture
SECTION 2 : Link from photobucket (Better to resize your picture to a max size of 1MB otherwise it takes the users longer to upload the picture when reading the post) - you can easily resize them with some program such as the Microsoft Photo Editor.
1 - Create an account on
www.photobucket.com (or log in if you already have an account)
2 - Click on the green button "Upload now"
3 - On the new page, on the top right, select the correct folder if you have different ones
4 - Then, click on the green button "Select photos and videos"
5 - Select the picture(s) you want to upload from your computer (note : use SHIFT+left mouse click to select a block of files, use CTRL+left mouse click to select several files)
6 - Click "Open" on the bottom right of the dialog box
7 - Photobucket.com will upload the picture(s) (progress bar).
8 - Once the upload is completed, click on the blue button "Save and continue to my album"
9 - Hover with your mouse over the picture you want to insert in your post
10- Click on the field showing the "Direct Link" - the field will briefly change to "Copied", which means that the necessary code has been copied to your clipboard (Note : do not copy anything else until you have pasted it in your post, otherwise, it will be erased from your clipboard).
11- Create a new post, go to the editor (the box where you enter the post's text)
12- Position the cursor where you want to enter the picture
13- Click on the "Image Link" icon in the toolbar, above the editor box - that is the icon showing a picture with a couple of chain links.
14-New fields will appear between the toolbar and the emoticons
15-Enter the size of the picture in the "Size" field (it depends on the size of the original picture - as an example, the photos in the photo competition posts are set to 500). If you leave it blank, it will be the same size as the original
16- Go to the "URL" field, press CTRL+A (shortcut for select all) and then CTRL-V (shortcut for paste).
17 - Press on the "Insert" button - some code will be added to your post (do not alter it, otherwise the picture will not show)
Example :
[img size=500]http://i305.photobucket.com/albums/<your_file_name>.jpg[/img]
18- In order to preview your post before you submit it for publication, refer to section 3 of this post.
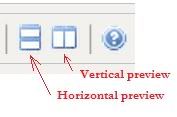
SECTION 3 - PREVIEW YOUR POST
Once you have written your post, make sure your link is correct.
You can preview the post by clicking on one of the preview icons in the toolbar – the post (and the picture will appear either below or beside the editor (where you enter the text).