
Retirement and forum shutdown (17 Jan 2022)
Hi,
John Howell who has managed the forum for years is getting on and wishes to retire from the role of managing it.
Over the years, he has managed the forum through good days and bad days and he has always been fair.
He has managed to bring his passion for fish keeping to the forum and keep it going for so long.
I wish to thank John for his hard work in keeping the forum going.
With John wishing to "retire" from the role of managing the forum and the forum receiving very little traffic, I think we must agree that forum has come to a natural conclusion and it's time to put it to rest.
I am proposing that the forum be made read-only from March 2022 onwards and that no new users or content be created. The website is still registered for several more years, so the content will still be accessible but no new topics or replies will be allowed.
If there is interest from the ITFS or other fish keeping clubs, we may redirect traffic to them or to a Facebook group but will not actively manage it.
I'd like to thank everyone over the years who helped with forum, posted a reply, started a new topic, ask a question and helped a newbie in fish keeping. And thank you to the sponsors who helped us along the away. Hopefully it made the hobby stronger.
I'd especially like to thank John Howell and Valerie Rousseau for all of their contributions, without them the forum would have never been has successful.
Thank you
Darragh Sherwin
DIY LED light unit
- m4r10 (m4r10)
-
 Topic Author
- Offline
- Junior Member
-

- Posts: 233
- Thank you received: 34


Now with the problems

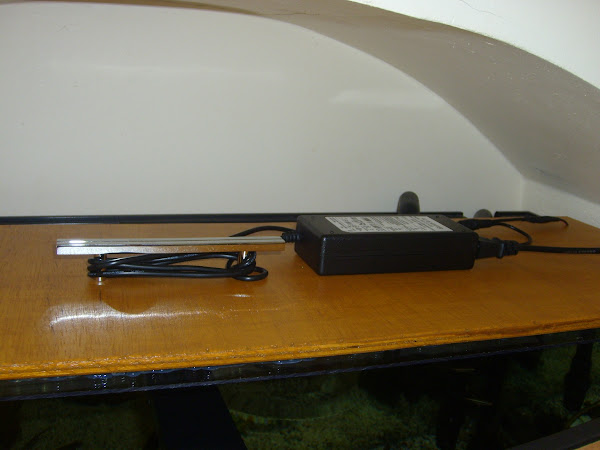
The LEDs are brighter towards the side where it conects with the PSU and are running hotter. The PSU I got exceeds the LEDs requirements, it has 6 Amps, while both LED strips require ~1.5 Amps each. Would this be of any concern and can the PSU damage the LEDs? It can be seen from the above pic that on the far side the LEDs are brighter.
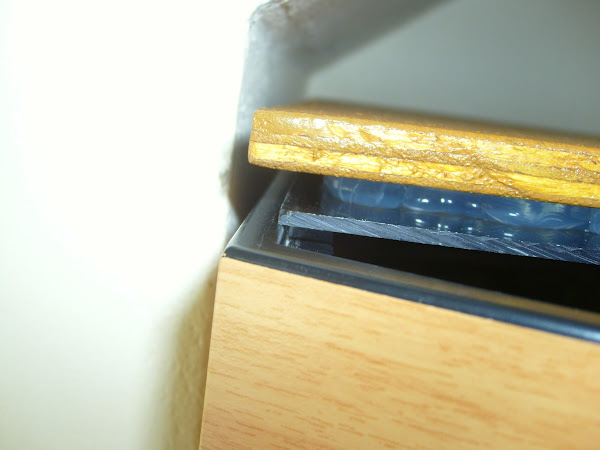
The pelxiglass is 1-2 mm longer than the intended space and sits on top of the tank instead of falling into the groove. Apart from filing it, what other method can I use to shorten it as I'm afraid of damaging the wood or the silicone?
Please Log in to join the conversation.
- BillG (Bill Gray)
- Offline
- Senior Member
-

- Posts: 435
- Thank you received: 95
hopefully addressing some of your questions and concerns, not necessarily in the order you raised them
")
There is no risk of the PSU damaging the LEDs based on it being over-rated for the LED strips unless it has a higher voltage than that required by the LED strips. The 6A output is the max rated for the PSU, however given that the LED strips will only draw 3A in normal operation, then the PSU will never run at full load.
The advantage this gives you is that the PSU will never run excessively hot. The voltage is constant from the PSU and the current drawn from it depends on the impedance of the load you connect to it, so you are safe in that regard
With respect to the LEDs appearing brighter closer to the PSU, this may well be the case and often occurs with Strip LEDs. The problem is due to them being in long strips, the further from the PSU, the less power available to drive the remaining LEDs. The only way around this is to determine if the strips can be split into shorter strips, if the specification detail for the LED strips states that it can be done, or if it stated that the LEDs have individual drivers (resistors), then you can make lots of short strips and split the PSU feed to the strips. You will not overload the PSU in doing tis as the total current demand is still only 3A but the power is more evenly distributed across all the LEDs. Hope this makes sense

Given that you have sealed the LEDs behind the acrylic sheet, I am not sure if you want to go to the trouble of opening it up again to try this.
Finally on the acrylic being 1 or 2mm too long, you could use a router to trim it a bit. If you use a router with a round over bit, then you can run around the sheet using the wood edge as a guide and it will leave you with a nice bevelled edge which will sit into the top of the tank no problem. If you are going to try this, you need the router at high speed and go slowly around the sheet of acrylic to minimise the risk of chipping it. Alternatively, you could use a sheet of sandpaper on a solid block to achieve the same result. Start with a relatively course paper like 120Grit and progress down to perhaps 600grit to achieve the final smooth finish.
Cheers,
Bill.
Please Log in to join the conversation.
- m4r10 (m4r10)
-
Topic Author
- Offline
- Junior Member
-
- Posts: 233
- Thank you received: 34
You're right in saying I'm not in the mood of opening the unit again to make another connection on the other end. I could've done that before sealing it as I have a 2 way connector for it, but rushed to finish it. I guess the difference in the brightness it's more obvious as I connected 2 strips, so there's 10m in total. With the first opportunity, I will split it in 2.
About the cutting, I don't have a router, so the sandpaper route is the only option I have. It will be messier but have no choice.
Please Log in to join the conversation.
- CrustyCrab (Peter Biddulph)
-

- Offline
- Elite Member
-

- Posts: 848
- Thank you received: 185
Please Log in to join the conversation.
- christyg (Chris Geraghty)
-

- Offline
- Premium Member
-

- Posts: 616
- Thank you received: 89
Please Log in to join the conversation.
- m4r10 (m4r10)
-
Topic Author
- Offline
- Junior Member
-
- Posts: 233
- Thank you received: 34
Please Log in to join the conversation.
- murph (Tony Murphy)
- Offline
- Junior Member
-
- Posts: 238
- Thank you received: 17
The reason the strips at the end of the chain look dimmer is because the cumulative resistance of the strips and connectors is too great.
3A is usually too much current for the individual wires in the first strips to handle.
Normally, the (reputable) manafacturers of these strips recomend that no more than 4 strips (i.e. 4-5m length) are daisy chained.
What you need to do (soon!!) is to remove the linkage at every 4th strip (or 2nd!!) and start the wiring for the next 2/4 strips directly from the PSU again.
Otherwise, the heating at the start end you are experiencing (the main conductor wires getting hot) will lead to molten plastic, dead fish (plastic fumes BAD!!!), possible vapourised copper (dead inverts) and a fire.
Hope this helps.
Please Log in to join the conversation.
- m4r10 (m4r10)
-
Topic Author
- Offline
- Junior Member
-
- Posts: 233
- Thank you received: 34
Regarding splitting the strip in shorter ones, will they run cooler as they draw enough current to satisfy their needs? If this is the case, will a 4 split cable be in order to use as it will be connected to the same PSU?
Please Log in to join the conversation.
- murph (Tony Murphy)
- Offline
- Junior Member
-
- Posts: 238
- Thank you received: 17
What I meant was the little U linkages at the end of the strips you have, in the first picture. Only link 4 of your strips like this. Then start the next 4 with a new connection from the PSU, etc. Theoretically, they should run cooler like this (they certainly won't be a fire hazzard!).
It should be easy enough to adapt the left-over links to join to the psu (cut and screw!).
If your current PSU is under-rated, get a second (or third) one and allow more control options.
Please Log in to join the conversation.
- m4r10 (m4r10)
-
Topic Author
- Offline
- Junior Member
-
- Posts: 233
- Thank you received: 34
Please Log in to join the conversation.