
Retirement and forum shutdown (17 Jan 2022)
Hi,
John Howell who has managed the forum for years is getting on and wishes to retire from the role of managing it.
Over the years, he has managed the forum through good days and bad days and he has always been fair.
He has managed to bring his passion for fish keeping to the forum and keep it going for so long.
I wish to thank John for his hard work in keeping the forum going.
With John wishing to "retire" from the role of managing the forum and the forum receiving very little traffic, I think we must agree that forum has come to a natural conclusion and it's time to put it to rest.
I am proposing that the forum be made read-only from March 2022 onwards and that no new users or content be created. The website is still registered for several more years, so the content will still be accessible but no new topics or replies will be allowed.
If there is interest from the ITFS or other fish keeping clubs, we may redirect traffic to them or to a Facebook group but will not actively manage it.
I'd like to thank everyone over the years who helped with forum, posted a reply, started a new topic, ask a question and helped a newbie in fish keeping. And thank you to the sponsors who helped us along the away. Hopefully it made the hobby stronger.
I'd especially like to thank John Howell and Valerie Rousseau for all of their contributions, without them the forum would have never been has successful.
Thank you
Darragh Sherwin
A Marine Aquarium in the Making.
- Puddlefish (Colin McCourt)
-
 Topic Author
- Offline
- Senior Member
-

- Posts: 347
- Thank you received: 10
The proposed statistics for the finished article are:-
Tank Size - 4' x 2' x 2' ( 1219 x 610 x 610)
Main Tank Volumes before displacement
Volume in litres: 453.069545
Volume in imperial gallons: 99.674303
Volume in US gallons: 119.701336

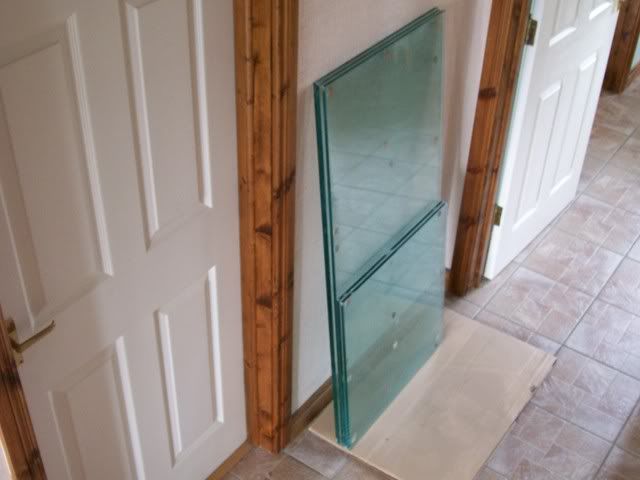
The first things first as they say was to get the raw material cut to size, as I work in a glass factory and a glasscutter by trade this was not a problem. For neatness I also had all the edges polished
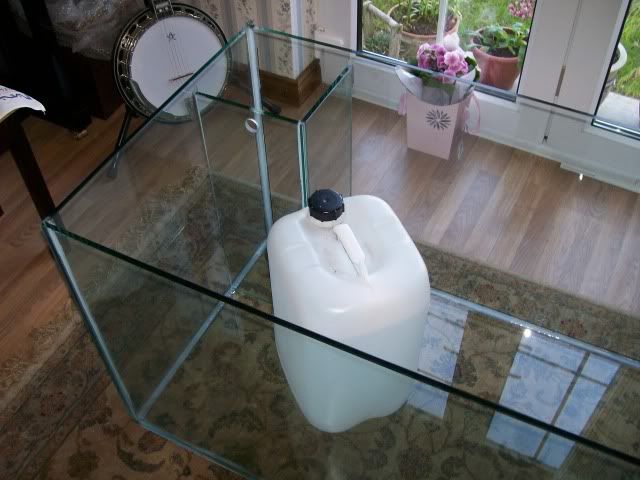
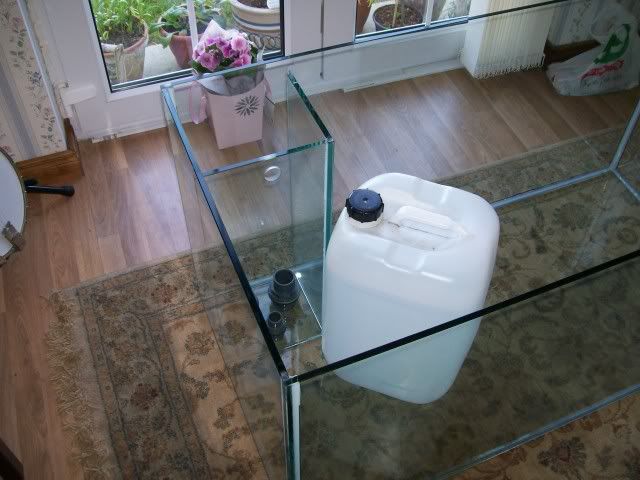
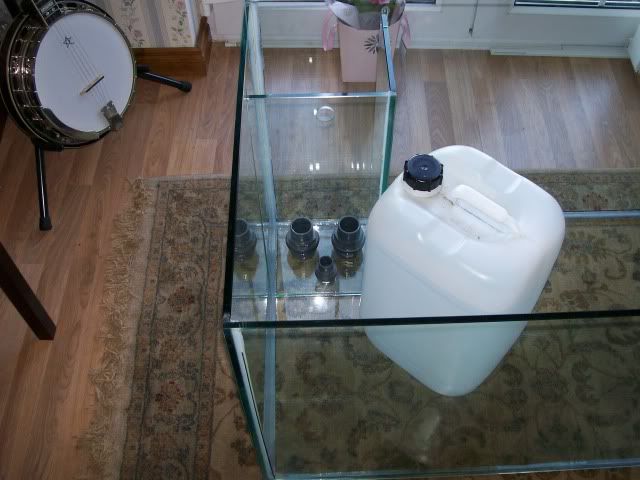
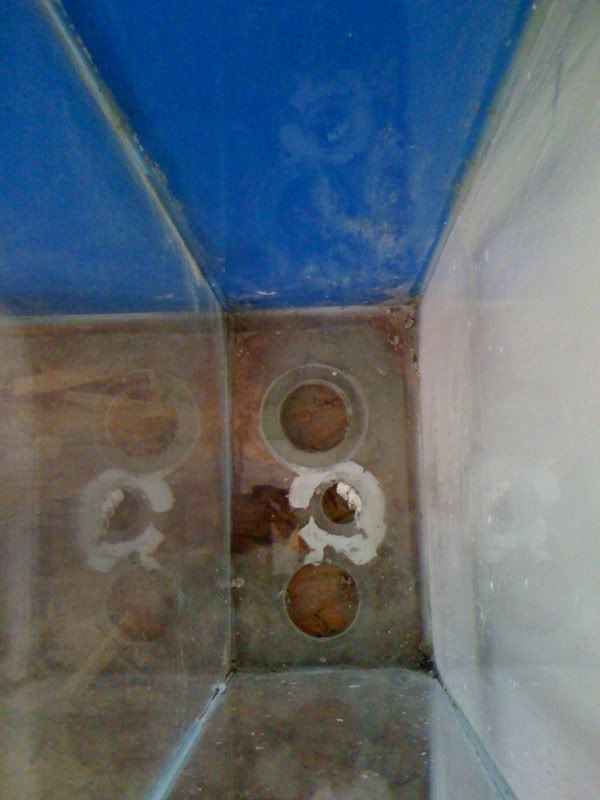
The next job in hand was to have the base of the aquarium milled by CNC machine to accept the bulkheads for the overflows and returns in a corner weir.
A series of three holes were milled in the left rear corner of the base (the holes have to be cut larger than the actual bulkhead stated sizes)
These holes would accept the Bulkheads (2x 40mm & 1x 25mm)

Two larger drains at the rear and a smaller return to the fore
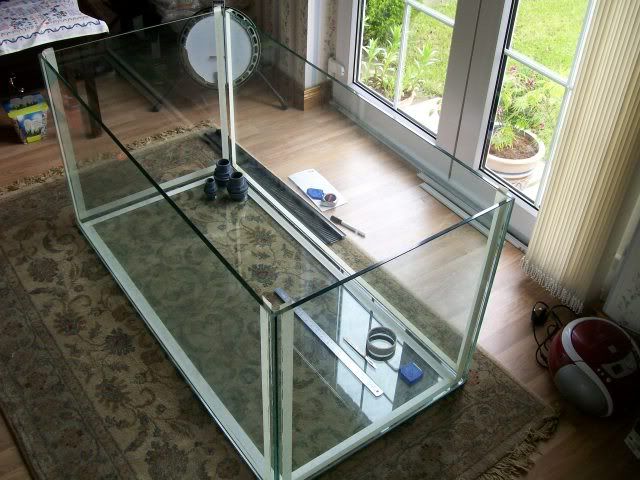
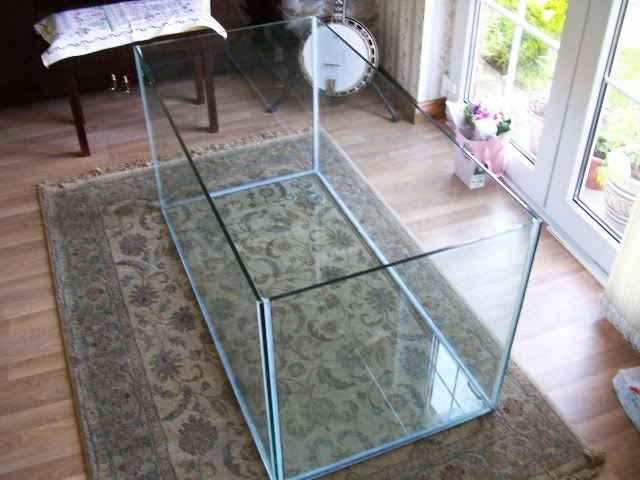
Finally made a start on building the tank.
Due to the Garage still being full of crap, I have taken up residence in the sitting room with my old Banjo and Piano.
Anyway please excuse odd picture angles and suchlike due to space limitations.
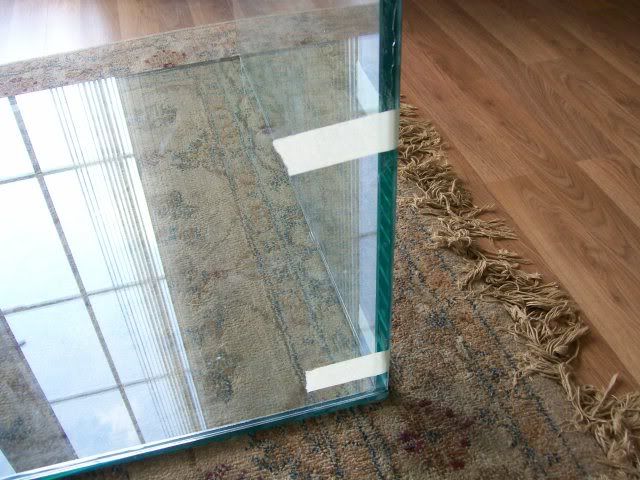
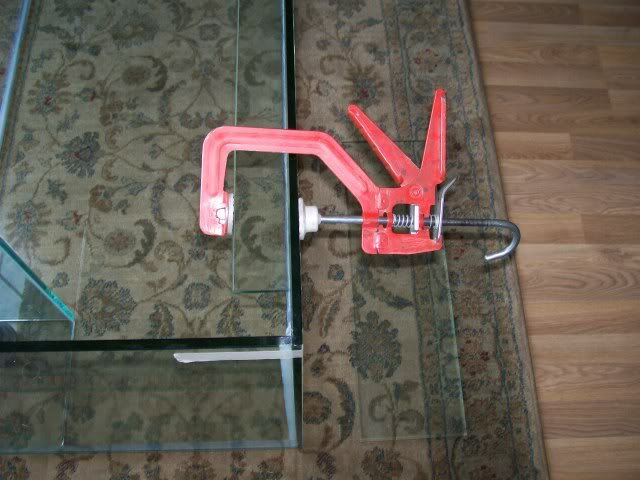
The front is already in situ on this shot, I'm now working on the end panels. (I would normally start with the ends, but this stuffs bloomin heavy)
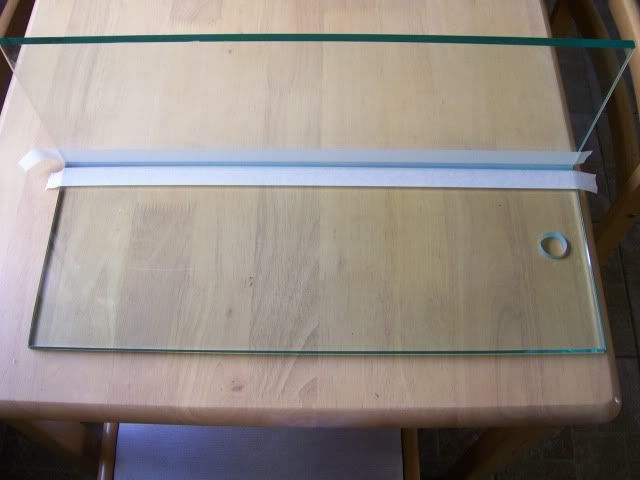
Notice the small tacking bead of silicone on the base section the same is applied to one edge of the end panel where it meets the front.
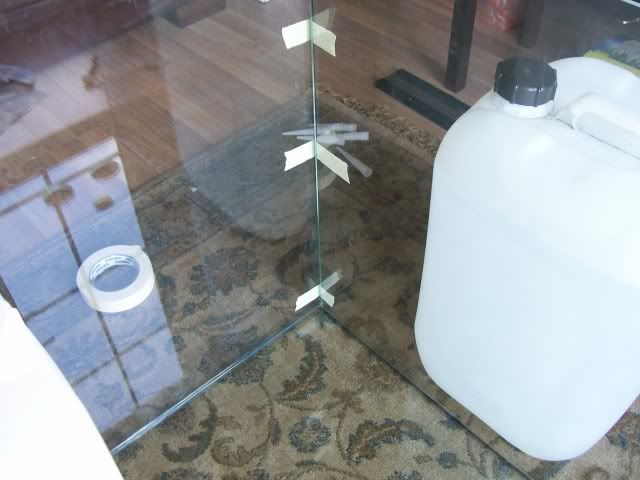
All squared up and taped and support given due to lack of help (all family at work)
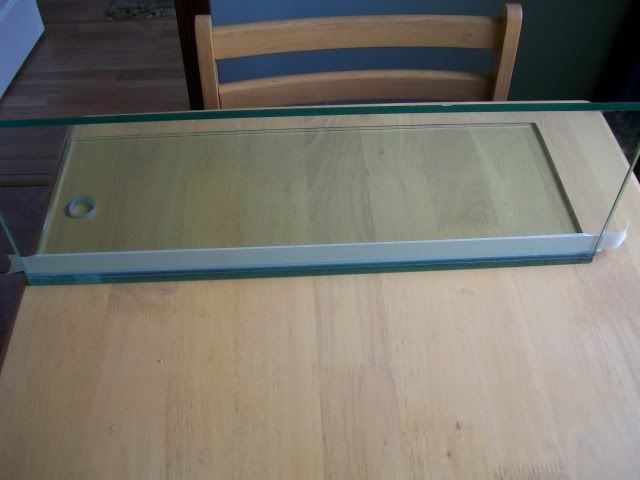
End adhered to the front panel, squared and taped

Wider angled shot

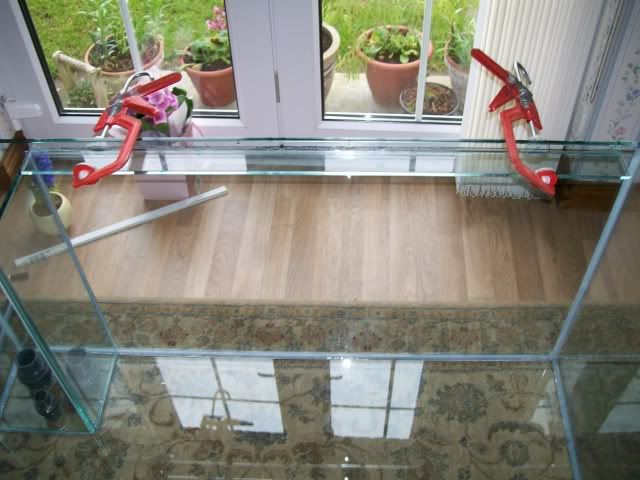
Both end panes and the front is now tacked, awaiting the back panel.
I got the last panel (back pane) tacked, levelled and squared.
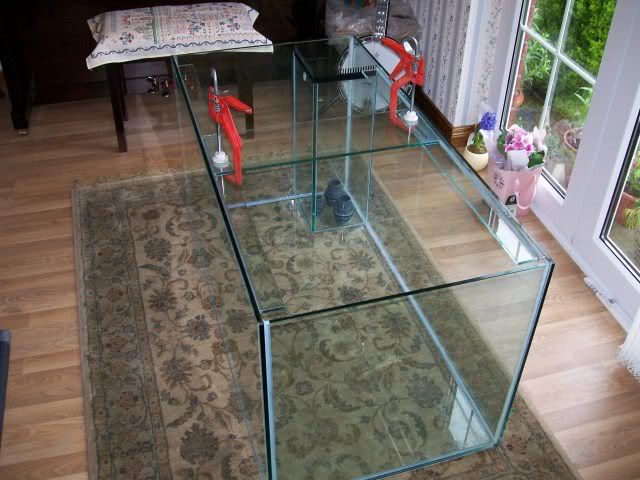
The whole thing is now banded and waiting to cure. All went smoothly with no hiccups.

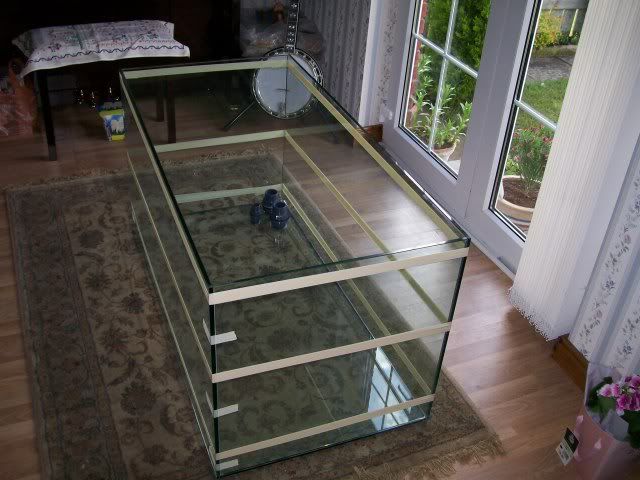
Well the banding tapes are all off now and I have been throwing this tank around somewhat this morning. No creeks or cracks to be heard.
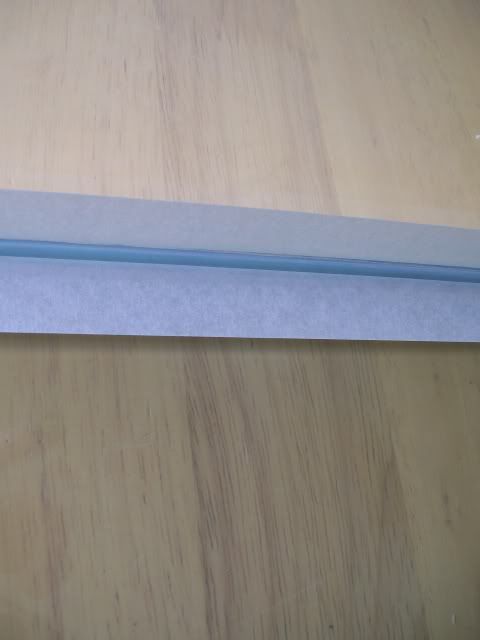
I've moved on to taping the inside of the tank in preparation for the eventual sealing.
I am going with a 10mm bead width on this tank as it's the biggest one in regards to width and depth that I have built thus far.
I have built six footers before for which I only used 8mm bead width.
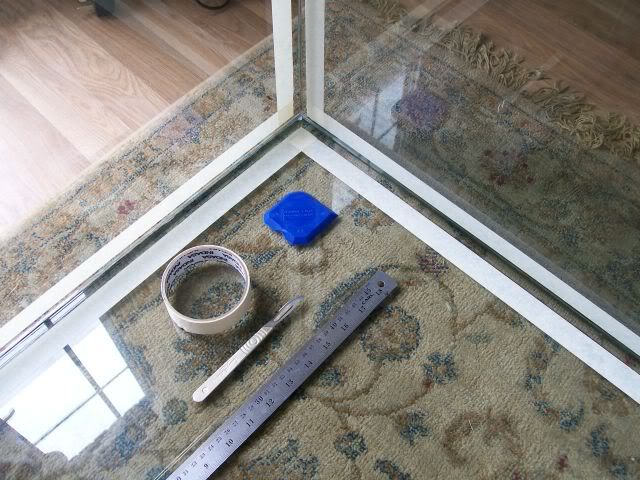
Some of the tools employed to make the 10mm bead runs.

A picture showing the 10mm bead channels

All done!
All I have to do now is clean the channels with some thinners and were good to go.
I've just finished tacking, squaring, taping and sealing the Weir Box. I didn't want to waste a silicone nozzle as the tank itself requires a larger fillet.
The aquarium is now fully sealed and all the tapes have been removed
The Weir Box has been placed in situ and checked for squareness.
In the following two pics the Weir Box has been tacked to the walls of the aquarium with a fine bead of silicone
(A water barrel as be placed against the assembly until the silicone cures.
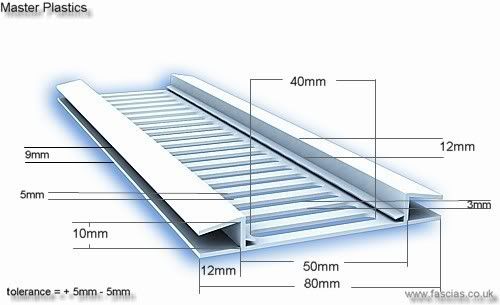
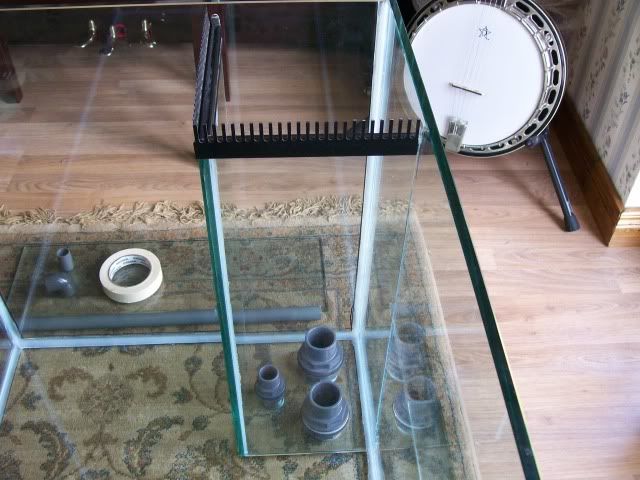
I Fabricated my weir comb from some black plastic Soffit Vent Strip
(see below for profile)
I spent a little time cutting and fitting the Weir Comb. The first job was to cut the piece of black soffit in half
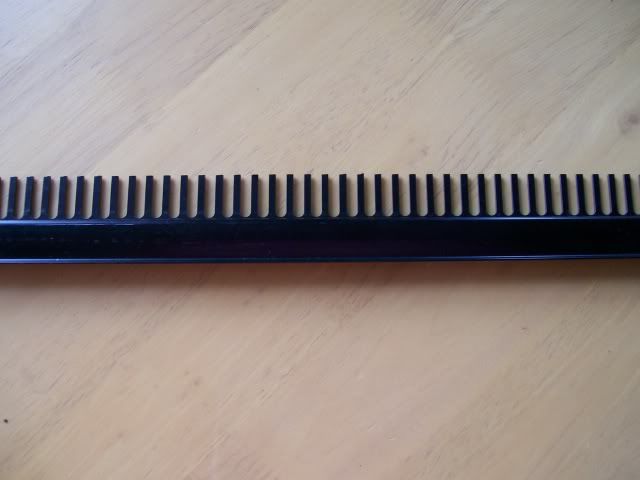
I have cut the Weir Comb
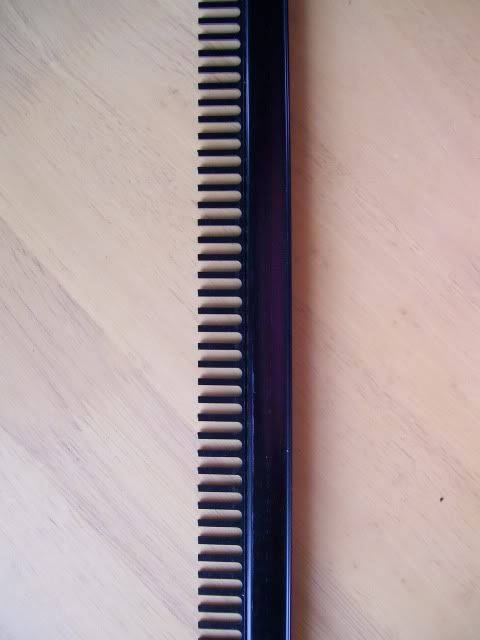
into one length to begin with
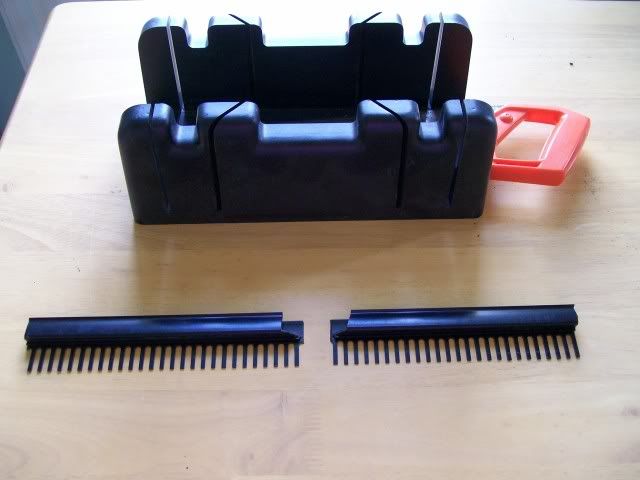
Then I cut it to the exact length and mitred the corners for a neat tidy fit.
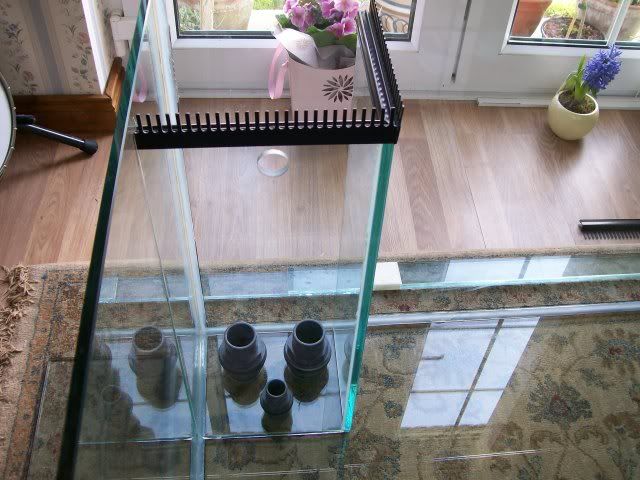
This now slots neatly on top of the glass Weir Box
All finished, now on to the next little job!....The Bracing
Well we are nearing the end of this aquarium build and I've completed the bracing. Things really did go as smooth as expected, no major hiccups were encountered so I am relieved to have got to this stage.
So here follows some photos of the actual tank bracing.
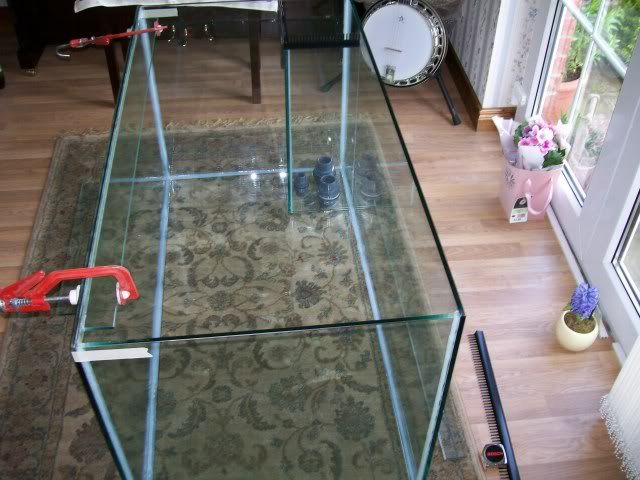
Clamps holding the front bracing spar in situ.
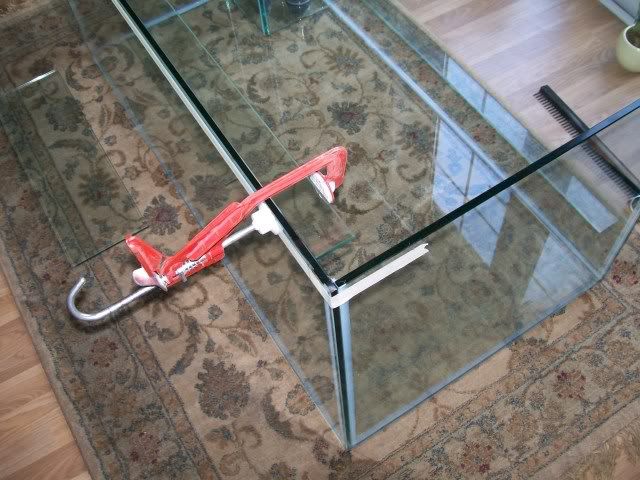
The front bracing spar
A close-up shot of the clamping on the front bracing spar

Another shot of the front spar
The rear bracing spar, levelled and clamped in situ

The cross brace 200mmx8mm (centred and sealed)
Well all the braces are in place now and once cured and sealed I will move onto the internal plumbing.
The curtain is now ready to close on this particular section pertaining to the build in of this tank. All that is left is for me to perform some internal plumbing and give the project a good clean.
In the meantime here are some pictures concerning the in-tank plumbing
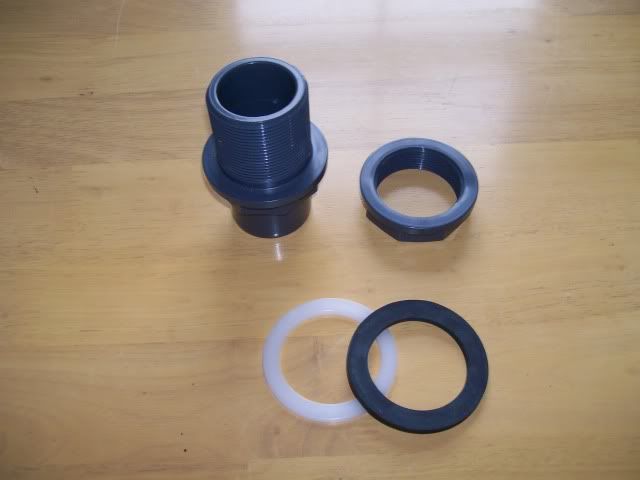
The washers on the Bulkheads must be removed as these will eventually rot in a Saltwater environment and could eventually lead to leaks (Which wouldn't endear me to my better half if that happened :no:)
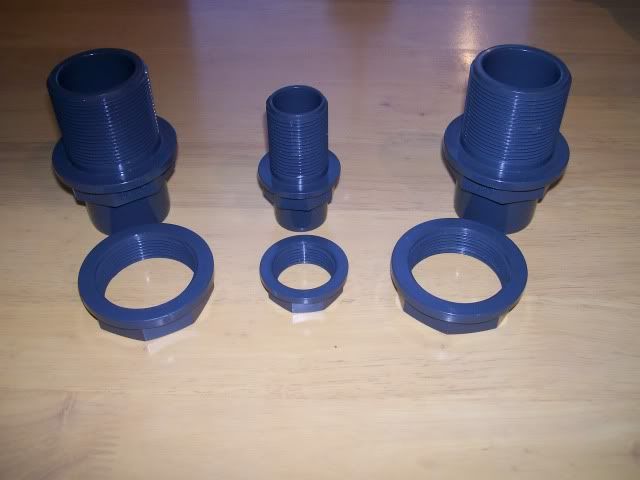
So with all the washers discarded, we're good to go!
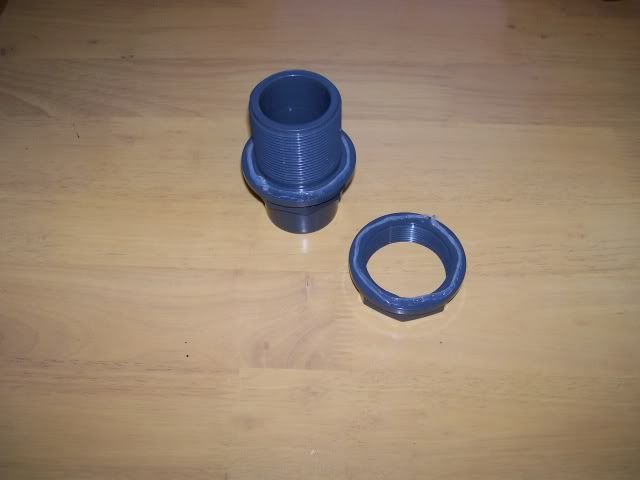
A generous bead of silicone is applied to each flange of the Bulkhead before connecting to the tank
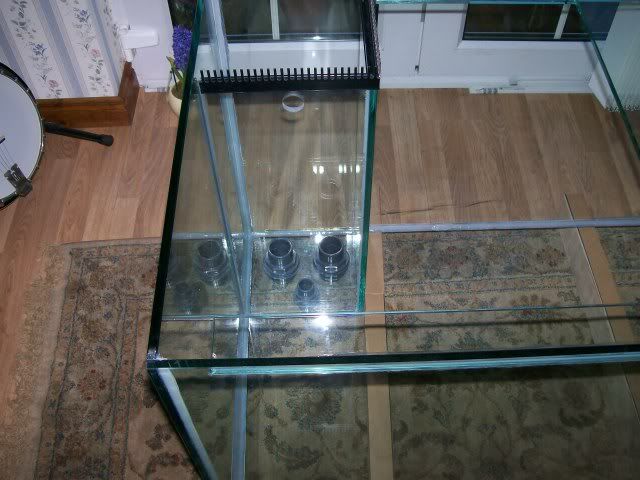
This photo shows all the Bulkheads inserted in the tank base and silicone allowed to cure
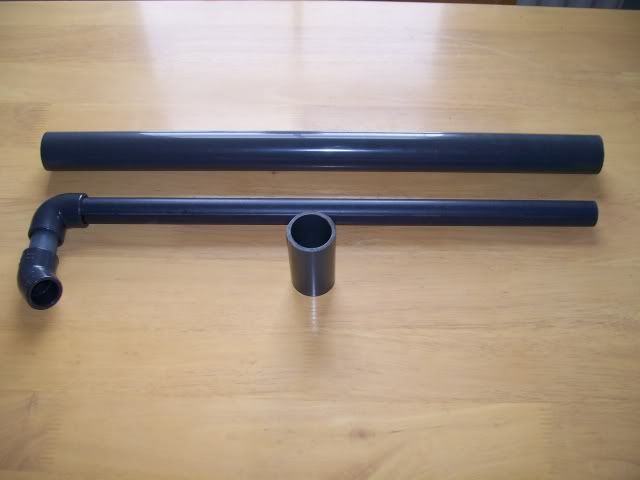
Next the pipework is cut to size. The larger 40mm pipe is the actual overflow (it is cut just slightly lower than the height of the weir wall), the smaller 40mm pipe is used primarily for sound dampening purposes, which I will explain later in another chapter of this build. The 25mm pipe with the 90 and 45 degree bends is for the return from the sump.
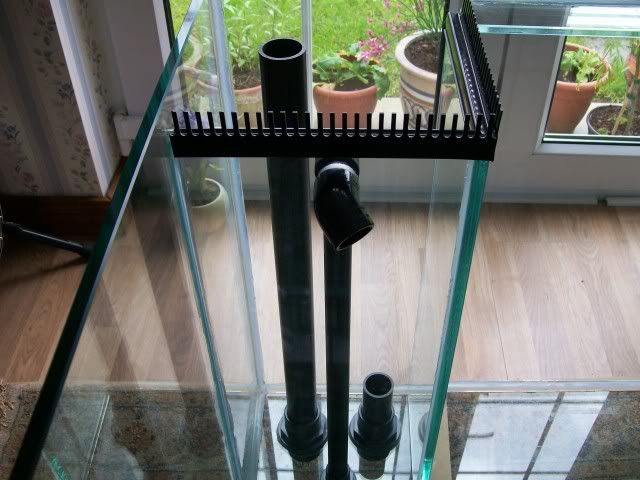
Finally all the pipework is placed in situ, but as yet not joined with solvent weld glue. All the hard jointing will be performed later.
Well that just about wraps up this chapter in the building of a Reef Aquarium.
Hope you were able to glean something from this topic.
Happy Reefkeeping
Regards

Please Log in to join the conversation.
- Fishowner (Gavin fishowner)
-

- Offline
- Platinum Member
-

- Posts: 2030
- Thank you received: 102
Gavin
Please Log in to join the conversation.
- cardinal (Lar Savage)
-

- Offline
- Premium Member
-

- Posts: 530
- Thank you received: 0
Very Interesting.....Really enjoying all of your articles....
Thanks... Lar
Please Log in to join the conversation.
- houseofmil (Martin Bromell)
- Offline
- Junior Member
-

- Posts: 106
- Thank you received: 0
Keep up the good work martin
Please Log in to join the conversation.
- john gannon (john gannon)
-

- Visitor
-

thanks
john
Please Log in to join the conversation.
- mickdeja (Mick Whelan)
-

- Offline
- Platinum Member
-
- Posts: 1142
- Thank you received: 36
Follow me up to Carlow
Please Log in to join the conversation.
- Puddlefish (Colin McCourt)
-
Topic Author
- Offline
- Senior Member
-
- Posts: 347
- Thank you received: 10
two small questions,when you say tacking would you put a full bead of silicone down the edge of the glass or would you just use a couple of blobs and how long you leave your silicone to cure before moving on to next stage
I start with the base and build on it. I always run full beads, full length. I also work with polished glass which means the edges are chamfered to a degree which allows me to place a fine fillet of silicone into this all around the outside after I have sealed up internally. This is a double surety when building larger tanks.
I leave the silicone when tacking up (on large tanks) 48 hrs. On a tank that size I would leave for about a week before water testing
Regards
C
Please Log in to join the conversation.
- wolfsburg (wolfsburg)
-
- Visitor
-
Was it difficult to mask off the inside of the tank for taking the bead when it was together? Would it have been possible to mask it off before the sides were assembled?
Rory
Please Log in to join the conversation.
- Puddlefish (Colin McCourt)
-
Topic Author
- Offline
- Senior Member
-
- Posts: 347
- Thank you received: 10
Thanks Rory
C
Please Log in to join the conversation.
- wolfsburg (wolfsburg)
-
- Visitor
-
Please Log in to join the conversation.
- Tetra (Tetra)
- Offline
- Senior Member
-
- Posts: 252
- Thank you received: 0
")
Please Log in to join the conversation.
- Viperbot (Jason Hughes)
-

- Offline
- Platinum Member
-
- Posts: 1597
- Thank you received: 42
Jay
Location: Finglas, North Dublin.
Life
may not be the party we hoped for, but while we
are here we might as well dance.
Please Log in to join the conversation.
- mickdeja (Mick Whelan)
-
- Offline
- Platinum Member
-
- Posts: 1142
- Thank you received: 36
Next the pipework is cut to size. The larger 40mm pipe is the actual overflow (it is cut just slightly lower than the height of the weir wall), the smaller 40mm pipe is used primarily for sound dampening purposes, which I will explain later in another chapter of this build. The 25mm pipe with the 90 and 45 degree bends is for the return from the sump.
Any more on this Colin as i am starting to plumb me weir at the moment. In the weir I too have three holes and will be for the intake of water directed to the sump, the smaller one is for the return of the water from the sump but what is the third hole for. I was goin to use the durso standpipe for the intake of water to reduce gurgling sound but u mention that on yer weir that the third 40mm hole will be used for sound dampening purposes. Any chance u could further advise on this.
Mick.......
")
Follow me up to Carlow
Please Log in to join the conversation.
- Turner85 (David Turner)
- Offline
- Junior Member
-
- Posts: 143
- Thank you received: 0
Please Log in to join the conversation.
- alan.s (alan)
-

- Offline
- Junior Member
-
- Posts: 131
- Thank you received: 0
Al
Please Log in to join the conversation.
- mickdeja (Mick Whelan)
-
- Offline
- Platinum Member
-
- Posts: 1142
- Thank you received: 36
Im looking to do the plumbing on a weir myself,mick has yours got 3 holes around 30mm running in line with each other.
U will need to use an inch and a quarter bulkhead or 30 mm.
My three holes are 2 inch and a half bulkheads to use and a three quarter inch bulkhead or 2 40 mm holes and a 20 mm hole. Now i am thinkin since it is such a big tank of using the 2 bigger 40 mm holes as intake into the tank and using the smaller 20 mm hole as the return.
Any ideas how to cover up the weir as u can see straight through it?

Mick.....
Follow me up to Carlow
Please Log in to join the conversation.
- Turner85 (David Turner)
- Offline
- Junior Member
-
- Posts: 143
- Thank you received: 0
Please Log in to join the conversation.
- michaelangello (Michael)
- Offline
- Junior Member
-
- Posts: 46
- Thank you received: 0
Please Log in to join the conversation.