
Retirement and forum shutdown (17 Jan 2022)
Hi,
John Howell who has managed the forum for years is getting on and wishes to retire from the role of managing it.
Over the years, he has managed the forum through good days and bad days and he has always been fair.
He has managed to bring his passion for fish keeping to the forum and keep it going for so long.
I wish to thank John for his hard work in keeping the forum going.
With John wishing to "retire" from the role of managing the forum and the forum receiving very little traffic, I think we must agree that forum has come to a natural conclusion and it's time to put it to rest.
I am proposing that the forum be made read-only from March 2022 onwards and that no new users or content be created. The website is still registered for several more years, so the content will still be accessible but no new topics or replies will be allowed.
If there is interest from the ITFS or other fish keeping clubs, we may redirect traffic to them or to a Facebook group but will not actively manage it.
I'd like to thank everyone over the years who helped with forum, posted a reply, started a new topic, ask a question and helped a newbie in fish keeping. And thank you to the sponsors who helped us along the away. Hopefully it made the hobby stronger.
I'd especially like to thank John Howell and Valerie Rousseau for all of their contributions, without them the forum would have never been has successful.
Thank you
Darragh Sherwin
Juwel vision 260 light unit repair
- dannyb (Daniel Byrne)
- Offline
- Junior Member
-

- Posts: 204
- Thank you received: 34
I found a thread online that helped me out a good bit, I then took over the kitchen table and started to open the unit up
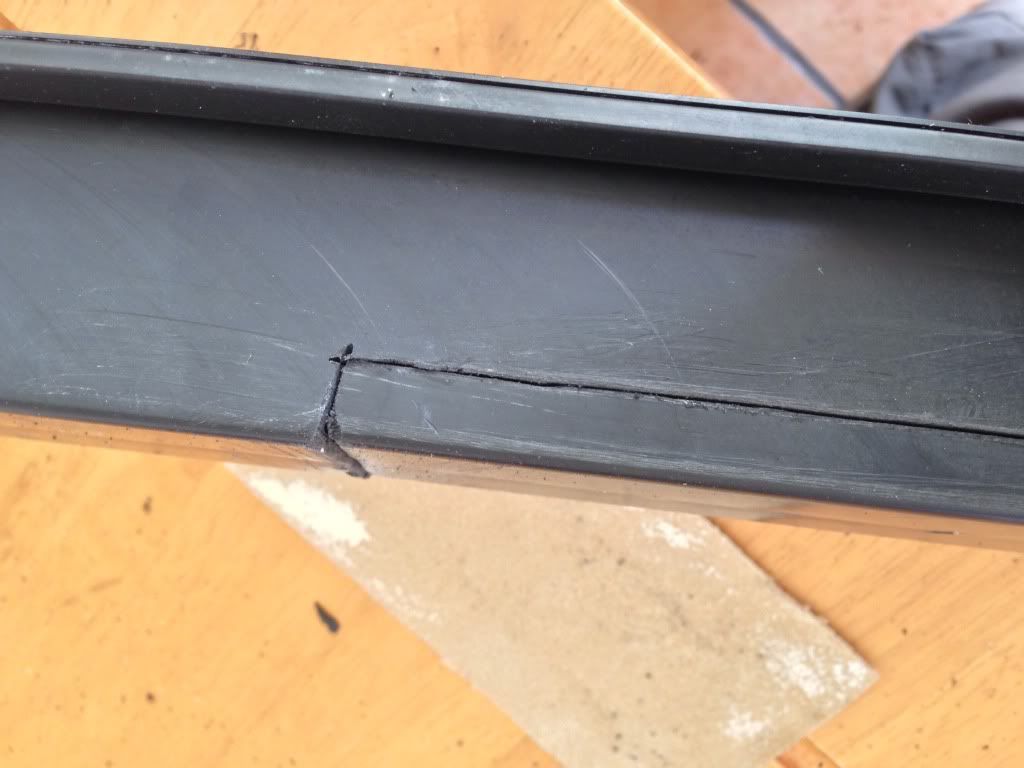
As you will see I made my cuts along the sides instead of on top, this was to help me when it came time to put it all back together
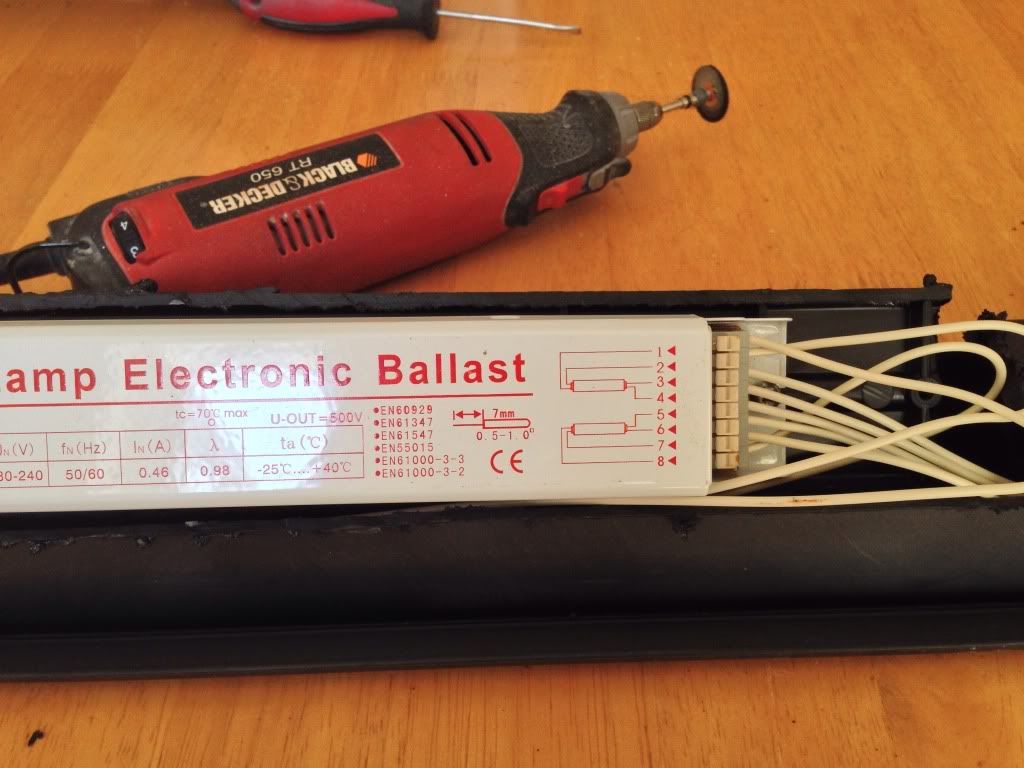
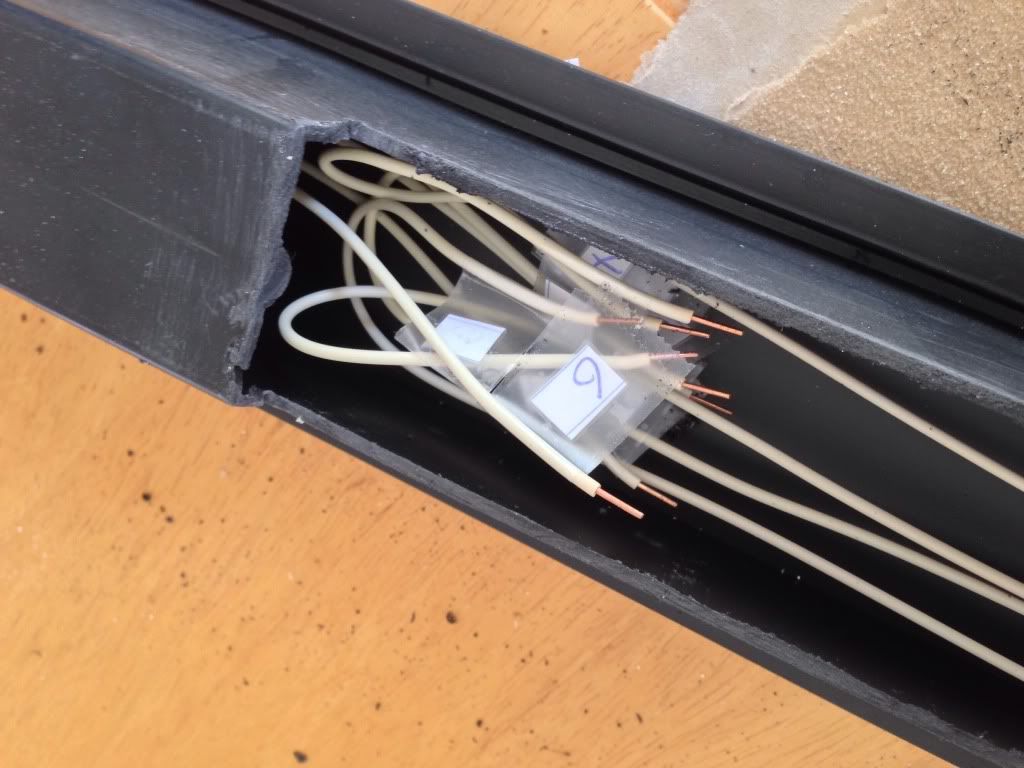
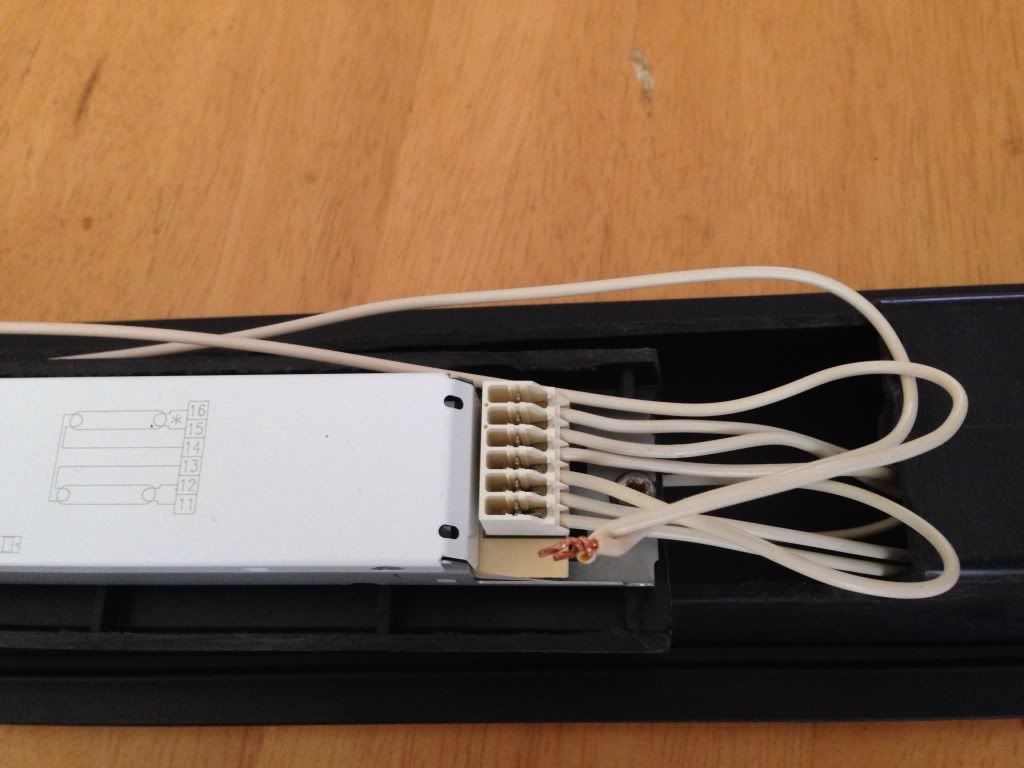
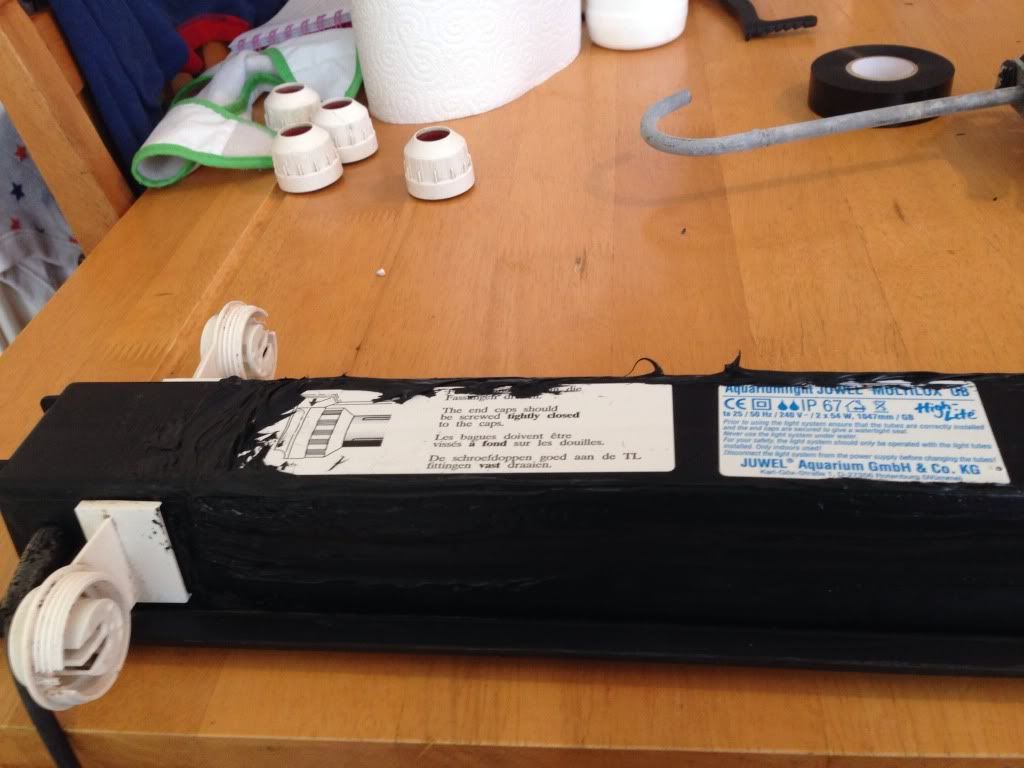
I got it open and took note of all the wires and numbered them as I disconnected them
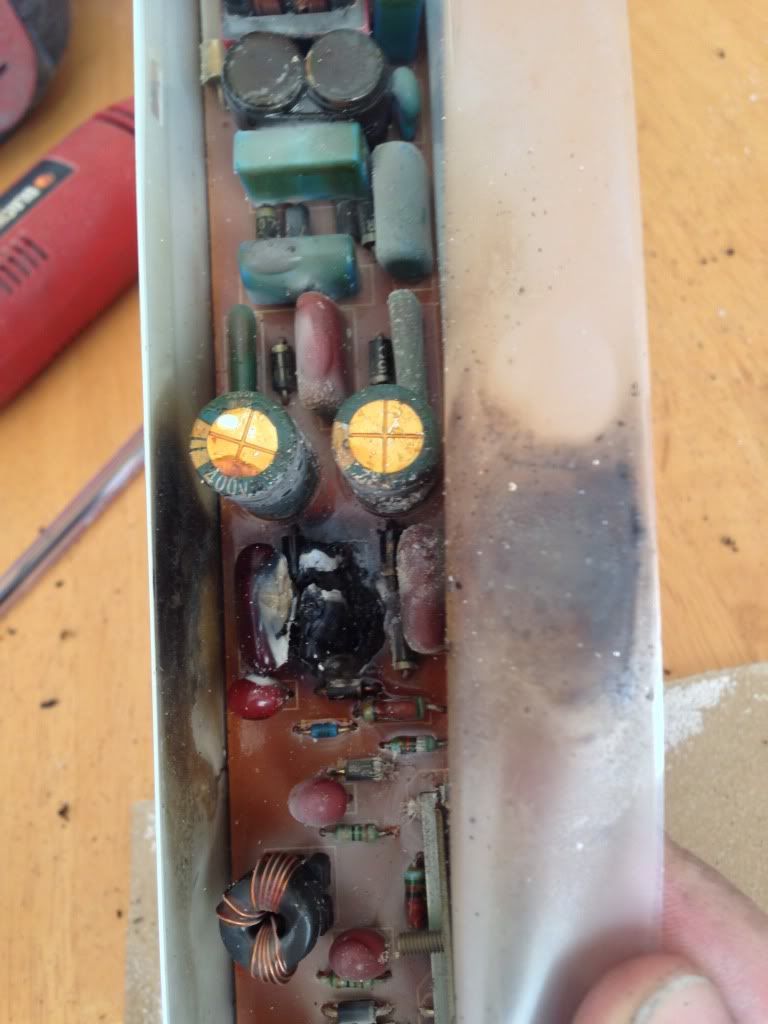
I then opened up the ballast itself to see the damage and I was a bit shocked to see and smell this
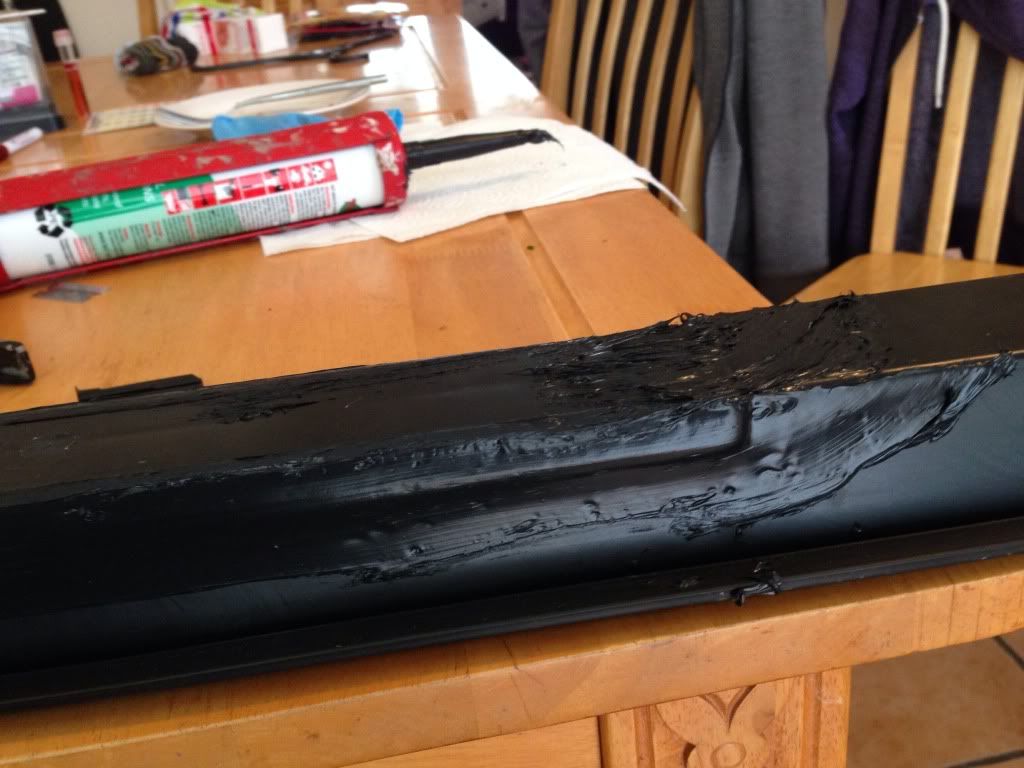
After I cleaned up all the rough edges from my cutter I gave it a good sanding all around the edges to help the sealer bond better later on, as I was in no hurry to finish I set it aside for a few weeks to dry out as it was soaked on the inside
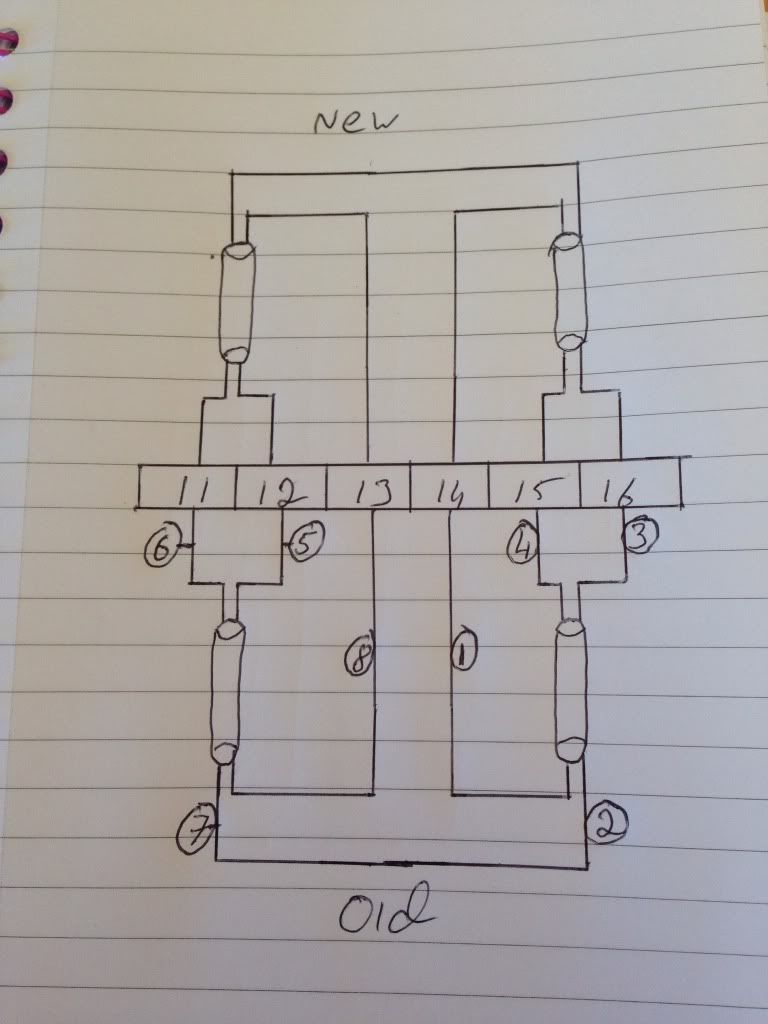
I was lucky to pick up a brand new ballast in work for free from a contractor we had in redoing our emergency lighting, he also made up a wiring diagram for me as the juwel ballast had 8 wire sockets and the new one had only 6, I found it very easy to follow and here it is just in case anyone else come across this problem, on the top (new) part is the diagram that is on the new ballast and the bottom (old) is how the 8 wires are transferred to fit 6
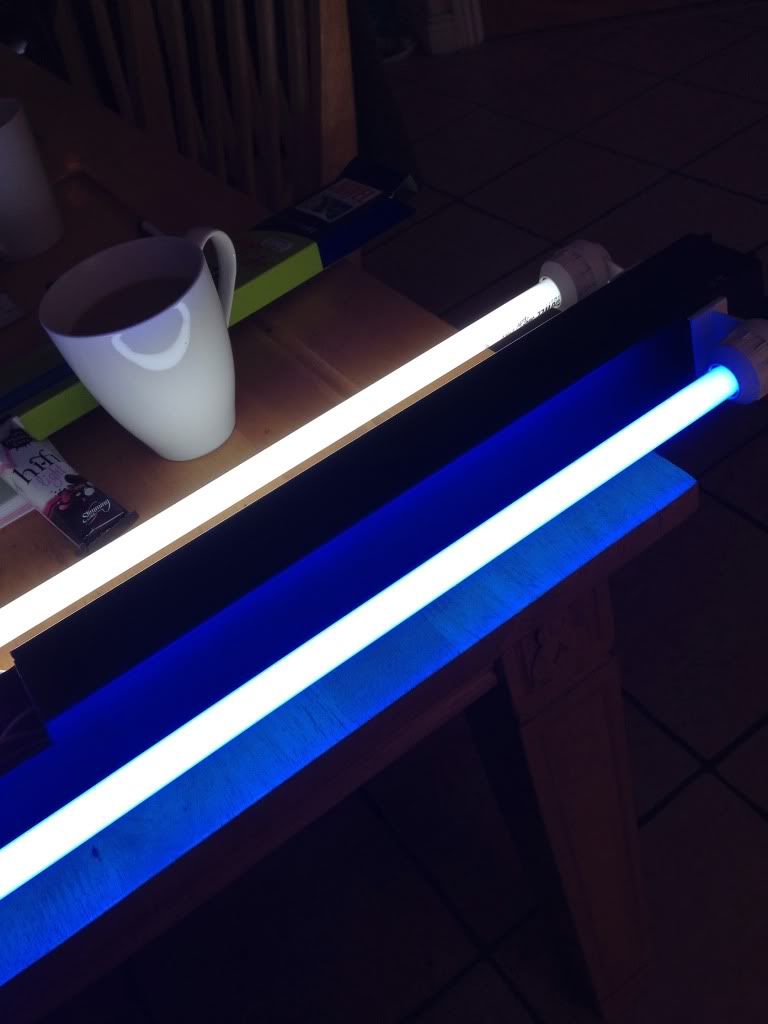
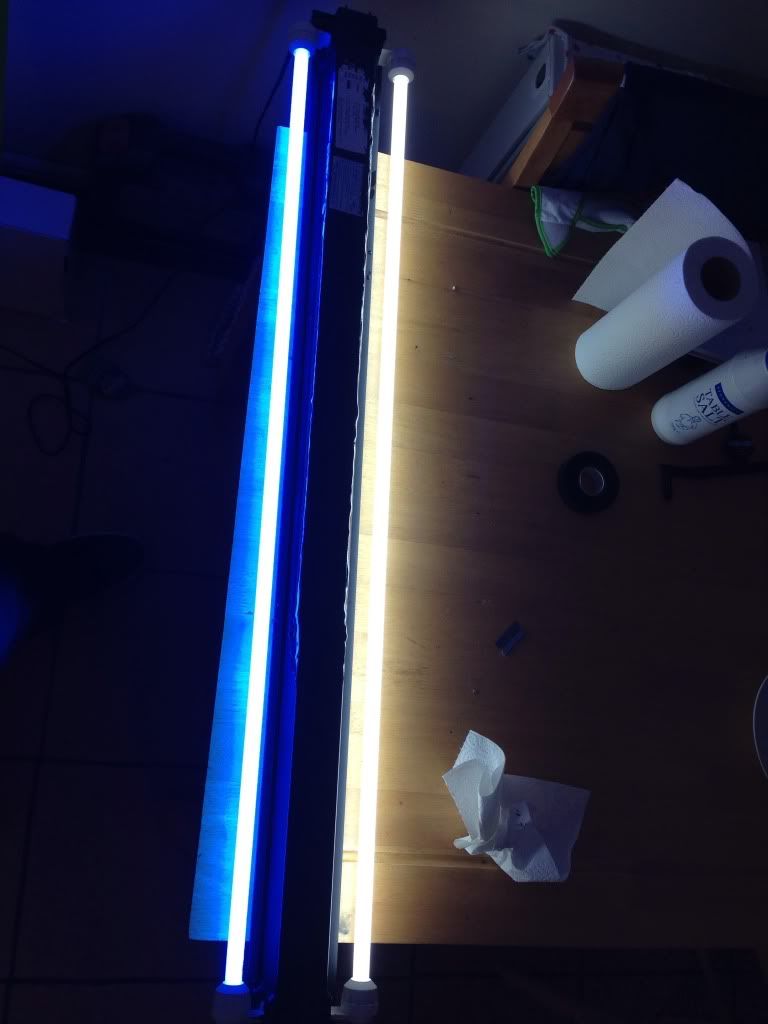
And here thay are all in place for testing and 1st flick of the switch and we had light
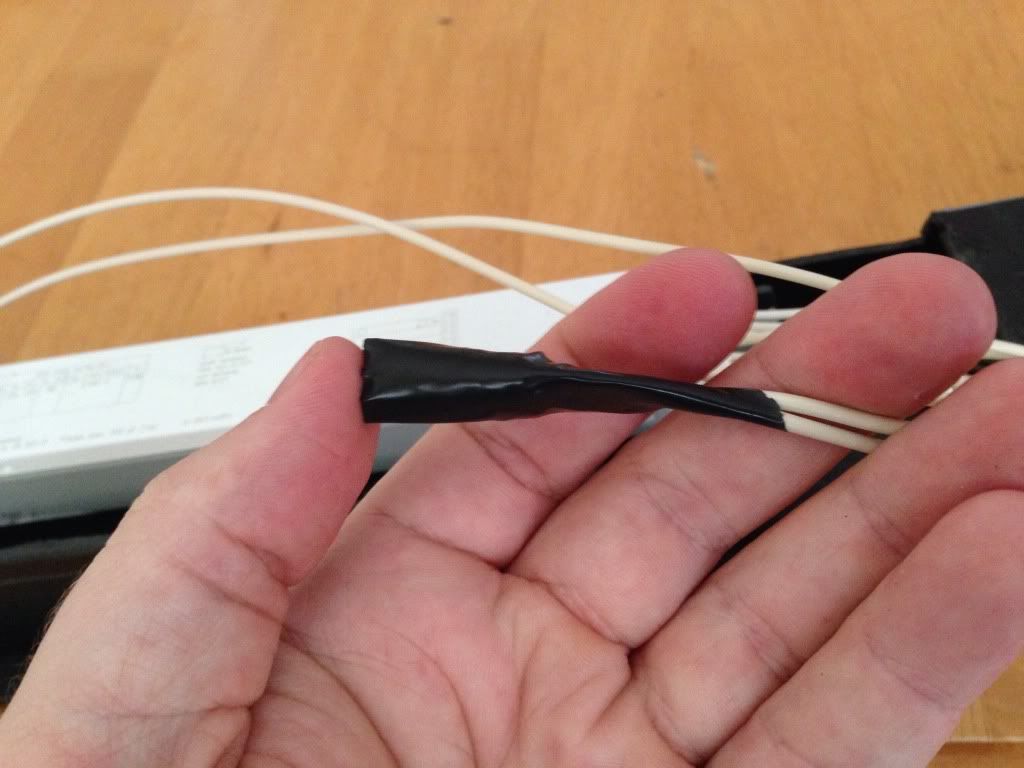
With the test done I put a bit of solder on the twisted wires and a heat shrink cover with insulation tape over that as well
I let the unit run like this for an hour then I turned it off and let it cool then ran it again for another hour, when it was cool again I started to seal it up and make it water tight again, tec 7 is what I used I ran a good heavy beed all around the edges and sat the cover back into place, it looks a bit rough but I don't really care as it will not be seen
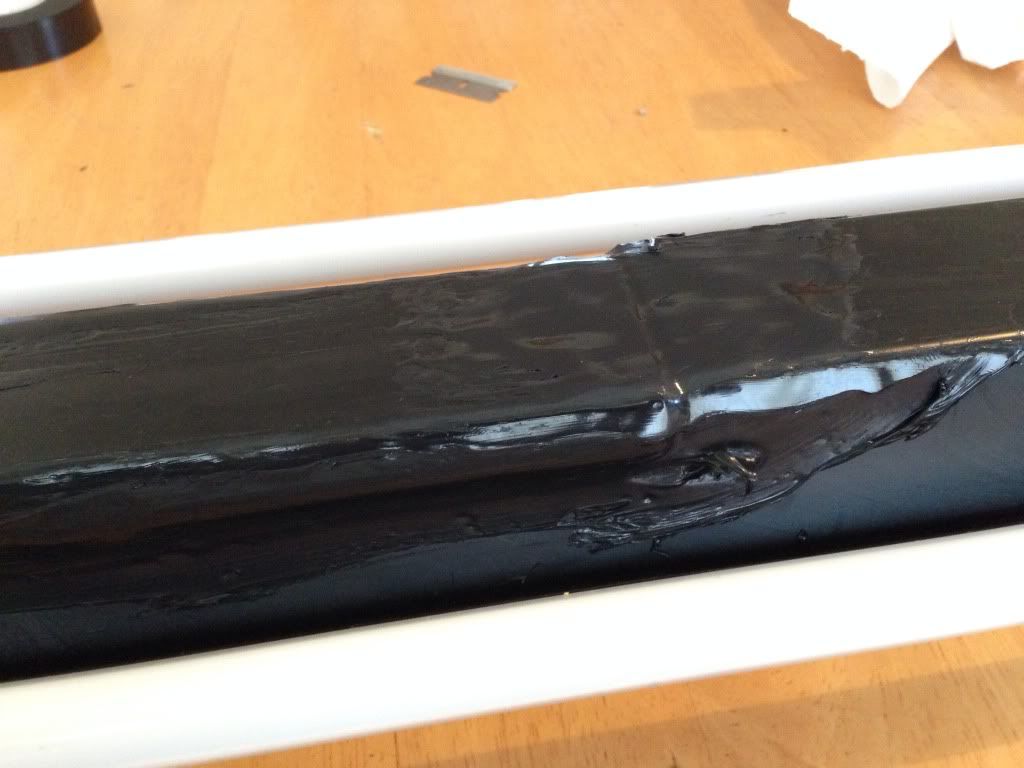
Once done I smooth out the sealer a bit and put the tubes back in to test it again and all is good, now it's just a waiting game as I have to leave it for 24 hours to cure fully
I really hope this helps someone as its a job I would recommend for you to try all in hour wise start to finish without testing there was just over an hour in it, il post up pics of it in the tank when its ready
Please Log in to join the conversation.
- anglecichlid (ciaran hogan)
-

- Offline
- Elite Member
-

- Posts: 902
- Thank you received: 201
Very good write up,could even get yourself
A few nixers
Anyone with a aquarium can keep fish,
But it takes real skill to be a fish keeper,
And it's spongeBob,
SpongeBob lives in a pineapple under the sea
BLANCHARDSTOWN
Please Log in to join the conversation.
- dannyb (Daniel Byrne)
- Offline
- Junior Member
-
- Posts: 204
- Thank you received: 34
Please Log in to join the conversation.
- irish-zx10r (James feenan)
-

- Offline
- Platinum Member
-

- Posts: 1536
- Thank you received: 145
Something fishie going on here
Please Log in to join the conversation.
- derek (Derek Doyle)
-

- Offline
- Platinum Member
-
- Posts: 1397
- Thank you received: 133
30 tanks specialise in african cichlids, angelfish and various catfish
Please Log in to join the conversation.
- dannyb (Daniel Byrne)
- Offline
- Junior Member
-
- Posts: 204
- Thank you received: 34
I still have your Ballast in the car lol sorry you can have it for a spare when u come down this way
Cheers man, my other job put me on night shifts for the next few months so when I'm not in there or sleeping I'm in the garage trying to make up lost time, but I might be "sick" soon and will be in Carlow again so il take the trip across to you
very good description, danny. I have done this repair myself and the only difference was I cut the hole out at the flat part and left a small 1/4 inch lip and cut a new piece of flat acrylic and it can be finished very neatly. but as you say it is not really visible and is only important if the tank is eventually sold on. the new ballast cost me 17e and it is a great saving on the unreasonable cost of replacing these light units.
Thanks Derek, there is a few hints now I would do slightly different but it's working for now so if it gives up again i will finish it off better
Please Log in to join the conversation.
- dannyb (Daniel Byrne)
- Offline
- Junior Member
-
- Posts: 204
- Thank you received: 34
Please Log in to join the conversation.
- collywobbles (colm moans)
- Offline
- Junior Member
-
- Posts: 15
- Thank you received: 2
Please Log in to join the conversation.
- dannyb (Daniel Byrne)
- Offline
- Junior Member
-
- Posts: 204
- Thank you received: 34
Please Log in to join the conversation.