
Retirement and forum shutdown (17 Jan 2022)
Hi,
John Howell who has managed the forum for years is getting on and wishes to retire from the role of managing it.
Over the years, he has managed the forum through good days and bad days and he has always been fair.
He has managed to bring his passion for fish keeping to the forum and keep it going for so long.
I wish to thank John for his hard work in keeping the forum going.
With John wishing to "retire" from the role of managing the forum and the forum receiving very little traffic, I think we must agree that forum has come to a natural conclusion and it's time to put it to rest.
I am proposing that the forum be made read-only from March 2022 onwards and that no new users or content be created. The website is still registered for several more years, so the content will still be accessible but no new topics or replies will be allowed.
If there is interest from the ITFS or other fish keeping clubs, we may redirect traffic to them or to a Facebook group but will not actively manage it.
I'd like to thank everyone over the years who helped with forum, posted a reply, started a new topic, ask a question and helped a newbie in fish keeping. And thank you to the sponsors who helped us along the away. Hopefully it made the hobby stronger.
I'd especially like to thank John Howell and Valerie Rousseau for all of their contributions, without them the forum would have never been has successful.
Thank you
Darragh Sherwin
90lt Planted Tank Journal
- tanks_alot (Denis Coghlan)
- Offline
- Senior Member
-

- Posts: 442
- Thank you received: 0
I suppose I should try and convey what the landscape I am trying to recreate looks like. It is a typical grass and rock set-up however I am going to try for an aged look with rounded weathered rock and only two species of plants. One that will give a carpeting effect and one largest palmate species sporadically planted among the rock
“Outcrops”. To try and convey what I am “trying” to go for here are some snapped I stole form the internet.

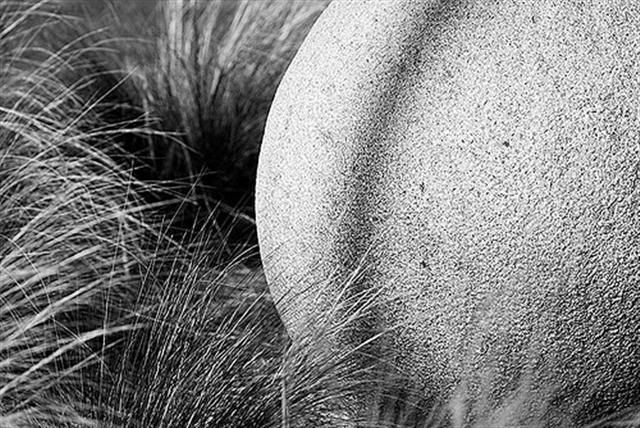


That’s the idea and hopefully it will be achievable.
The tank I am going to use is the first tank I ever bought. It is roughly 90 litres with dimensions of 76L x 32W x 36H it has been unused for well over a year and shows its age.
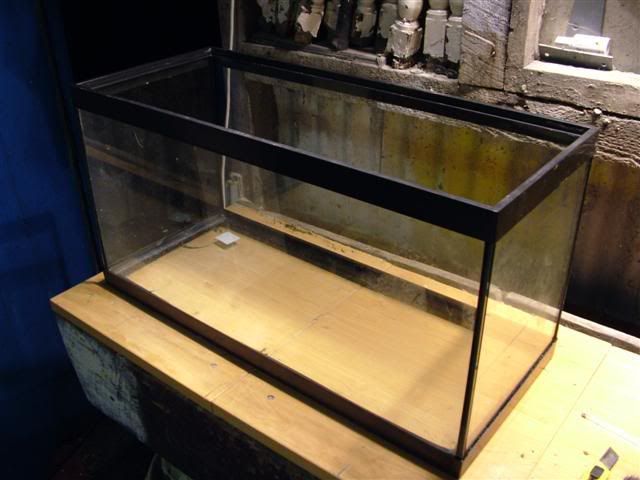
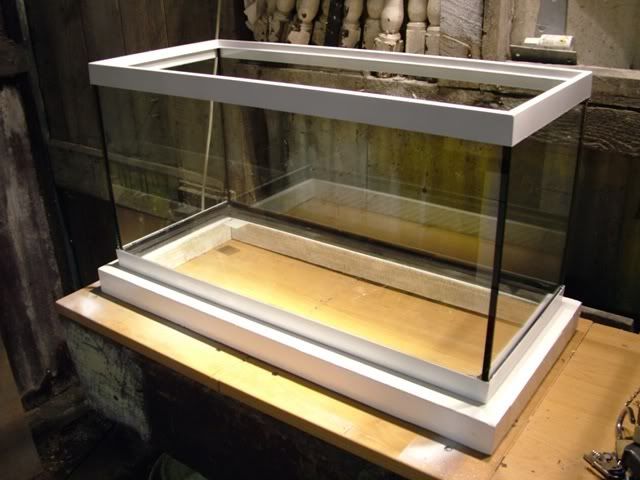
The black plastic needed to be revamped so as not to detract from the overall look of the tank. I want the display to look as bright as possible to I decided to spray the plastic with white appliance enamel. The enamel dries very hard and is durable and water proof. In order to do this I removed the upper plastic rim and silcione. I didn’t remove the lower one as it was far too embedded in the silicone and could do without the headache of having to reseal the tank. I think the pictures below will explain the process better than I can word it.
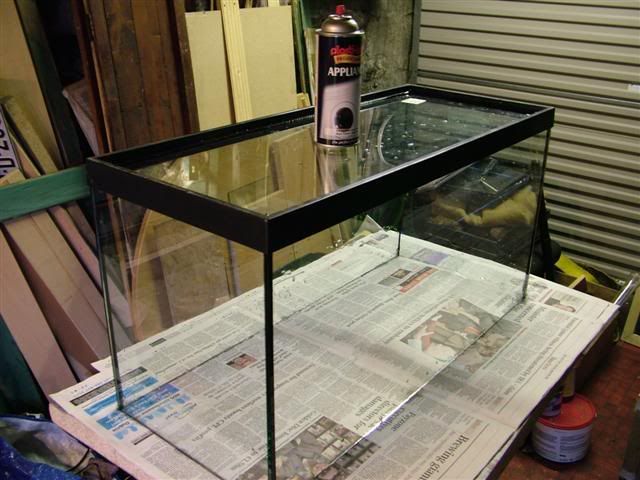
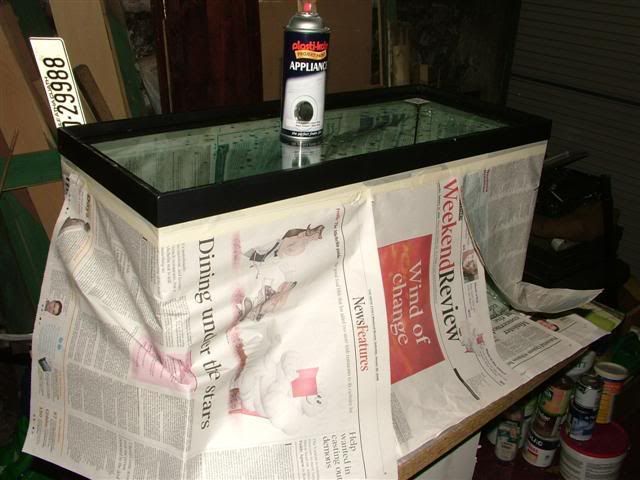


In my opinion it looks a lot fresher and cleaner than it would had I left it black. That’s all for the moment before I bore the eyes of you out! I have nearly finished the over-tank light kit with the new 20W T-4’s (on trial for plant growth) and I will post the results tomorrow.
Regards
Denis
Lead me not into temptation, For I can find it myself!
Please Log in to join the conversation.
- derek (Derek Doyle)
-

- Offline
- Platinum Member
-

- Posts: 1397
- Thank you received: 133
30 tanks specialise in african cichlids, angelfish and various catfish
Please Log in to join the conversation.
- 2poc (2poc)
-

- Visitor
-

Please Log in to join the conversation.
- Valerie (Valerie)
-
- Visitor
-
")
Thank you for sharing this with us !
Regards,
Valerie
Please Log in to join the conversation.
- tanks_alot (Denis Coghlan)
- Offline
- Senior Member
-
- Posts: 442
- Thank you received: 0
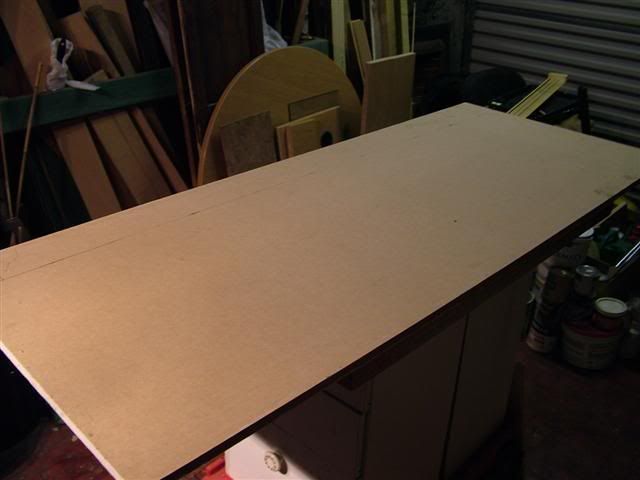
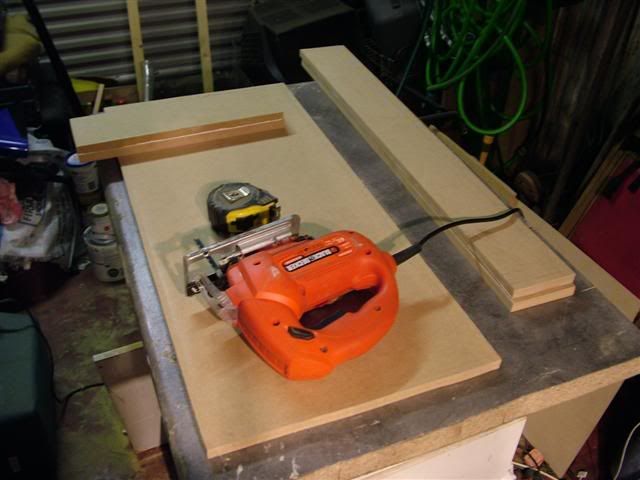
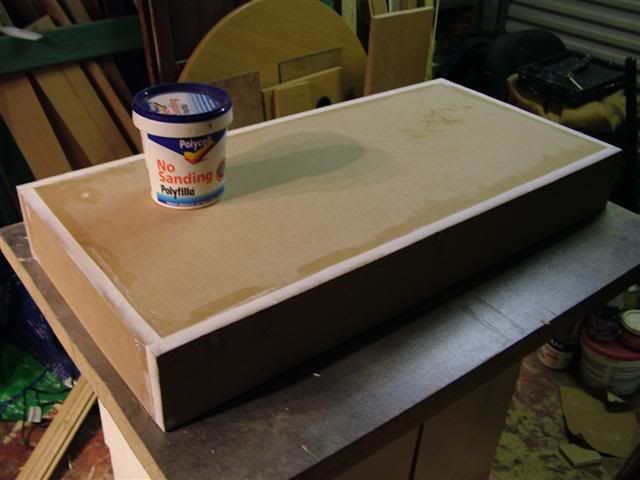
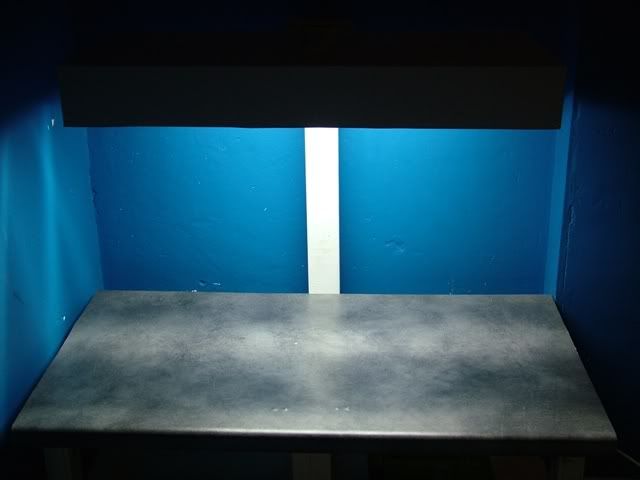
This next instalment involves creating the box for the light fixtures and an elevating stand under the tank to give the tank a look of being framed. The box for the light kit was fairly simple, I cut out the required sides and top from a sheet of 12mm MDF, although I’m handy enough with the power tools it’s fairly difficult to get a dead straight edge with a jig saw. As a result I had to incorporate some polyfilla so that no light would be escaping through gaps in the joins. I’ve seen homemade light boxes where light is beaming out through gaps in all sorts of direction and I wanted to avoid the same effect. Plus the pollyfilla will give the edge a finished (all one piece) look. The light box will hold three 20W T4 suspended over the tank. I’m unsure as to how much heat will be given off by these tubes but that is something I must look into. After the box was assembled and filled I added three coats of pure white gloss so that it would match the tank. The box is the same size as the “elevating stand” however it is a bit deeper to accommodate the light fittings.


The elevating stand is not a stand as such, it is really a couple of piece of 2 x 2 joined together so that when the tank is placed on it, the tank will looked framed between it and the over-tank light kit. Hopefully, when the light kit is placed over the tank enough light will run down the outside of the tank an illuminate the elevating stand. I think it gives a very nice presentation to the tank. I hadn’t seen it done before so I’m pleased that it turned out so well.
Regards
Denis
Lead me not into temptation, For I can find it myself!
Please Log in to join the conversation.
- tanks_alot (Denis Coghlan)
- Offline
- Senior Member
-
- Posts: 442
- Thank you received: 0
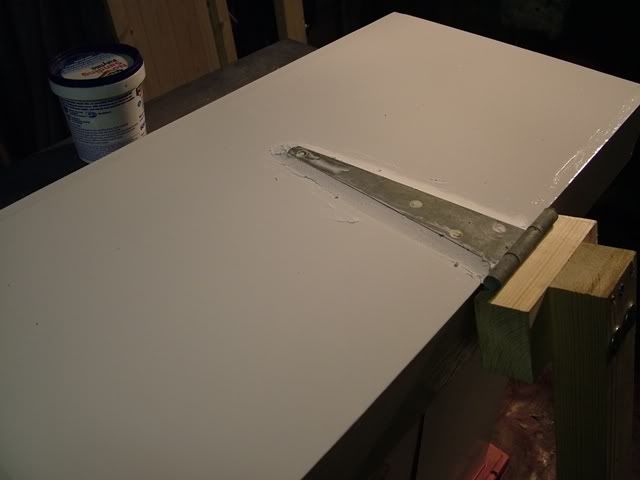
The light box is nearly finished and only requires the bits to hold it above the tank. Originally I was going to suspend the box above the tank with wire, cables, chain etc but considering this tank will be heavily planted, I wanted access to be as easy as possible. For this reason I have used a single large back strut with a large door hinge which means that the box can be flipped back and rest against the wall. The hinge has also got extra support within the hood so the screws will not pull out. The area around the hinge has also been pollyfilled so that it will be flush with the top panel when painted.
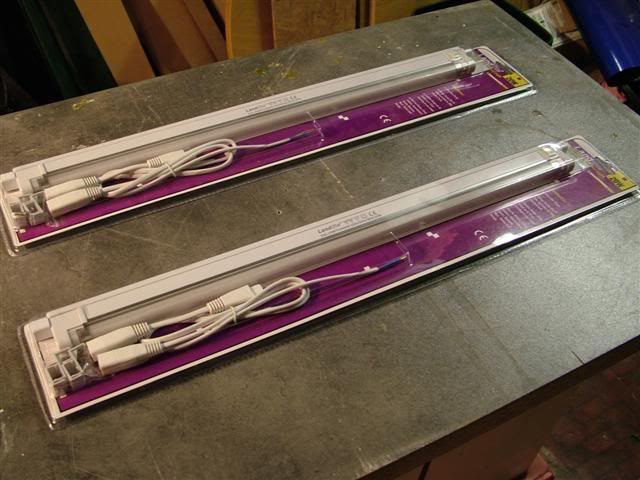
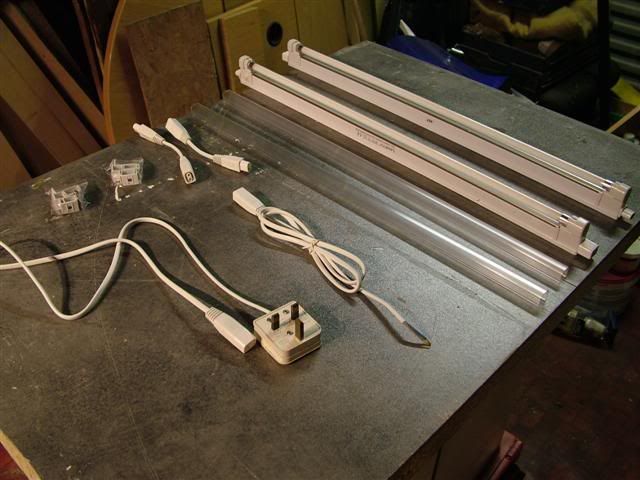
The fittings going into the box are T4's. These puppies are said to have 3-5 times the lumen out put of T8's. So, hopefully 2 20W tubes will provide adequate lighting for plant growth. They are very simple to install and only require you to wire a plug. The other handy part about these fittings is that you can join up to ten fittings together with the handy joining cable they provide. Plus each fitting has its own on and off switch if you don't want all of the lights to be on.
Regarding substrate; Can any users suggest a quality plant growth medium. I was looking at a bag of \"Azoo plant bed growth medium\" it seemed better value that eco-complete and has better reviews on the Internet.
Also, I was pondering about the idea about mixing the substrate with a soil based compost (john Innes No.3, top soil). Would this help the growth of the plants or should I just stick with 100% aquarium plant substrate?
Lead me not into temptation, For I can find it myself!
Please Log in to join the conversation.
- Cardnim (Andrew Hanley)
- Offline
- Junior Member
-

- Posts: 92
- Thank you received: 0
In both my planted tanks I have used the \"JBL AquaBasis Plus\" substrate. Its not trying to compete with Eco-Complete or any of the other expensive Seachem ones, but at less than half the price I cant complain.
Basically, its iron content will expire in a few months, but you then add JBL 7+13 AquaBalls at the base of your plants and this is suppsoed to give them targetted nutrients including iron for about 12 months! The Aquaballs are fairly cheap for a box of 50 and so far, Ive had good results.
I cant say they are better than anything else though, as all Ive used is the JBL system; but it certainly helped on my low budget!
Good luck mate.
P.S. Personally, I wouldnt use the John Innis (or any non-aquatic compost/fertiliser) as I have read they are very high in urea, hence ammonia. Perhaps they would be fine, but because I dont know whats in there, Id be worried about putting into into our closed system tanks.
Please Log in to join the conversation.
- tanks_alot (Denis Coghlan)
- Offline
- Senior Member
-
- Posts: 442
- Thank you received: 0
Azoo Plant Growth Bed link
As for the project; I have nearly fishing the majority of the required construction work and the only thing that remains to do is drill a hole in the back of the lid for the lights power cord. The hinge looks very discrete and I'm impressed with the over all look of the tank/lights and when I have a few minutes I will mount the light kit over the stand for the tank.


Let there be light!!
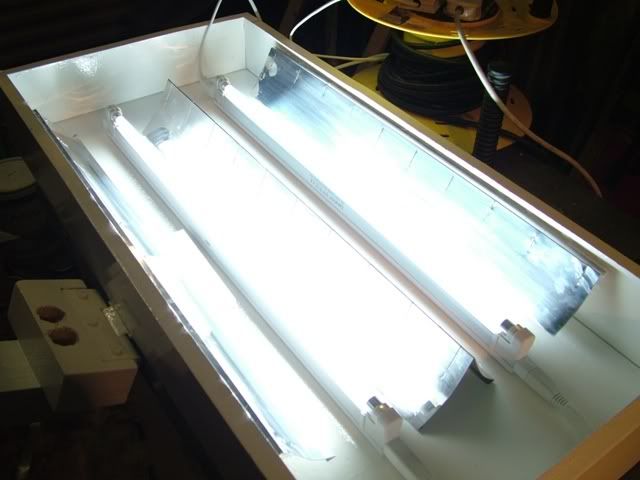
I added a few reflectors to the hood but I am concerned that the areas at either end of the tank might not get sufficient light as the tubes are a little on the short side. Would people recommend that I add two 6w T4's in a perpendicular position at each end to the existing lights to avoided this problem or should it be ok?
I'm looking forward to assembling the tank. However, it will be another month at least before any water or plants go it. The next couple of things to do on my list are selecting a few nicely shaped rock, try and copy Zig's receipt for DIY plant ferts and choose the plants I would like to have.
Regards
Denis
Lead me not into temptation, For I can find it myself!
Please Log in to join the conversation.
- tanks_alot (Denis Coghlan)
- Offline
- Senior Member
-
- Posts: 442
- Thank you received: 0
In general I'm pleased with the way the hinge on the lights worked out and flipping the box up to gain access to the tank is a sinch and will mean that I will be far more enthusiastic about putting the hand in the tank for pruning and maintenance.
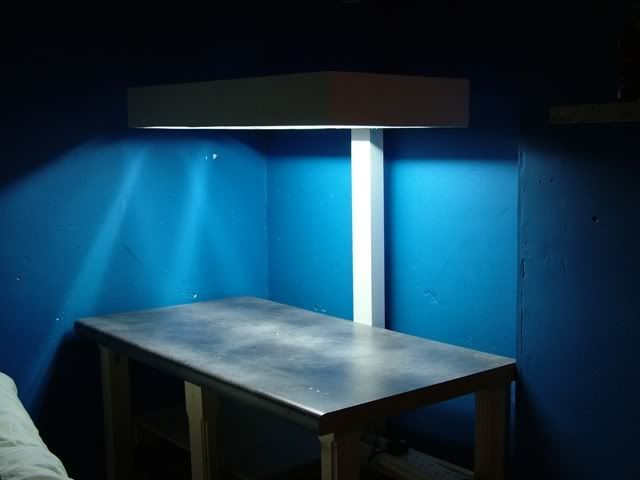
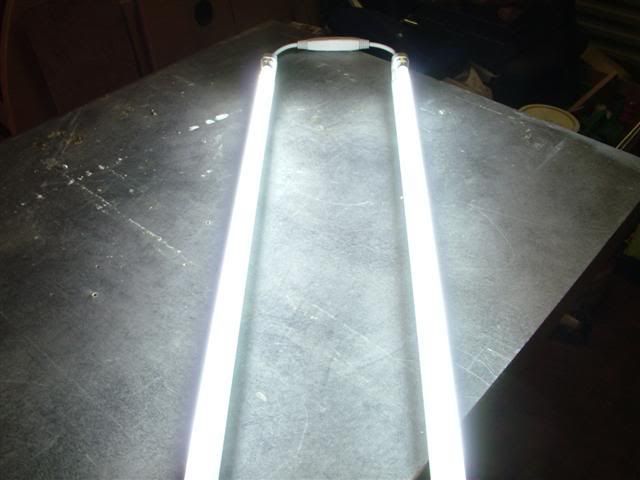
As for the T4's and the reflectors, see for yourself! It looks like a football stadium in my room! These tubes use a fraction of the energy of normal T8's but the light output is massive
 Lets just hope they allow for plant growth:dry: .
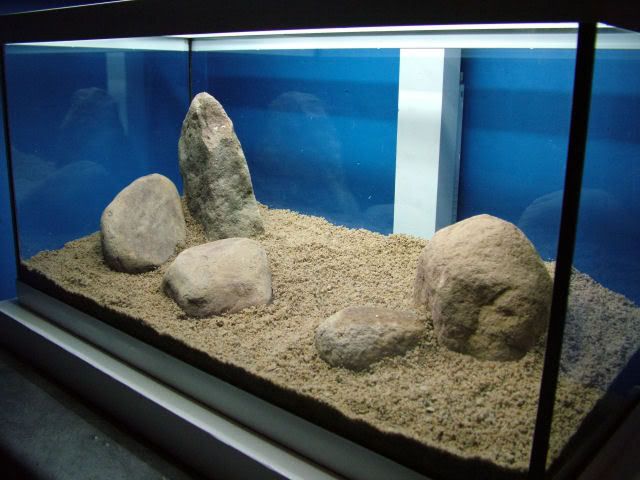
Here are a couple of snaps with the tank in place! Its pretty much the design I was going for with straight lines and lots of 90 degree angle corners. Plus, I think the white looks very clean, which in turn should make the green of the plants sing.


And for those of you who don't like looking at empty tanks here are two snaps of the typical view that I hope to be taking of my nicely
 planted tank in the future (these are not the rocks that I will be using, although they are the same rock type).
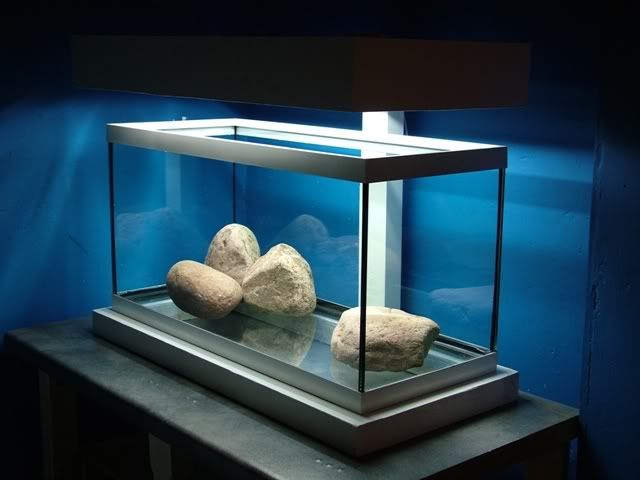

Slating and Rating is welcome, as I would like some suggestions as to what I could do to improve the setup. Plus, I'm big now so I will not be offended by any strong criticism.
Regards
Denis
Lead me not into temptation, For I can find it myself!
Please Log in to join the conversation.
- tanks_alot (Denis Coghlan)
- Offline
- Senior Member
-
- Posts: 442
- Thank you received: 0
Background and around rocks
Eleocharis acicularis
Eleocharis parvula
Echinodorus tenellus
Foreground (carpet)
Hemianthus callitrichoides
Glossostigma elatinoides
Also if people have ideas about other plants that I might incorporate please let me know. The brief for the plants I am looking for is;
Background; grass like of thin leaved plants that will grow to no more than 7-10cm
Foreground; very low growing carpet forming plant that does not require to be attached to rocks or sticks.
Cheers
Denis
Ps. Check out this cracking tank with a tree growing in it!
Now this is a Landscape
Lead me not into temptation, For I can find it myself!
Please Log in to join the conversation.
- lampeye (lampeye)
- Offline
- Premium Member
-

- Posts: 741
- Thank you received: 0
also what about cuba for the carpet plant?
lampeye
Please Log in to join the conversation.
- Cardnim (Andrew Hanley)
- Offline
- Junior Member
-
- Posts: 92
- Thank you received: 0

Watch that your water parameters are right for the plants you have in your list. The Eleocharis although supposedly \"easy\" to grow, doesnt do well in low light, and I found out only after much experimentation that it doesnt grow at all in low KH.
The Glosso. is also reportedly hard to grow.
Do you know your water parameters (eg. GH KH pH etc?)
I get all my plants from Greenline - the website is a bit hard to use, but just click the PLANTS link at the top right of the home page, and you'll be off. They easily have the best range Ive seen, plus full run down of all the plants requirements. They seem to have got a decent write up in this months PFK too (if that means anything at all!
)www.aquaticplants.eu.com/
Please Log in to join the conversation.
- arabesque (Mick Veale)
- Offline
- Senior Member
-
- Posts: 315
- Thank you received: 0
p.s. where did u purchase the T4's?
Please Log in to join the conversation.
- tanks_alot (Denis Coghlan)
- Offline
- Senior Member
-
- Posts: 442
- Thank you received: 0
what about a black background?
also what about cuba for the carpet plant?
I haven't thought about a colour for the background yet but I might try for a brighter colour than black. It will be a piece of card that can be changed easily if I want a different colour. You can pick these up in an art and hobby shop for about €1.50 so I wont be constraining myself to just on colour and I will most definitely try black. The other thing I will be using with the background is two cold cathode tubes on the outside of the tank, between the card and the glass. This will give a sort of uplighting effect and give different tones of colour on the piece of card. (I will explain in more detail about this later in the thread).
As for \"Cuba\", that is the common name for Hemianthus callitrichoides which I have already included on the list. It seems to be one of the easiest to grow and most commonly used.
Cardnim wrote:
Do you know your water parameters (eg. GH KH pH etc?)
Thanks for the plant link, I will have a more indepth look at what is available later. As for my water parameters, the pH is between roughly 6.8 and 7.1, but I still have to get the equipment to check for GH and KH. I will let you know when I get them. I will have to invest in them anyway as I will need to work out roughly how many parts per million I have when I start injecting co2.
Arabesque :
where did u purchase the T4's?
I picked the T4's up in woodies. They cost €25 for the largest fitting which is 20W and they have them in about 4 smaller sizes. Not sure if the sale is still on but I got them for 19 euro a pop. I'm still not sure if they will be any use for plant growth but if you are looking for a general light fitting for fry tanks etc. they would be perfect. They also come with a protective light diffuser that will also help against water damage.
Lead me not into temptation, For I can find it myself!
Please Log in to join the conversation.
- arabesque (Mick Veale)
- Offline
- Senior Member
-
- Posts: 315
- Thank you received: 0
Please Log in to join the conversation.
- tanks_alot (Denis Coghlan)
- Offline
- Senior Member
-
- Posts: 442
- Thank you received: 0
I've been in mayo for the last couple of days and out of broadband coverage so I haven't had a chance to work on the tank or therefore there has been no need for an update.
I'm heading along to the ITFS meeting this evening to make use of the library (getting the two plants books) and to talk with peter (aka Zig) about fertz, planting arrangements, co2 dosing etc.... I must staring putting together my list of questions. I will post an update when I get some money to buys the rest of the equipment that I need. I'm looking forward to getting some water in the tank!
Regards
Denis
Lead me not into temptation, For I can find it myself!
Please Log in to join the conversation.
- tanks_alot (Denis Coghlan)
- Offline
- Senior Member
-
- Posts: 442
- Thank you received: 0
This is not really an update on the progress of the tank as I haven't had a great deal of opportunity to work on the tank or collect the rest of the pieces required.
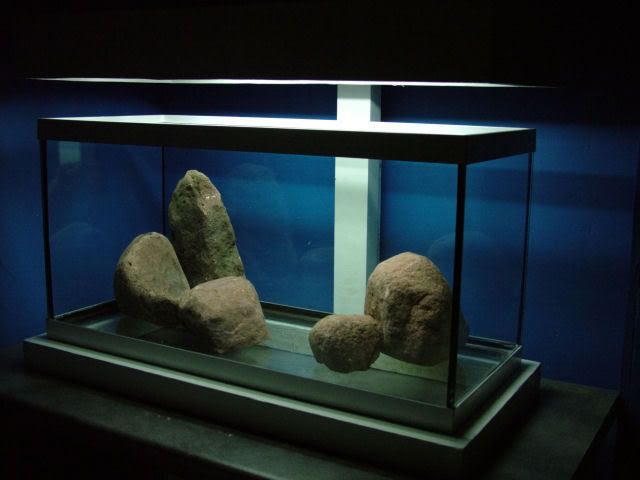
However, I have been playing around with the hardscape of the rocks. I will be using a total of five rocks and although they are not as detailed or as interesting as some of the rocks I've seen in other \"Iwagumis\" setups, they give the look that I am trying to achieve. I like the arrangement of the rocks on the left but might have to change the right a little. I think it will look a lot different when the substrate goes in provided the scape with more depth of field.
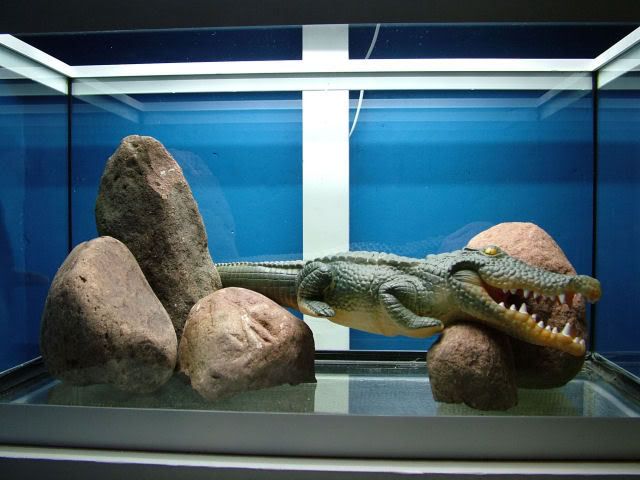
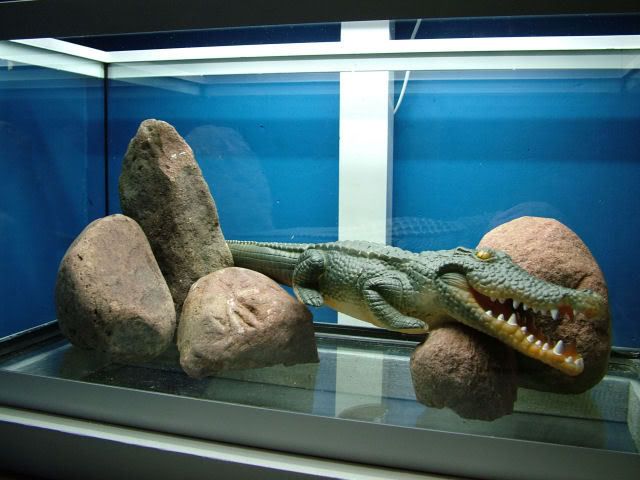
P.s. I will move the reptile on when he gets too big for the tank!

Lead me not into temptation, For I can find it myself!
Please Log in to join the conversation.
- Tom (Tom Brecknell)
-

- Offline
- Moderator
-

- Posts: 330
- Thank you received: 1
")
PS.I don’t think your reptile has long to live, he seems a bit stiff.??????
Please Log in to join the conversation.
- tanks_alot (Denis Coghlan)
- Offline
- Senior Member
-
- Posts: 442
- Thank you received: 0
As for the project, You people reading this must be starting to wonder if water is ever going to make it into the tank! So far this project have been a very laid back and I would like to have all my bases covered before starting to plant.
After pondering about the amount of light in this tank (and other peoples concerns) if it will be sufficient to allow for \"quality\" plant growth I decided to add an additional two 18W T8's. Many thanks to JohnH for providing me with the extra set of splash proof leads that I needed. The ballast that I am using is a standard electronic number stripped from a lighting hood that used to be in supermacs (spot the cheapskate). It was a fairly simple process but it was important to observe and record the original wiring on the electronic ballast before stripping off the old wires and adding the splash proof end caps. See the pictures below for a brief run down of operations. As it stood I had roughly 2 watts per gallon with the T4's but with the addition of the new tubes it has bumped it up to 3.8 watts per gallon. Is this classified as high light?

Standard 2 x 18w T8 ballast stripped of its original wiring. The ballast has been mounted away from the tank to avoid water damage.
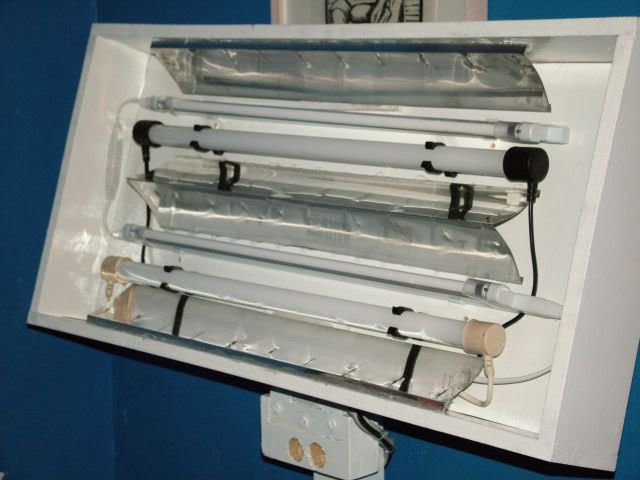
Had to move the existing T4's to make space for the T8's, but they all fitted in neatly!

T4 tubes on their own on a fast shutter speed

T8 tubes running, I will have to replace that shitty warmlite tube and it makes my tank look pink. I was sold it as a juwel daylight tube


Everything going full blast. Photo was taken on a fast shutter speed to stop brightness, other wise it would look like the below picture.
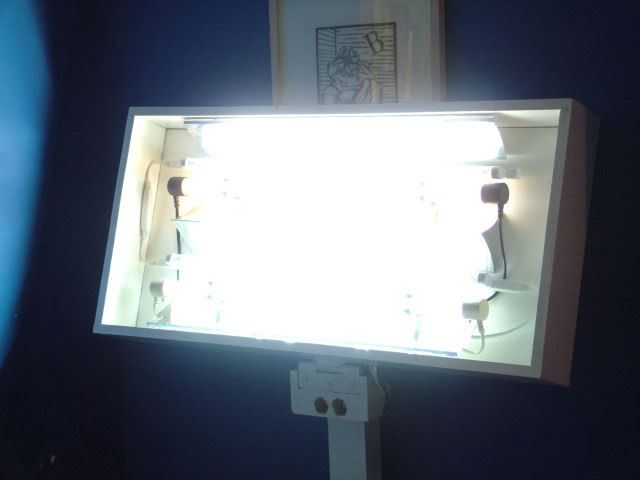
Let there be light!
The next two photos are a comparison of the extra light given off by the two new tubes. Both photos where taken with the same aperture and shutter speed so light absorption by the lens of the camera is identical. The first photo is the T4 tubes only, while the second photo has both the T4 and T8 tubes running. Although it doesn't show a massive difference, the small increase in light can cause a dramatic effect on the growth of plants (hopefully
 ).
).

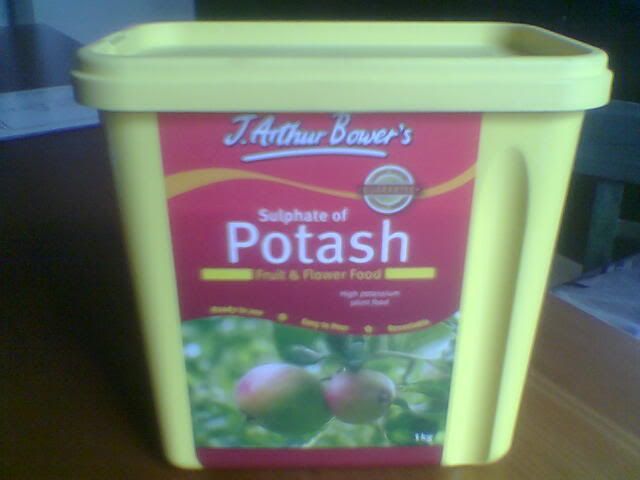
That's all for the moment. I'm still on the hunt for the co2 fire extinguisher, \"J Arthur Bowers Sulphate of Potash\" (if you are in a garden centre over the weekend cast an eye in the fert section and see if they have any, cheers), grit or sand and some plants. Hopefully by next weekend I can start to plant
 .
.Regards
Denis
Lead me not into temptation, For I can find it myself!
Please Log in to join the conversation.
- Deeco (Deeco)
- Offline
- Junior Member
-
- Posts: 203
- Thank you received: 0
You know yourself

Please Log in to join the conversation.
- tanks_alot (Denis Coghlan)
- Offline
- Senior Member
-
- Posts: 442
- Thank you received: 0
Regards
Denis
Lead me not into temptation, For I can find it myself!
Please Log in to join the conversation.
- Tom (Tom Brecknell)
-
- Offline
- Moderator
-
- Posts: 330
- Thank you received: 1
Howdy folks,
P.s. I will move the reptile on when he gets too big for the tank!
Did the Reptile get too big for the tank or did it escape............Tom.
Please Log in to join the conversation.
- tanks_alot (Denis Coghlan)
- Offline
- Senior Member
-
- Posts: 442
- Thank you received: 0
Did the Reptile get too big for the tank or did it escape............Tom.
I left the lid off for a moment when I left the room!
I would just like to ask the question again and this time add a picture for effect. If you happen to be in a horticultural centre near dublin over the weekend can you please have a look for the following product.

It is J. Arthur Bowers \"sulphate of potash\". Myself and Darren are looking to get our hands on some so we can put the final ingredients into a DIY fert mixture. So, if you see any please let me know and I will venture out and pick some up.
Regards
Denis
Lead me not into temptation, For I can find it myself!
Please Log in to join the conversation.
- Cardnim (Andrew Hanley)
- Offline
- Junior Member
-
- Posts: 92
- Thank you received: 0
Not sure if you are wanting the BOWERS make specifically, but I understand that Suplhate of Potash is just another name for Potassium Sulphate, which is available (in many different sizes) from among others, AquaEssentials:
www.aquaessentials.co.uk/index.php?main_...amp;products_id=1559
I just got some myself and have altered my own EI recipe to give a little more postassium and a little less phosphate.
Please Log in to join the conversation.
- tanks_alot (Denis Coghlan)
- Offline
- Senior Member
-
- Posts: 442
- Thank you received: 0
You are spot on Cardnim with the sulphate of potash being Potassium, however I think it might cost a little bit more to buy it online in the pure Potassium Sulphate form then the 4 eruo I spent on a Kg of the stuff today. I will write post with more detail about mixing of the ferts later (I'm really just doing what platty and zig have suggested).
Lead me not into temptation, For I can find it myself!
Please Log in to join the conversation.
- tanks_alot (Denis Coghlan)
- Offline
- Senior Member
-
- Posts: 442
- Thank you received: 0
The first layer into the tank was a layer of horticultural grit to give the overall shape of the substrate hardscape that I wanted. I also did this as I didnt want to waste a load of plant substrate at the back of the tank where I wanted the substrate to be higher. I firmly pressed this layer down so when I spread the layer of plant substrate on this it would not be disturbed.

The next layer to be added was the plant substrate. I used the entire 5L bag of Tropica Plant Substrate giving about 2-3cm layer evenly around the tank.
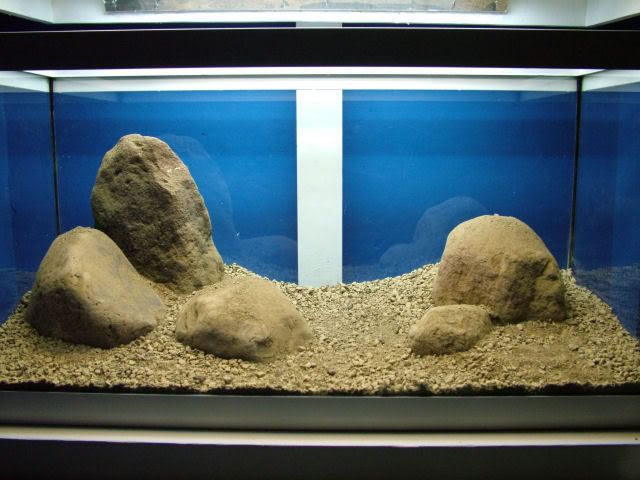
Next and last into the mix was a sprinkeling of more horticultural grit given about 1-2cm deep covering of the plant substrate so that it doesnt float away or get disturbed to easily when the water is added.
The next two things I added are for \"TOM\" who seemed very upset with the loss/escape of my Crocadile. I hope these fellas make up for it!

I hope these fellas cant get out of the tank as I'm running out of fake animals!

My own personal opinion on the finished hardscaping; I'm sceptical if all the rocks are going to be visible once the plants start to grow. I would think that after a while the only rocks that are going to be visible will be the two large fellas on either side of the tank. The other thing that I would like to say is that in the pictures don't give the tank any \"depth\". However, as I sit here looking at it I think it looks rather well but is in need of some plants.
Until Next time!
Regards
Denis
Lead me not into temptation, For I can find it myself!
Please Log in to join the conversation.
- Cardnim (Andrew Hanley)
- Offline
- Junior Member
-
- Posts: 92
- Thank you received: 0
I have to say, that third picture (the one with different sized grains in the substrate) looks great. Ive been reading a bit about this recently, and your pic reminded me of it. Of how using different size gravel/grains in a substrate can add interest and variety at key areas.
I suppose if you arent going to see the rocks once the plants have grown that you definately wont see the substrate so its probably academic.
Cant wait to see it planted. It could look fantastic.
Please Log in to join the conversation.
- Tom (Tom Brecknell)
-
- Offline
- Moderator
-
- Posts: 330
- Thank you received: 1
The next two things I added are for \"TOM\" who seemed very upset with the loss/escape of my Crocadile. I hope these fellas make up for it!
I hope these fellas cant get out of the tank as I'm running out of fake animals!
Until Next time!
Regards
Denis
Are you trying to tell me that the Crocodile was not real,I can take it????


Oh ya the tank is looking great.
Please Log in to join the conversation.
- tanks_alot (Denis Coghlan)
- Offline
- Senior Member
-
- Posts: 442
- Thank you received: 0
my own EI recipe to give a little more potassium and a little less phosphate.
Out of curiosity Cardnim what amounts do you put into your fert mix.
I have the following raw ingredients but I am unsure of the actual amounts to add. It was mentioned that you can add equal parts of everything but I cant imagine that you would add the same amount of magnesium sulphate as you would Potassium Sulphate?
I have all the ingredients that Zig suggested to include;
250g KNo3 - Potassium Nitrate (raw)
125g K2Po4 - Potassium Phosphate (raw)
125g MgSO4 - Magnesium Sulphate (Epsom Salts)
1000g K2SO4 - Potassium Sulphate (Sulphate of potash)
One of the only receipts I found is for an Estimated Index fert solution by George Farmer on Fishforum.net,
He suggest the following
Potassium Nitrate - 40g to 500ml of water and adding 10ml per 100L of water would give you a value of 5ppm.
Potassium Phosphate - 15g to 500ml of water and adding 5ml per 100L of water would give you a value of 1ppm.
Potassium Sulphate - 55g to 500ml of water and adding 10ml per 100L of water would give you a value of 5ppm
Magnesium Sulphate - 70g to 500ml of water and add 50ml once a week per 100L of water - this would give a target of 7ppm.
It is possible to add the solutions into one bottle except for the trace mix as, depending on the chelator used, the iron could react with the phosphate. Generally speaking it is a good idea to make the solutions up in separate bottles until you are comfortable with the dosing.
I would like to only have one bottom of fert solution so would can I put everything into one 500ml bottle but tweak the amounts of each additive so that when I add 10mls of the solution to the tank I will still get the required ppm values above? The other thing I was trying to avoid is using the estimated index method as it requires a weekly 50% water change and I would rather add smaller amounts daily or the PPS method as its also know. Does anyone have a link or info on the PPS method and how to make up a solution?
Lead me not into temptation, For I can find it myself!
Please Log in to join the conversation.
- Cardnim (Andrew Hanley)
- Offline
- Junior Member
-
- Posts: 92
- Thank you received: 0
Please Log in to join the conversation.