Retirement and forum shutdown (17 Jan 2022)
Hi,
John Howell who has managed the forum for years is getting on and wishes to retire from the role of managing it.
Over the years, he has managed the forum through good days and bad days and he has always been fair.
He has managed to bring his passion for fish keeping to the forum and keep it going for so long.
I wish to thank John for his hard work in keeping the forum going.
With John wishing to "retire" from the role of managing the forum and the forum receiving very little traffic, I think we must agree that forum has come to a natural conclusion and it's time to put it to rest.
I am proposing that the forum be made read-only from March 2022 onwards and that no new users or content be created. The website is still registered for several more years, so the content will still be accessible but no new topics or replies will be allowed.
If there is interest from the ITFS or other fish keeping clubs, we may redirect traffic to them or to a Facebook group but will not actively manage it.
I'd like to thank everyone over the years who helped with forum, posted a reply, started a new topic, ask a question and helped a newbie in fish keeping. And thank you to the sponsors who helped us along the away. Hopefully it made the hobby stronger.
I'd especially like to thank John Howell and Valerie Rousseau for all of their contributions, without them the forum would have never been has successful.
Thank you
Darragh Sherwin
Upgrading to a new tank - the adventure begins ;)
- Bohrio (Alex Rodriguez)
-
 Topic Author
- Offline
- Premium Member
-

- Posts: 540
- Thank you received: 54
Jonathan, yes the ties are there just to hold the pipes until the glue dries and also until I fix them to the wall which will only happen once I move the aquarium back against the wall. That shouldnt take long and it will have to happen probably tomorrow
I am happy to report that there were no leaks during the test today so everything is ready. All I need now is to start aqua escaping!
The process of how to work with reef ceramics and how to "cycle" it is pretty cool, I will explain it briefly on this thread, IMO the entire reef ceramic stuff needs a separate post, I will do that in the near future.
Sorry I forgot to answer your question regarding that empty bulkhead. That's the old return bulkhead that will now be used as a second emergency drain. I need to connect them both together, I will probably work on that tomorrow morning as well
Please Log in to join the conversation.
- carlowchris (chris)
-

- Offline
- Premium Member
-

- Posts: 640
- Thank you received: 70
Very nice plumbing
Please Log in to join the conversation.
- Bohrio (Alex Rodriguez)
-
 Topic Author
- Offline
- Premium Member
-

- Posts: 540
- Thank you received: 54
Well not exactly, 25 mm should give you a max flow of around 3500-4000 lph. This is with minimum head loss. I tested this with a 12000 lph pump and a 50 cm 25 mm tube. I 'd say 32 mm will give you around twice as much but this will depend on your return set up. Most people think (and I was one of them) that by buying a 10000 lph pump you will instantly get around that flow no matter what diameter your pipes have.
However, once you start putting things such as T, ball valves, check valves, elbows, etc plus the headloss (length from the pump to the tank) I noticed that the max flow rate as around 2400 lph at 99%, I couldnt get pass this number.
My main problem was the backpressure (this affects the pump performance as well as increases noise and reduces life time). Pumps like my Blau come with an adaptor (kind of in the shape of a cone) which has a 16 mm diameter aperture at the top. You can cut this to several sizes, my blau has connections for 16, 25, 32 and 40 mm. You can also connect a union directly to the pump outlet instead of a hose,, in mine I can connect a 32 mm union to it which is what some people do (specially with external pumps).
So the main thing to consider when designing a return is backpressure and friction. For instance, It is good practice to leave a straight pipe or hose from the outlet of the return pump to be first elbow/turn 10 times greater than the thickness of the pipe. This is mainly to reduce backpressure.
So, for instance, in my case, I am using 40 mm pipe at the beginning so I would need 40 cm of straight piping. You can put T in between as long as the pipe continues on a straight line and that nothing is blocking/constricting the flow for this first 40 cm, things such as ball valves, check valves etc could do this.
For instance, if you open the typical 25 mm check valve the inside diameter (at least on mine) was around 19 cm. That is a big difference! Most of the unions out there will reduce the diameter a bit, for instance, a 40 mm union will reduce it down to 35 mm, so to avoid this I used 50 mm unions with 50 to 40 mm reducers, reducers had a diameter of 40 mm.
Next thing to be careful with is how much flow your emergency drains can handle. Mine (1 x 32 mm and 1 x 25 mm) should be able to handle at least 6000 lph so I need to make sure flow never exceeds this number, even if my other 2 pipes can handle 4 times that flow.
When I did the flow test yesterday at 65% my 2 x 32 mm pipes (no full siphon) could not handle the flow, so I must have been getting around over 6000 lph which is already a massive improvement from what I had before. Now before I had one 25 mm return (which was in fact one around 16 mm after all those valves etc), now I have a 40 mm return pipe, split into 2 x 32 mm return lines. Also, the flow at 99% with 1 single 25 mm line was very strong and turbulent, with x 32 mm is much more gentle.
I will have more exact figures when I do a proper flow test later today, I will report back then.
Please Log in to join the conversation.
- jeff (Jeff Scully)
-

- Offline
- Platinum Member
-

- Posts: 1461
- Thank you received: 204
Where the tongue slips, it speaks the truth.
A life making mistakes is not only more honourable, but more useful than a life spent doing nothing at all.
Please Log in to join the conversation.
- Bohrio (Alex Rodriguez)
-
 Topic Author
- Offline
- Premium Member
-

- Posts: 540
- Thank you received: 54
Yes, everything will be fixed against the wall with a few pipe brackets and normal L's. However, they will go against wood not the wall itself as you can see in the picture below.
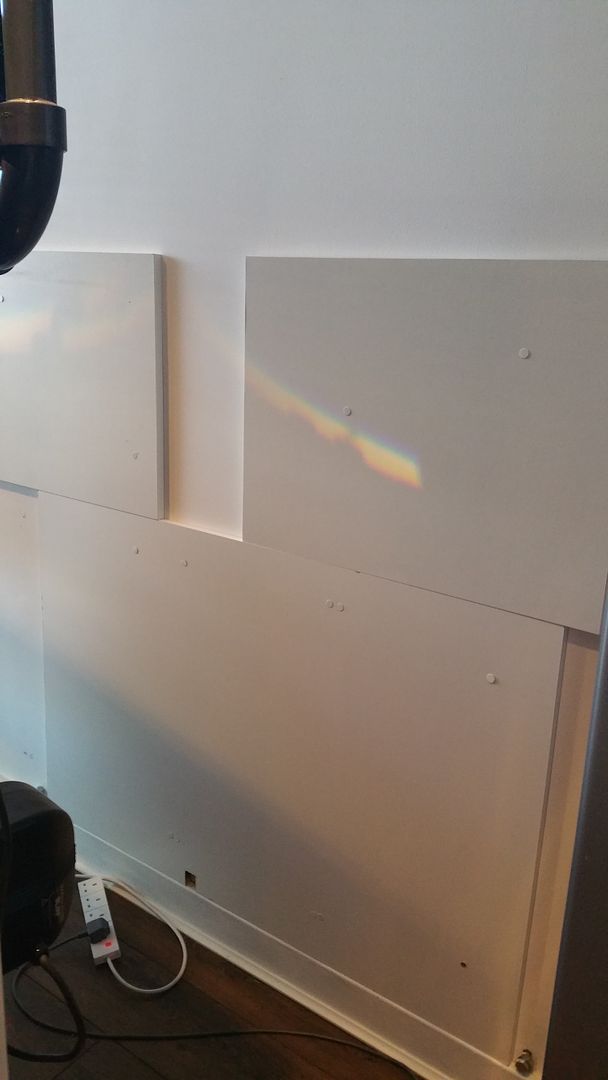
There are current 2 brackets holding the main pipe arm, they are fix to the aquarium cabinet, for the rest I am using cable ties at the moment to hold these pipes which is more than enough, If I wanted I could leave it like this but I rather have extra support brackets.
After I do the reef ceramic aquaescaping (thats tomorrow), I will need to fill the tank up with tap water and run it for 1 week, this is part of a water treatment process where I will need to add silicate remover as well, then, I need to empty the tank and fill it up with RO water and do the same treatment again for another week. After that the tank will be ready to be filled with salt water (or just mix salt to the current RO insde the tank)..
Before this second treatment process I will have another oportunity to move the tank and finish off anything that needs done.. There is another option and this is to attach the pipes to the bottom of the overflow with clamps and silicone, might do it anyway but that will be done later stage between the 1st and the 2nd reef ceramic treatment. This will be the last chance I will have to make any modifications to the back of the tank as once the tank is filled for the second time (with RO) I dont want to empty if again.
Please Log in to join the conversation.
- jeff (Jeff Scully)
-

- Offline
- Platinum Member
-

- Posts: 1461
- Thank you received: 204
Where the tongue slips, it speaks the truth.
A life making mistakes is not only more honourable, but more useful than a life spent doing nothing at all.
Please Log in to join the conversation.
- carlowchris (chris)
-

- Offline
- Premium Member
-

- Posts: 640
- Thank you received: 70
Please Log in to join the conversation.
- Bohrio (Alex Rodriguez)
-
 Topic Author
- Offline
- Premium Member
-

- Posts: 540
- Thank you received: 54
Yes I know what you mean but I have already planned for that. I have several unions along the return so I can remove them if maintenance is needed.
For instance, I can remove the left side of the tank without needing to stop the flow and the same for the right.
The return is split in 3 main pieces, center, left and right. I can access all unions from both sides of the tank without the need of moving it. In fact, the previous configuration with one single return going through the overflow was one of the few things I regretted doing when I designed the tank as It would have been very hard for me to access it in the event of a leak or for maintenance.
So for instance, if you look at the picture below
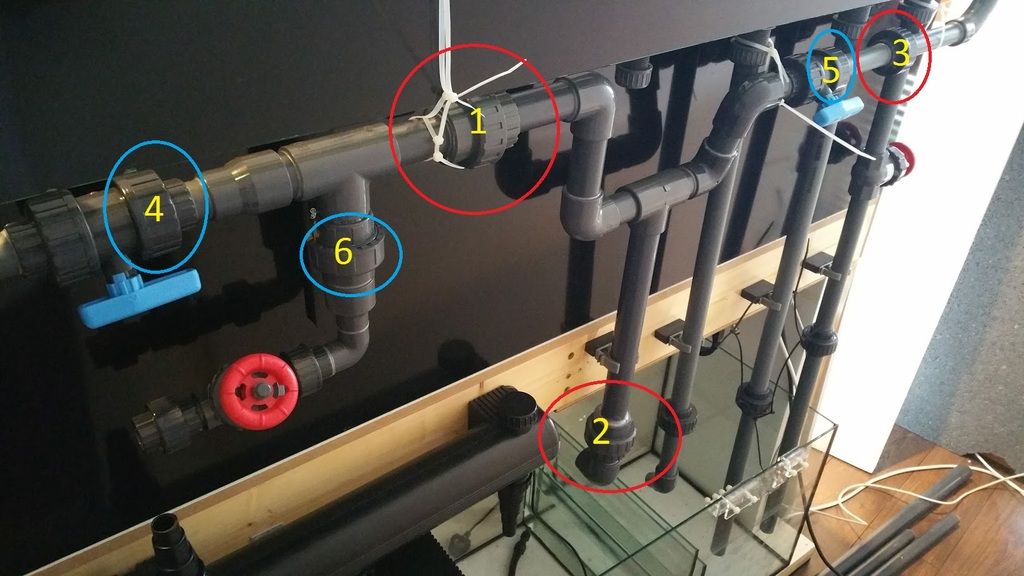
If I need to remove the left part I can close the ball valve on the left and do it (ball valve with the number 4), the UV as well (number 6), I can dismantle the entire left side by removing union 1, for the right side I can dismantle it without losing the return flow by removing either the ball valve union (number 5) or union 3. If I need to remove the middle section all I have to do is disconnect unions 1, 3 and 2.
So in theory it should be possible to remove the entire return without moving the aquarium. This is an exercise I am planning on doing while the rock is cycling anyway to see how difficult it would be to remove it all. I am also putting leak detectors on each side of the tank in case one side or both sides leak.
Is the same for the drain pipes, I can reach them all without needing to move the tank.
I thought a lot about this thing, the tank has been sitting in the living room for so long that I was bored and started to come up with possible future issues and how to prevent them. The tank has more unions as well, the return itself has not been finished yet (only the part from union 2 upwards, the design inside the sump is still a work in progress.
I am sure I have missed something, but at least by doing it like this I am certain that, if something goes wrong I should be able to fix it myself without a major job! I guess time will tell. What ever it happens it will be lesson learnt!
Can the pipe work be accessed through the cabinet??? Those boards fixed to wall are quite low.
Yes I can access the middle section from inside the pump. The left side from the left side of the tank and the right from the right.
The wood pieces are 145 cm tall and 155 cm wide in total. Ending just below the overflow box and the edge of the aquarium. Remember that the aquarium is missing the left and right covers that will block the view of the pipes and also prevent from anything (mostly feline) from getting inside the sump!
Please Log in to join the conversation.
- jeff (Jeff Scully)
-

- Offline
- Platinum Member
-

- Posts: 1461
- Thank you received: 204
Pictures are very hard to judge so I just couldn't see it happening, but hats off to yeh your nearly their
Where the tongue slips, it speaks the truth.
A life making mistakes is not only more honourable, but more useful than a life spent doing nothing at all.
Please Log in to join the conversation.
- Bohrio (Alex Rodriguez)
-
 Topic Author
- Offline
- Premium Member
-

- Posts: 540
- Thank you received: 54
So it should be possible to remove it without even removing the other ones although I'd say it would be wise to remove the ball valve in between (number 4) and the UV union
Please Log in to join the conversation.
- jeff (Jeff Scully)
-

- Offline
- Platinum Member
-

- Posts: 1461
- Thank you received: 204
Where the tongue slips, it speaks the truth.
A life making mistakes is not only more honourable, but more useful than a life spent doing nothing at all.
Please Log in to join the conversation.
- carlowchris (chris)
-

- Offline
- Premium Member
-

- Posts: 640
- Thank you received: 70
Beats me why these companies can't just put a simple Ethernet connection and an ip address to connect.
Please Log in to join the conversation.
- Bohrio (Alex Rodriguez)
-
 Topic Author
- Offline
- Premium Member
-

- Posts: 540
- Thank you received: 54
Not too many issues, the bluetooth set up was a bit confusing. You will need an extra driver (I think it came with the sotfware CD).
How far are you getting?
I agree, a simple ethernet connection would have made things so much simpler!
And sorry I missed your call today, I was sleeping!!
Please Log in to join the conversation.
- carlowchris (chris)
-

- Offline
- Premium Member
-

- Posts: 640
- Thank you received: 70
Thanks.......if worst comes to worst is there chance you'd be able to copy the CD for me????
Think I rang by accident earlier on.. .didn't mean to wake ya up sorry...
Please Log in to join the conversation.
- Bohrio (Alex Rodriguez)
-
 Topic Author
- Offline
- Premium Member
-

- Posts: 540
- Thank you received: 54
Sorry for the late replay.I am in the hospital since monday.
Sure you can have a copy of mine but I am almost certain you can download them from pacific sun.
Give me your email and I will share it in google drive
Please Log in to join the conversation.
- carlowchris (chris)
-

- Offline
- Premium Member
-

- Posts: 640
- Thank you received: 70
Thanks was reading up on there website last night...and apparently they suggest using an external Bluetooth adapter instead of the one that's built in .....apparently it's very easy to corrupt the data otherwise....so was in pc world today and got one ....hopefully that works...
Please Log in to join the conversation.
- carlowchris (chris)
-

- Offline
- Premium Member
-

- Posts: 640
- Thank you received: 70
Brilliant.doser 100% per cent quiter than my old one ....key seems to be to use a Bluetooth usb instead of the inbuilt one..
Please Log in to join the conversation.
- Bohrio (Alex Rodriguez)
-
 Topic Author
- Offline
- Premium Member
-

- Posts: 540
- Thank you received: 54
I am back in business now at least for a few weeks. Happy to hear you got the Doser sorted. I use the built in BT in my laptop but it is true its better in older computer you might want to try buying an external usb BT dongle instead of using the internal one.
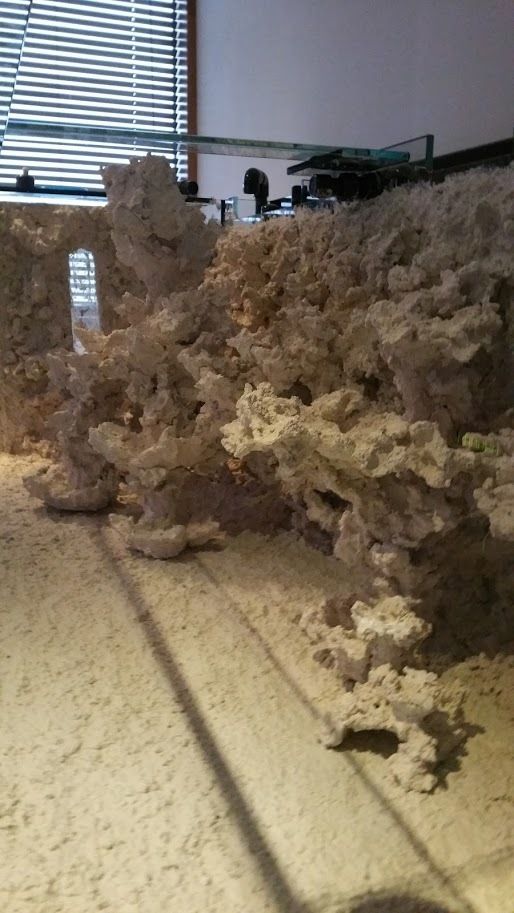
Had some time to continue with some stuff I had to prioritize the rockwork and after a lot of work (really a lot) and lots of cutting etc I found the layout I was looking for. I have plenty of spaces for fish to hide and for them to swim as well and also a lot of spots to place corals etc.
I decided to leave the right side fully unconvered so I can enjoy a full view of the aquarium from that side.
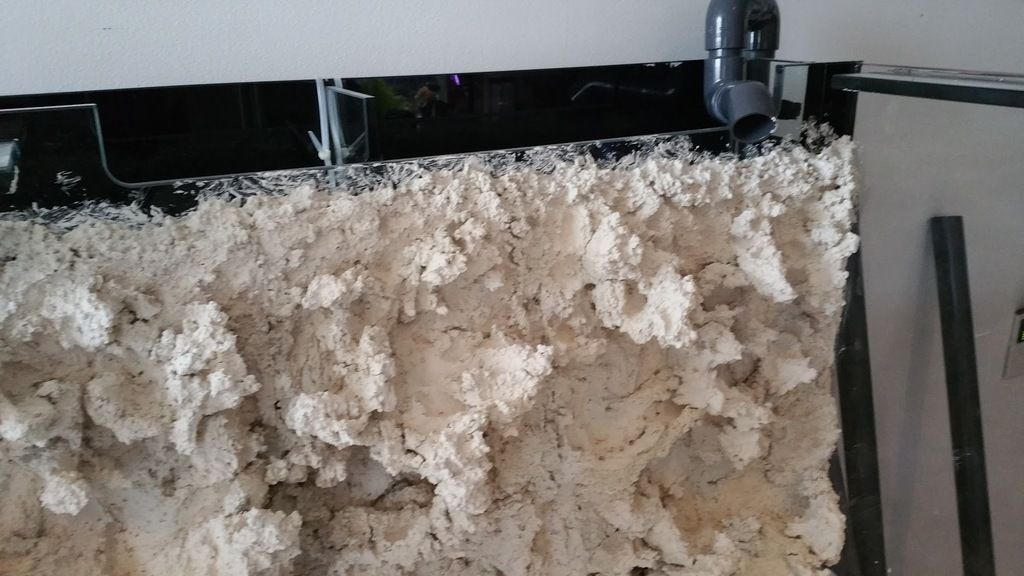
The process was quite tedius and dusty. I use an angle grinder to cut the plates into shapes that I liked best. Once in the aquarium I use mortar to fill up the gaps. For instance, if you look at the backwall here there are small gaps in between the plates etc.
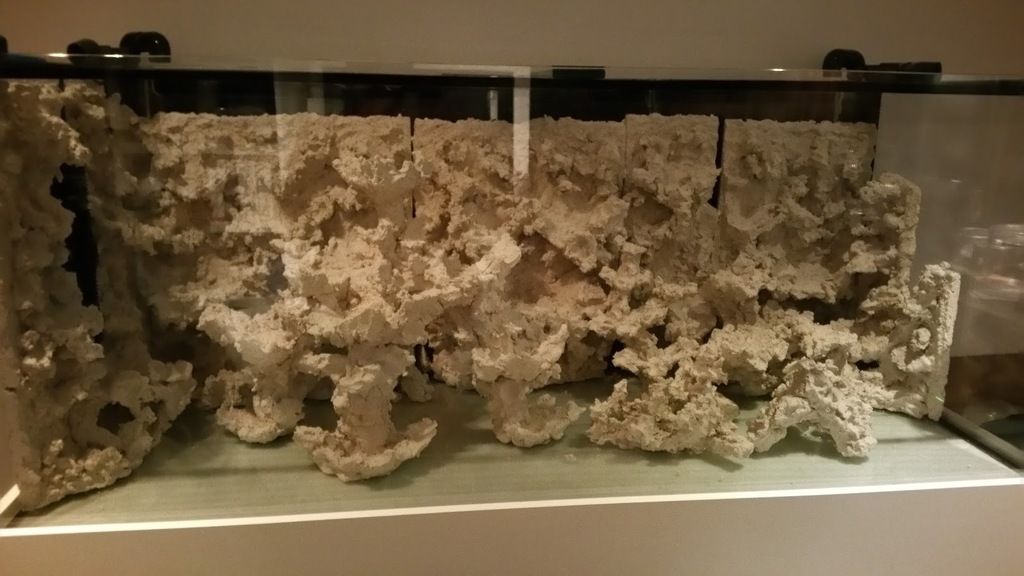
Those were filled/covered using mortar. Also as I was gluing the different pieces I was using mortar to cover this parts so glue wouldnt be visible (silicone) as well as to provide extra support.
This is how mortar looks like, its a dusty compound with tiny round rocks and once mixed with a bit of water looks like this
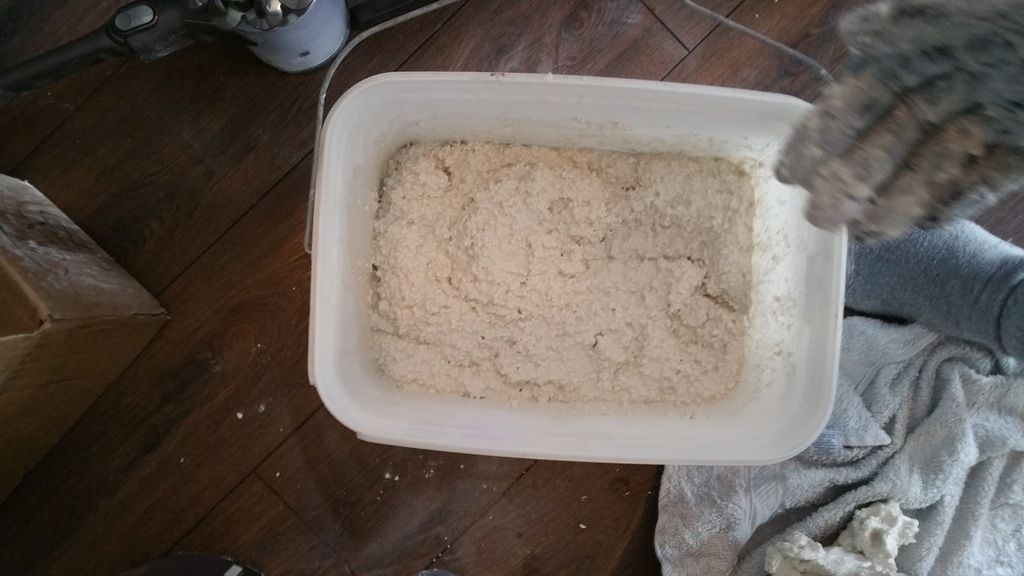
When dry it looks almost the same color as the "normal" rock. Its very helpful to give the aquarium that final smooth look that I wanted.
I also decided to use mortar for the bottom of my aquarium. It will be covered with live sand once I add saltwater in it. I think mortar gives a very naturalish look to the aquarium. There is no need to add sand to it, you could just have mortar and run it as a BB aquarium but instead of having glass you will have the aquarium bottom covered in white.
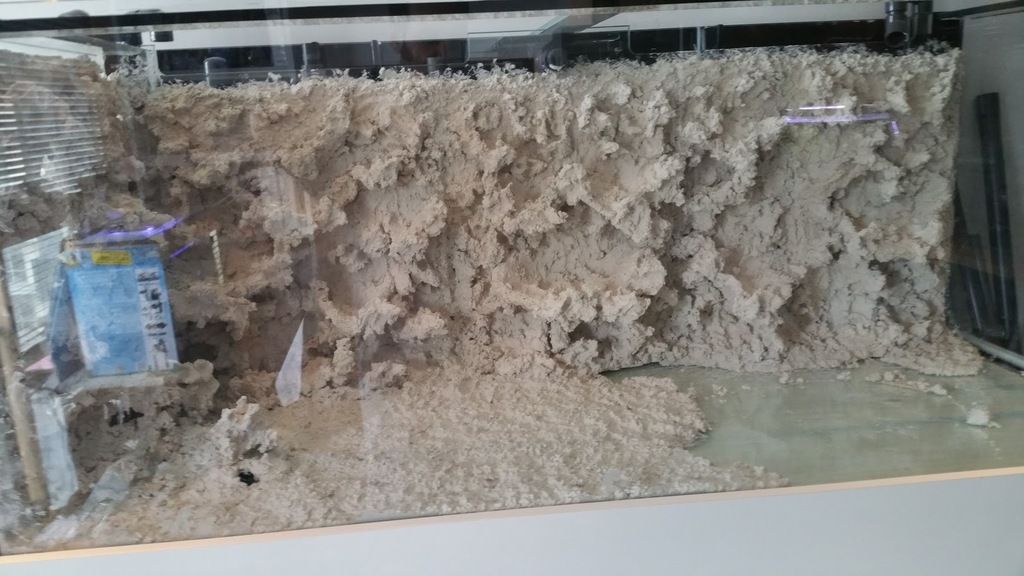
The process took a while but it was dead easy to do. In the process I also built Julio (my Blue spotted Jawfish) his own cave using a bit of PVC and mortar/rocks. I hope he likes it. I made a smaller one on the right just for him.
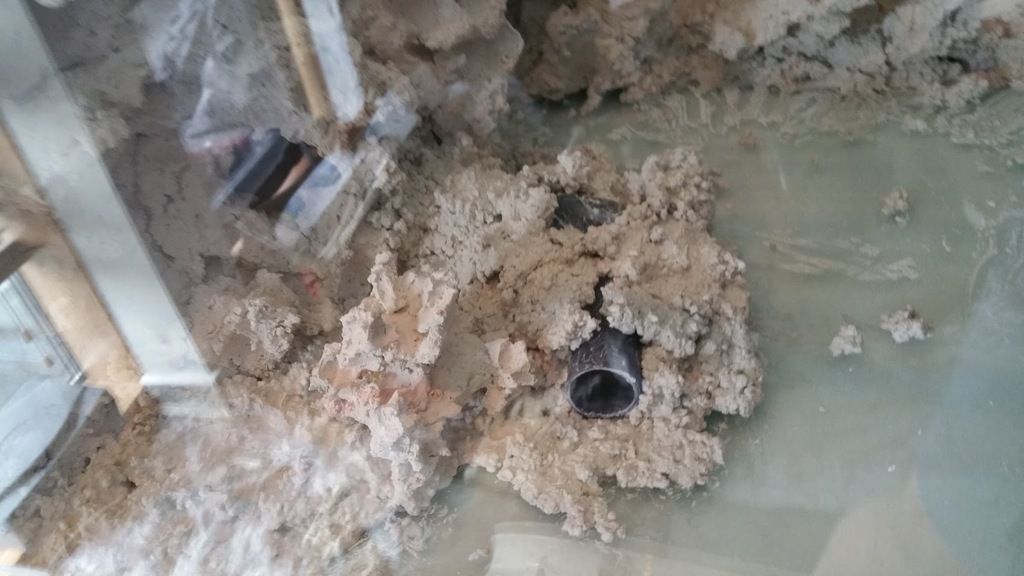
Here is a full view of Julios new apartment. Main entrance is on the left, right entrance will be covered with sand so he can dig it up and have a second exit. There should be enough space for him to make a third exit on the back if needed.
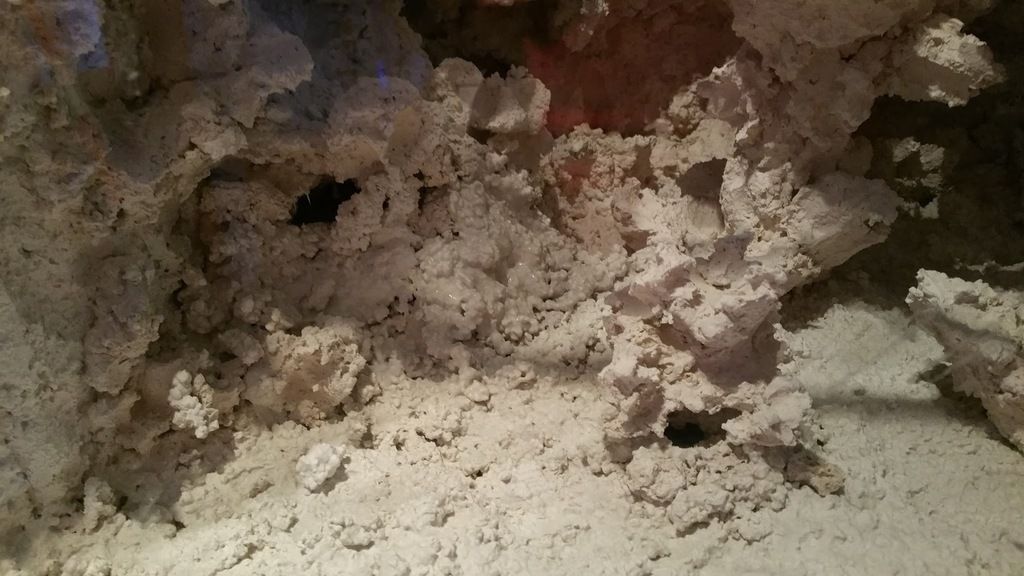
And this is the final result. Took a few hours for the mortar to dry
Please Log in to join the conversation.
- Bohrio (Alex Rodriguez)
-
 Topic Author
- Offline
- Premium Member
-

- Posts: 540
- Thank you received: 54
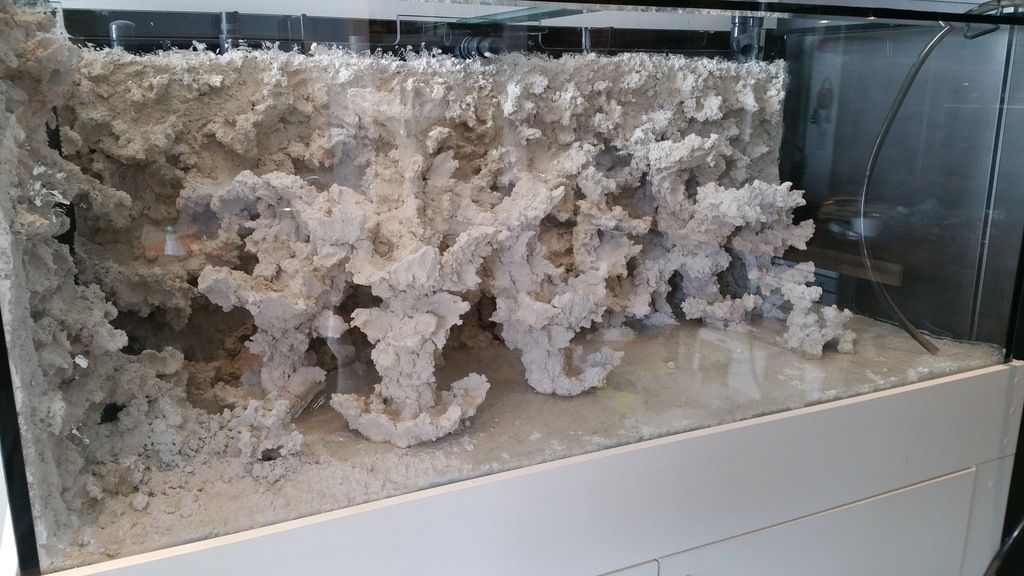
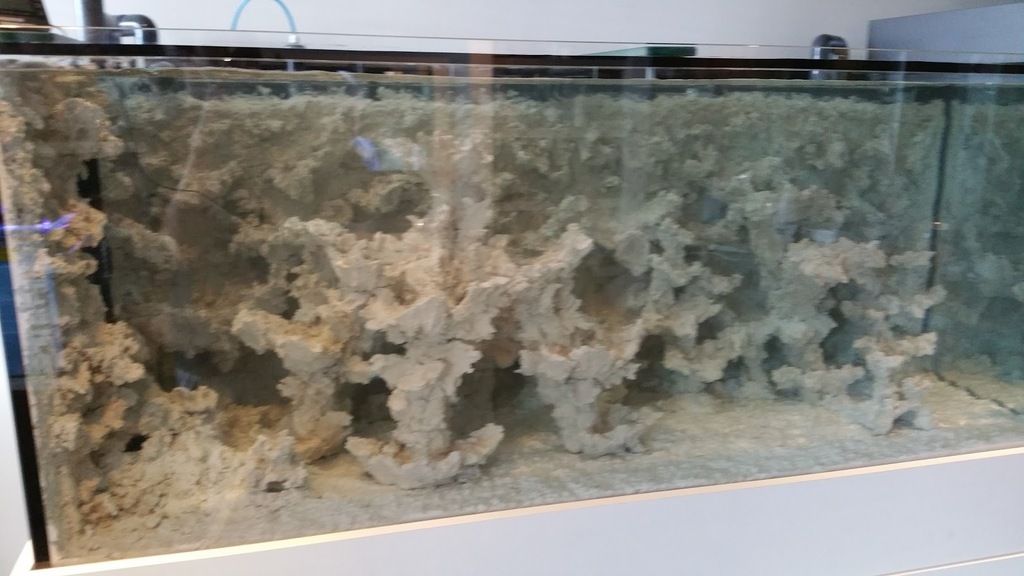
Ok so the next thing was to fill it up with water and to clean the edges of the aquarium as mortar tends to stain a bit. This was very easy to do using a glass scraper.
Then I started filling up the tank with tap water.
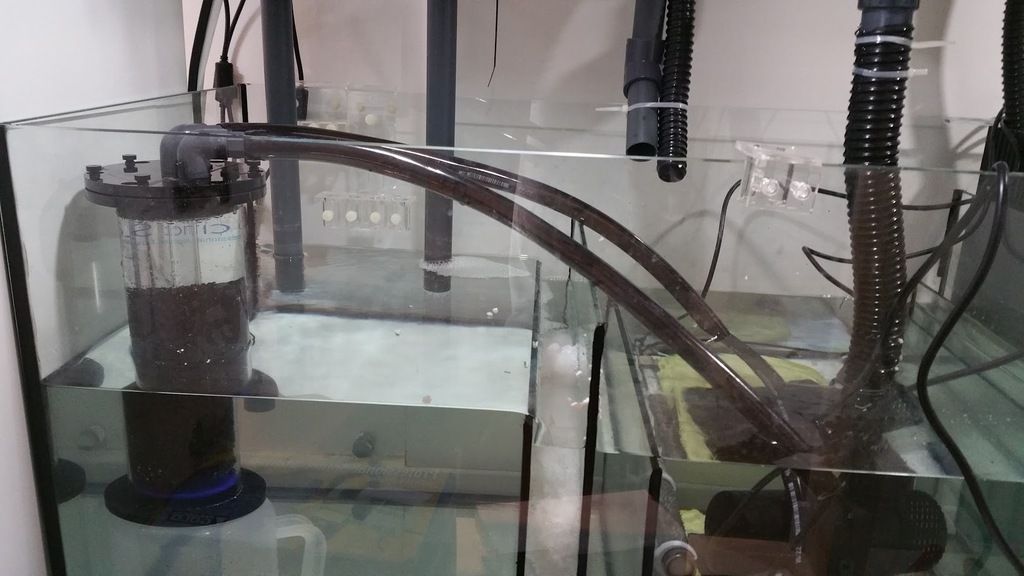
Then I started up the small PS reactor and added the silicate/phosphate remover media that the guys in Korallentwelt sent me. Looks very similar to GFO.
I will need to run it for 1 week using tap water and another week using RO water.
And last but not least was to fix the PS lights to the ceiling. That was pretty hard to do alone... not so much the fixing but lifting the lights over the aquarium.. or maybe I am just too weak now!
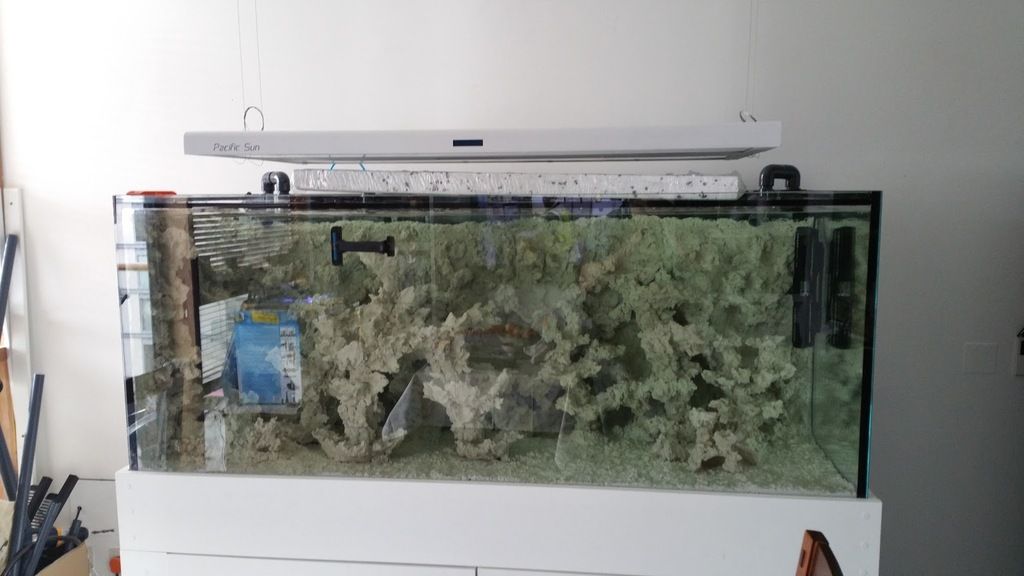
Here is another picture with the lights on
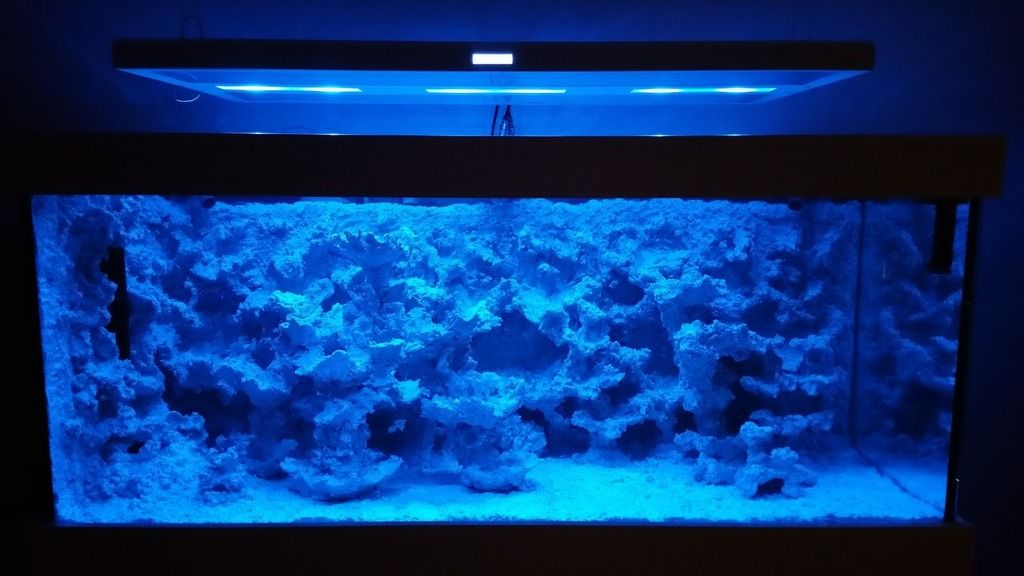
I have to say the look very nice on the tank and there will be plenty of light for me to grow any corals!
I turned the lights on only to take this picture. The lights will remain off for a while.
Hopefully silicates levels will be down to 1by next weekend, then the tank will be ready and I will start adding salt.
It will be a while before I can turn the lights on and add small fish but it is important to follow every step your man from Korallentwelt told me unless I want an algae bloom in my aquarium. I will describe this process at a later stage.
So all is left now aside from starting cycling etc is:
- Finish last part of the piping (this can be done even with the aquarium against the wall)
- Finish tiding up cables etc (this will be done today hopefully)
- Finish the support brackets to support the piping on the back of the aquarium (will be done when I empty the aquarium this week).
And thats about it. So almost there!
A few things are pending but they are just smaller additions/jobs.
Please Log in to join the conversation.
- gunnered72 (Eddy Gunnered)
-

- Offline
- Elite Member
-

- Posts: 797
- Thank you received: 105
Proves one thing...When your patient in this hobby the results can be amazing!!!
Please Log in to join the conversation.
- Jonlate (Jon Late)
-

- Offline
- Senior Member
-

- Posts: 439
- Thank you received: 38
There is so many places for the fish to swim in and out of.
It also looks like a great base to build the corals off, they will add a load of colour to it once they get going.
Hope you cut the bits up outside, I can just imagine the dust it made!!
How much will the entry fee be to come and view it when it's finished?
Please Log in to join the conversation.
- Bohrio (Alex Rodriguez)
-
 Topic Author
- Offline
- Premium Member
-

- Posts: 540
- Thank you received: 54
No entry fee for forum members
The dust was unreal. First day I did it outside. Second day it was after the hospital so I was feeling a bit weak so, although I did it outside as well I forgot to close the balcony door and when I came in it was all covered in dust
Thank God the wife was away for the week so I had time to dust it.
There are many places for fish to hide, hard to see it in the picture, made a few bigger ones for my hippo as he/she likes hiding at night. It will look much better when it will be covered with corals one day but thats another story.
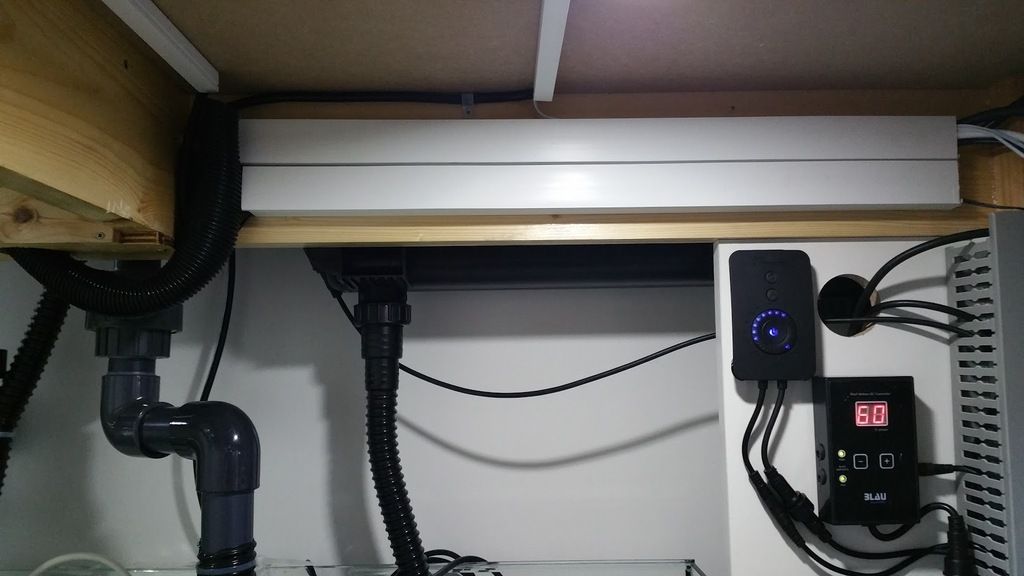
I just finished tiding up the electrics and I am very happy with the result.
I bought a few cable railing/tracking systems which IMO work really well in the aquarium as the hide most of the cables from plain sight. Also used some white tracking to cover other type of cables (those who wont be removed frequently).
Also replaced the amp meter with one with watts as well so it will measure voltage, amps and watts, the other one it is currently installed on the left side Circuit box.
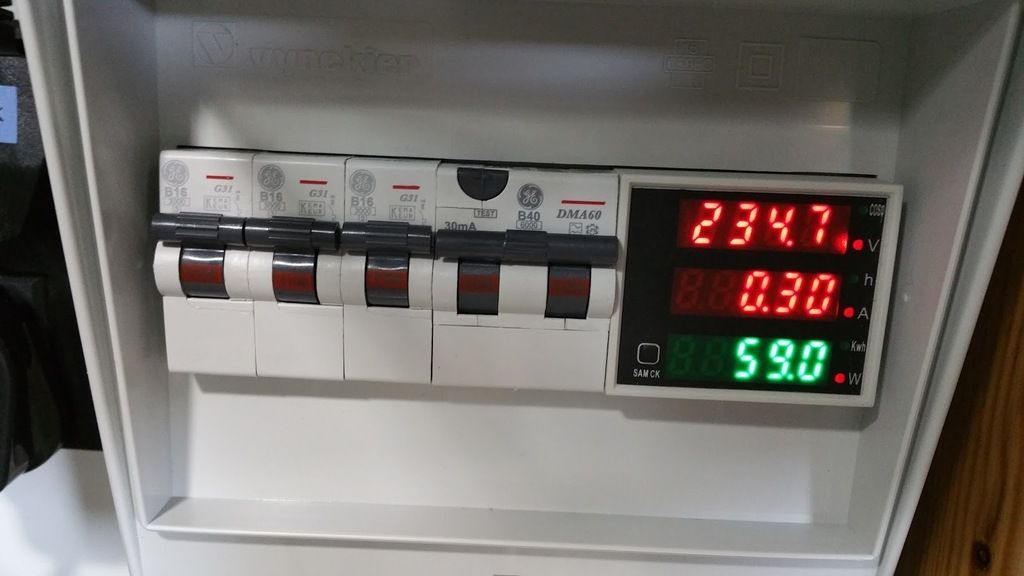
Anyway again very happy with the result, see for yourself
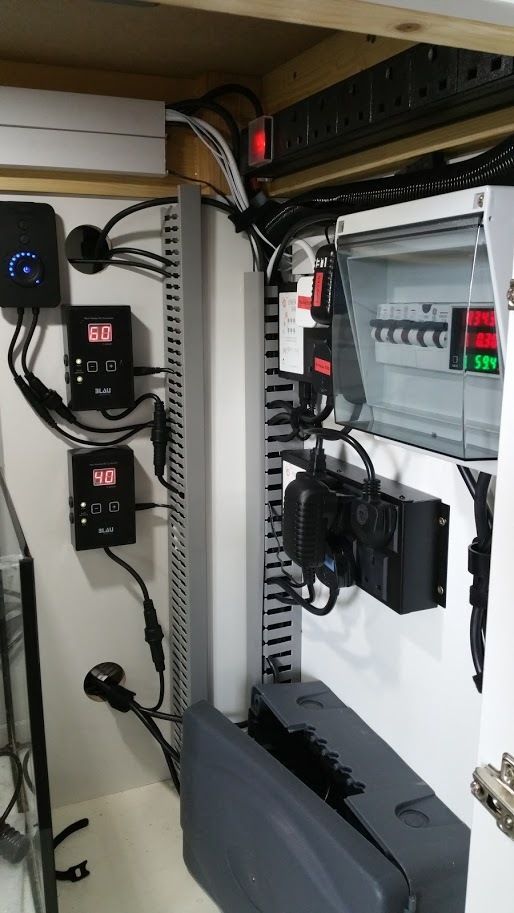
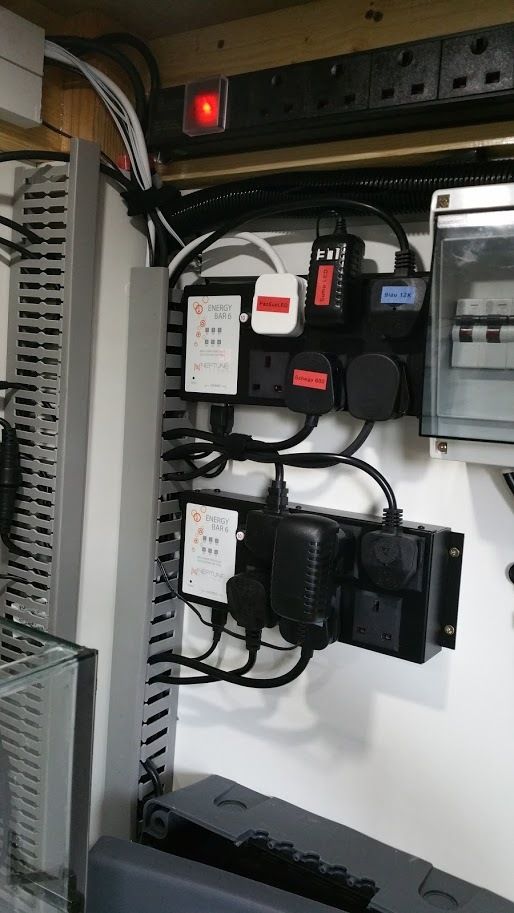
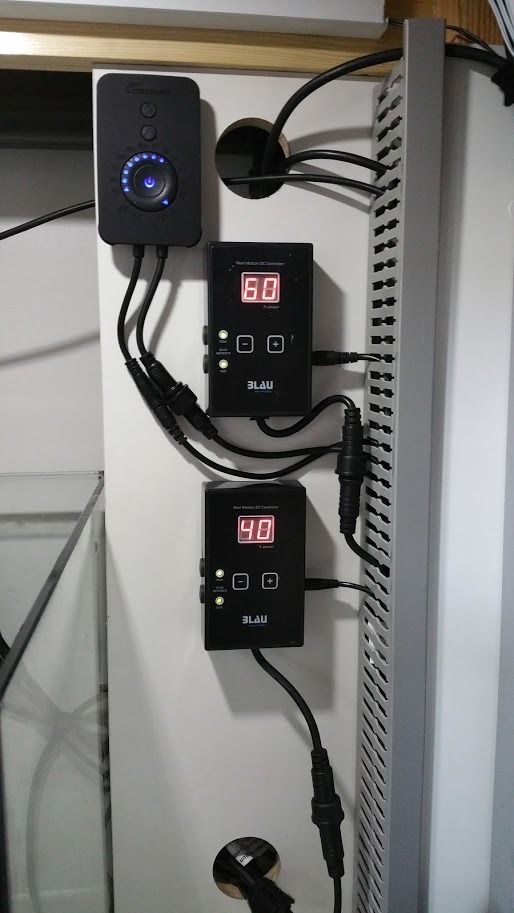
I still need to label cables etc, I will do that probably tomorrow. same as the cables coming out of the sump that need to be fixed to the back of the wall.
Please Log in to join the conversation.
- Lakes1985 (David Ward)
- Offline
- Junior Member
-

- Posts: 161
- Thank you received: 4
Please Log in to join the conversation.
- carlowchris (chris)
-

- Offline
- Premium Member
-

- Posts: 640
- Thank you received: 70
Where did ya get the cable railling thing... ..bloody messy cables everyone's nightmare
Please Log in to join the conversation.
- Bohrio (Alex Rodriguez)
-
 Topic Author
- Offline
- Premium Member
-

- Posts: 540
- Thank you received: 54
I bought if off electricalwholesaler.ie. Its called cable trunking, not very expensive but they only sell it in 3 meter pieces. Mine took a while to arrive, i believe it was out of stock.
Its made out of plastic so it wont rust with time!
Please Log in to join the conversation.
- Sukahn (Shane Doorley)
-

- Offline
- Senior Member
-

- Posts: 375
- Thank you received: 44
Please Log in to join the conversation.
- Bohrio (Alex Rodriguez)
-
 Topic Author
- Offline
- Premium Member
-

- Posts: 540
- Thank you received: 54
I got two different ones
1 2580 25 x 80mm Panel Trunking C/W Lid 14.34 euro
1 4060 40 x 60mm Panel Trunking C/W Lid 11.91 euro
That price is for 3 meters (minimum order).
so 40 mm and 25 mm. The one besides the Apex power bars are the 40 mm ones (by 80 mm tall).
Please Log in to join the conversation.
- jeff (Jeff Scully)
-

- Offline
- Platinum Member
-

- Posts: 1461
- Thank you received: 204
Where the tongue slips, it speaks the truth.
A life making mistakes is not only more honourable, but more useful than a life spent doing nothing at all.
Please Log in to join the conversation.
- Bohrio (Alex Rodriguez)
-
 Topic Author
- Offline
- Premium Member
-

- Posts: 540
- Thank you received: 54
So a couple of things have happened since, I set up the cover that I bought from H2OAquatics.
link
Putting it together was easy enough, it looks great and sturdy, I can't recommened it 100% yet because I am yet to see how it will react to rust, I will report back in a couple of months. Looks really nit I have to say
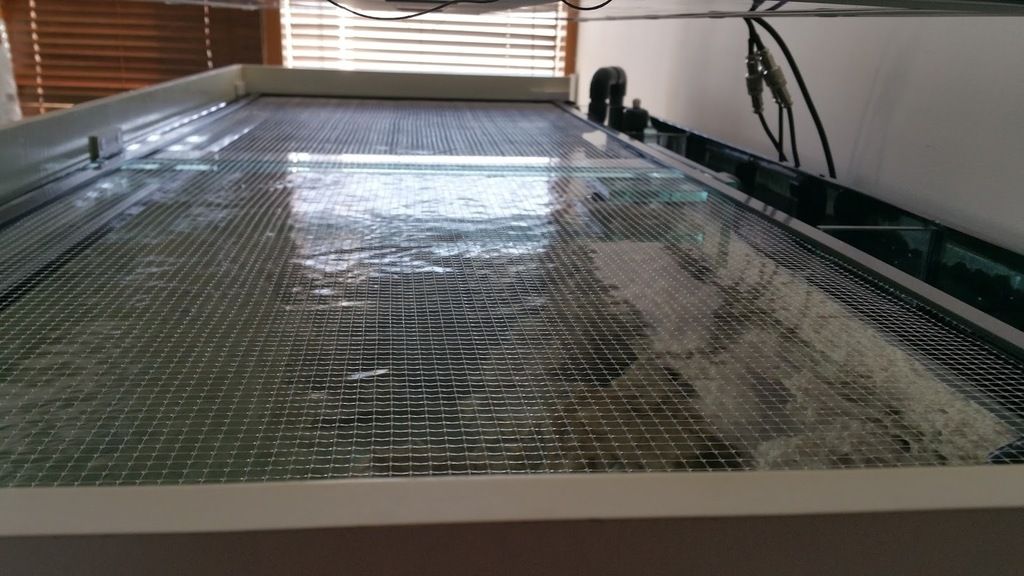
I also received something that I am not sure if any of you have ever heard off, it is called marine pure. Marine pure is an artificial bio-media material to host bacteria. I got 2 blocks of 8 x 8 x 1 inch, each having a surface volume of 140.000 ft2/ft2, or over 1 sq meter per gram! That's as much surface area as the best live rock out there, but the main difference with live rock is how much water marine pure can retain compared to the best live rock out there, 1 kg of Marine Pure can hold about 2400 grams of water vs 1 kg of for instance, fiji that hold 380 grams of water.
Its also 20x more efficient than bio balls and they dont act as a nitrate factory, they just hold bacteria colonies. Another thing I am looking forward to testing. Some pictures below
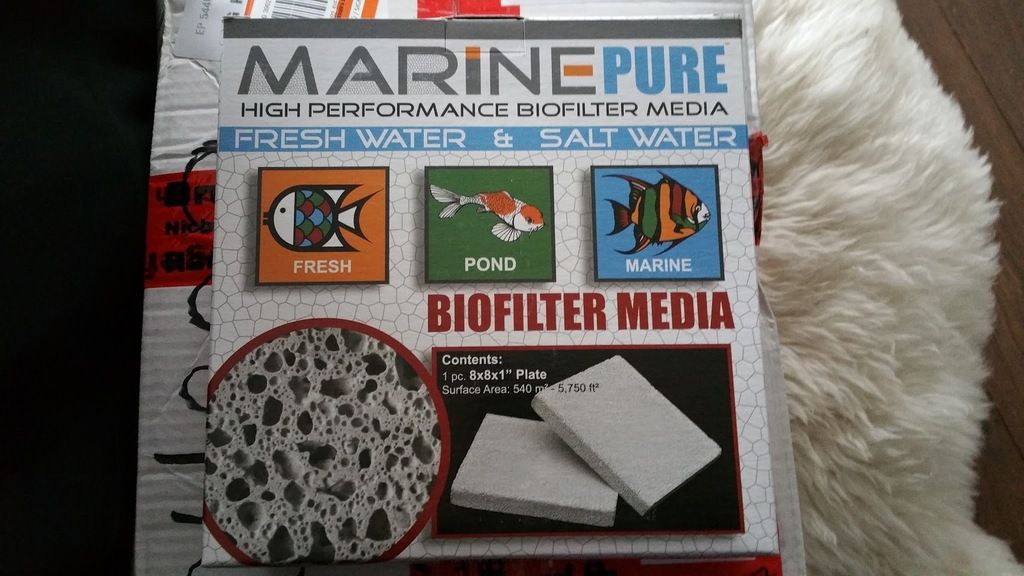
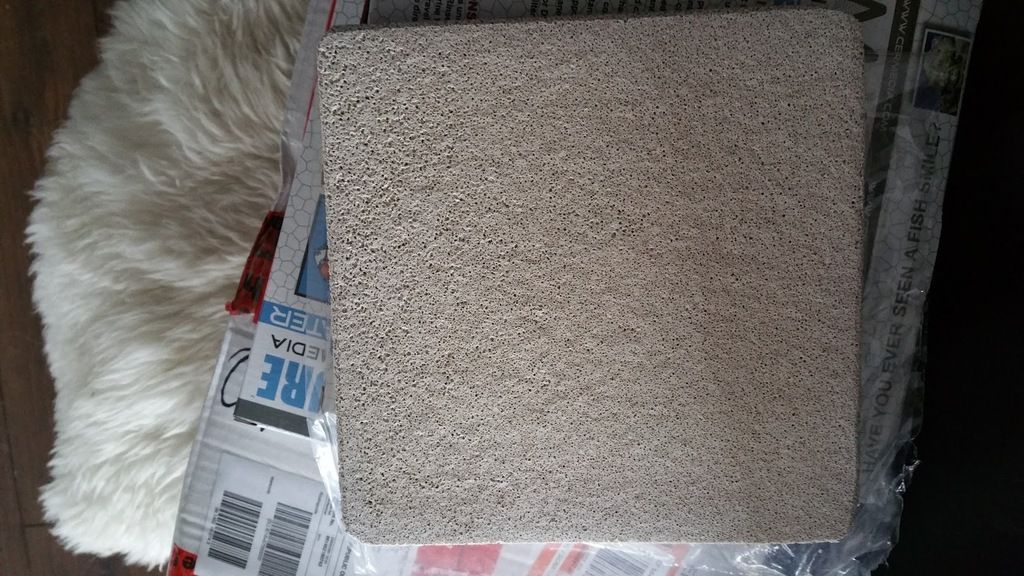
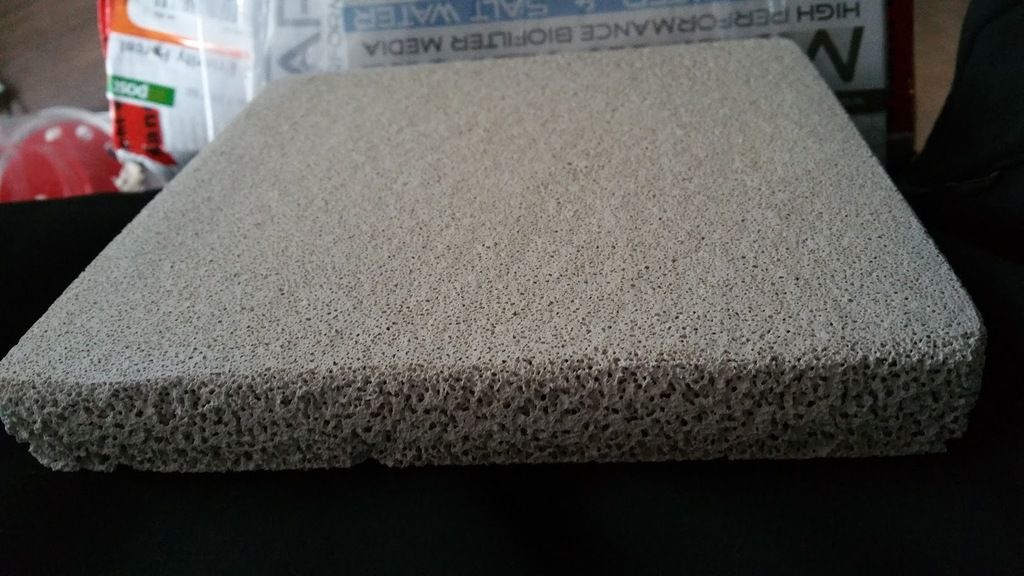
One block of this material is enough for a 100 gallon tank, I got two, they fit perfectly between my sump baffles. The only bad move from my part is that I should have bought this months ago and put them in my old tank so it would start building a bacterial colony. I think it might be too late to do it now but I might give it a go and seed it for 2 or 3 weeks.
And I think that's it, the tank is full with RO water now and running a silicate and phosphate reactor as well as some carbon. Should be ready in a week. I will probably empty it and fill it up again with more RO water, it only took 1 day to fill it up using an RO line directly into to the tank.
I forgot, for those interesting in Marine Pure, BRS posted a video a few months ago, I think is a good watch
Marine pure comes in blocks of 8x8x4, 8x8x1, balls, squares etc. I got them from Reefculture in the UK, not very expensive if you consider how effective it seems to be..
Please Log in to join the conversation.
- Sukahn (Shane Doorley)
-

- Offline
- Senior Member
-

- Posts: 375
- Thank you received: 44
Please Log in to join the conversation.

